Automating PDF Processing with DocsParse, Make.com, Airtable, and Gmail
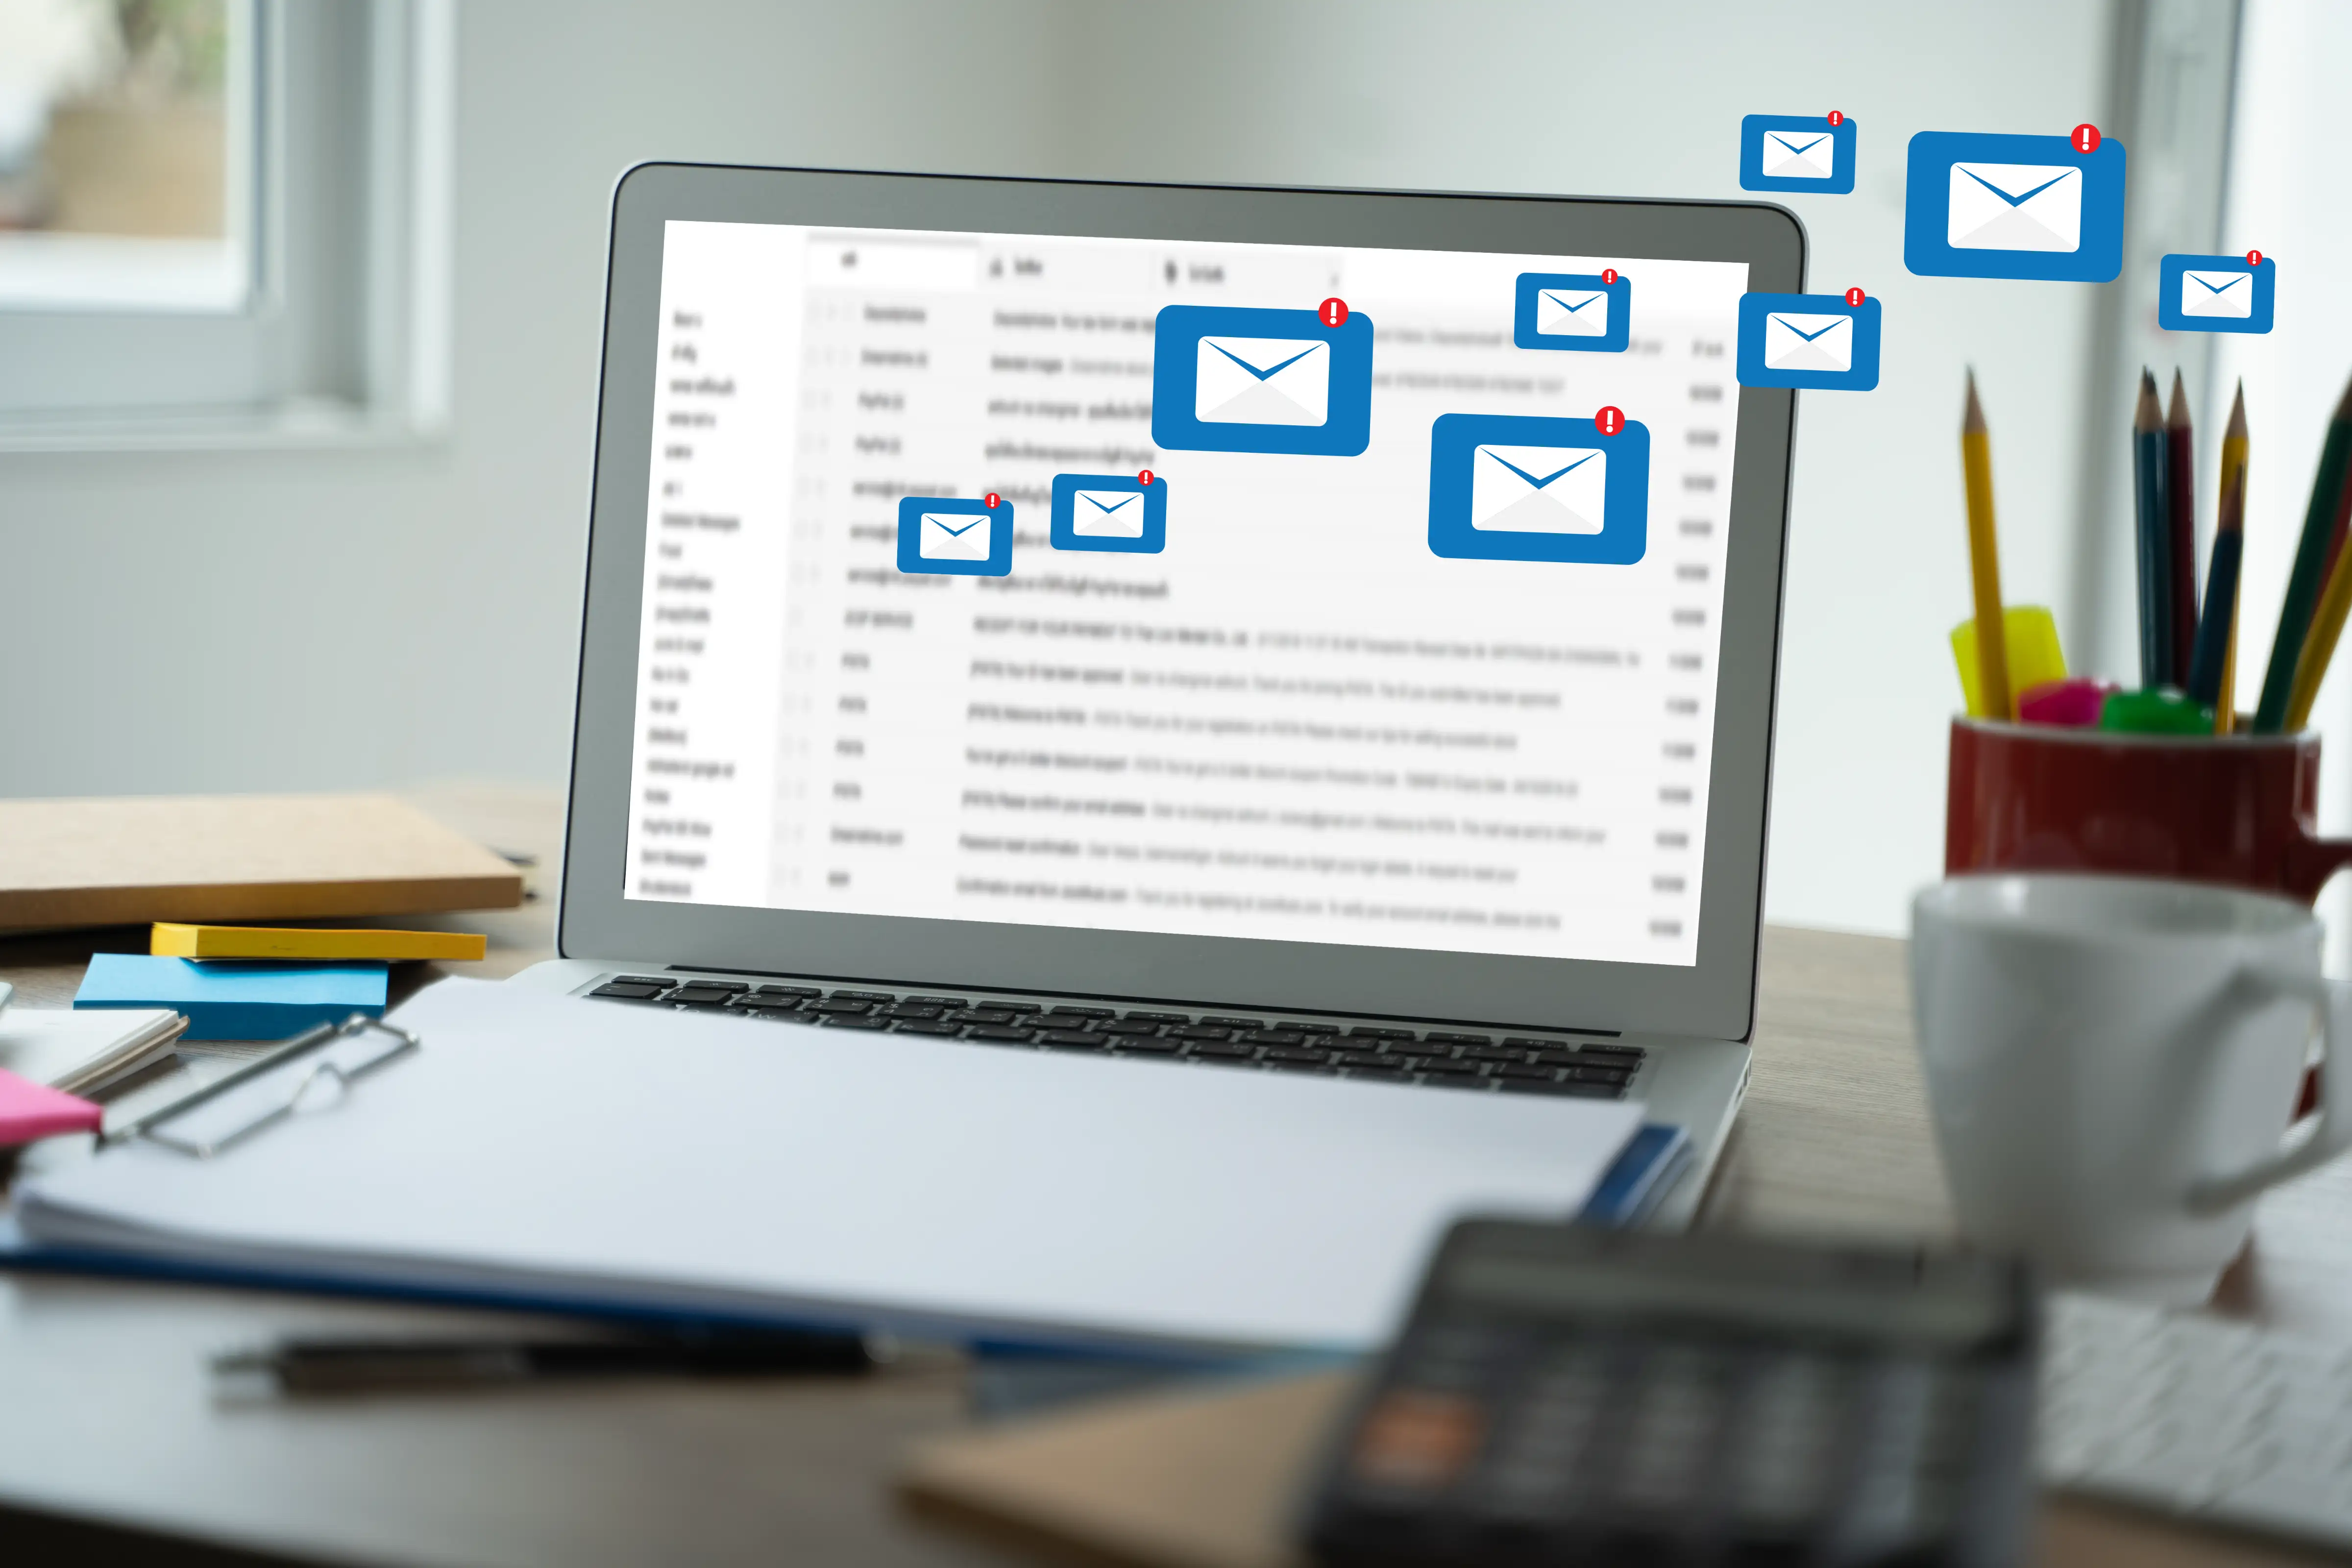

Table of Contents
Introduction
In today's digital age, efficient document processing is crucial for businesses of all sizes. This tutorial will guide you through setting up an automated document processing workflow using DocsParse, Make.com (formerly Integromat), Airtable, and Gmail. By the end, you'll have a streamlined system that automatically processes PDF documents from your email and organizes well-structured parsed data in Airtable.
Prerequisites
Before we begin, ensure you have accounts set up for the following services:
- DocsParse, ai-document processing and parsing service.
- Make, workflow automation service, you can use any other service that supports webhooks.
- Airtable, cloud-based spreadsheet-database hybrid service.
- Gmail, email service you can use any other service that supports email forwarding and filters.
You should also have basic familiarity with these platforms. If not, don't worry - we'll guide you through each step.
Overview of the Workflow
Our automated workflow will follow these steps:
- Emails with document attachments are forwarded to DocsParse Workflow Inbox
- DocsParse processes the documents and extracts relevant data
- Make.com retrieves the processed data from DocsParse
- The extracted data is then automatically added to an Airtable table
Step-by-Step Guide
Step 1: Setting up DocsParse for Document Processing
- Log into your DocsParse account and create your first workflow

- Upload your first document. It may take a few seconds for DocsParse to process your document.
- Once the document is parsed, modify the scheme by clicking "Add custom property."
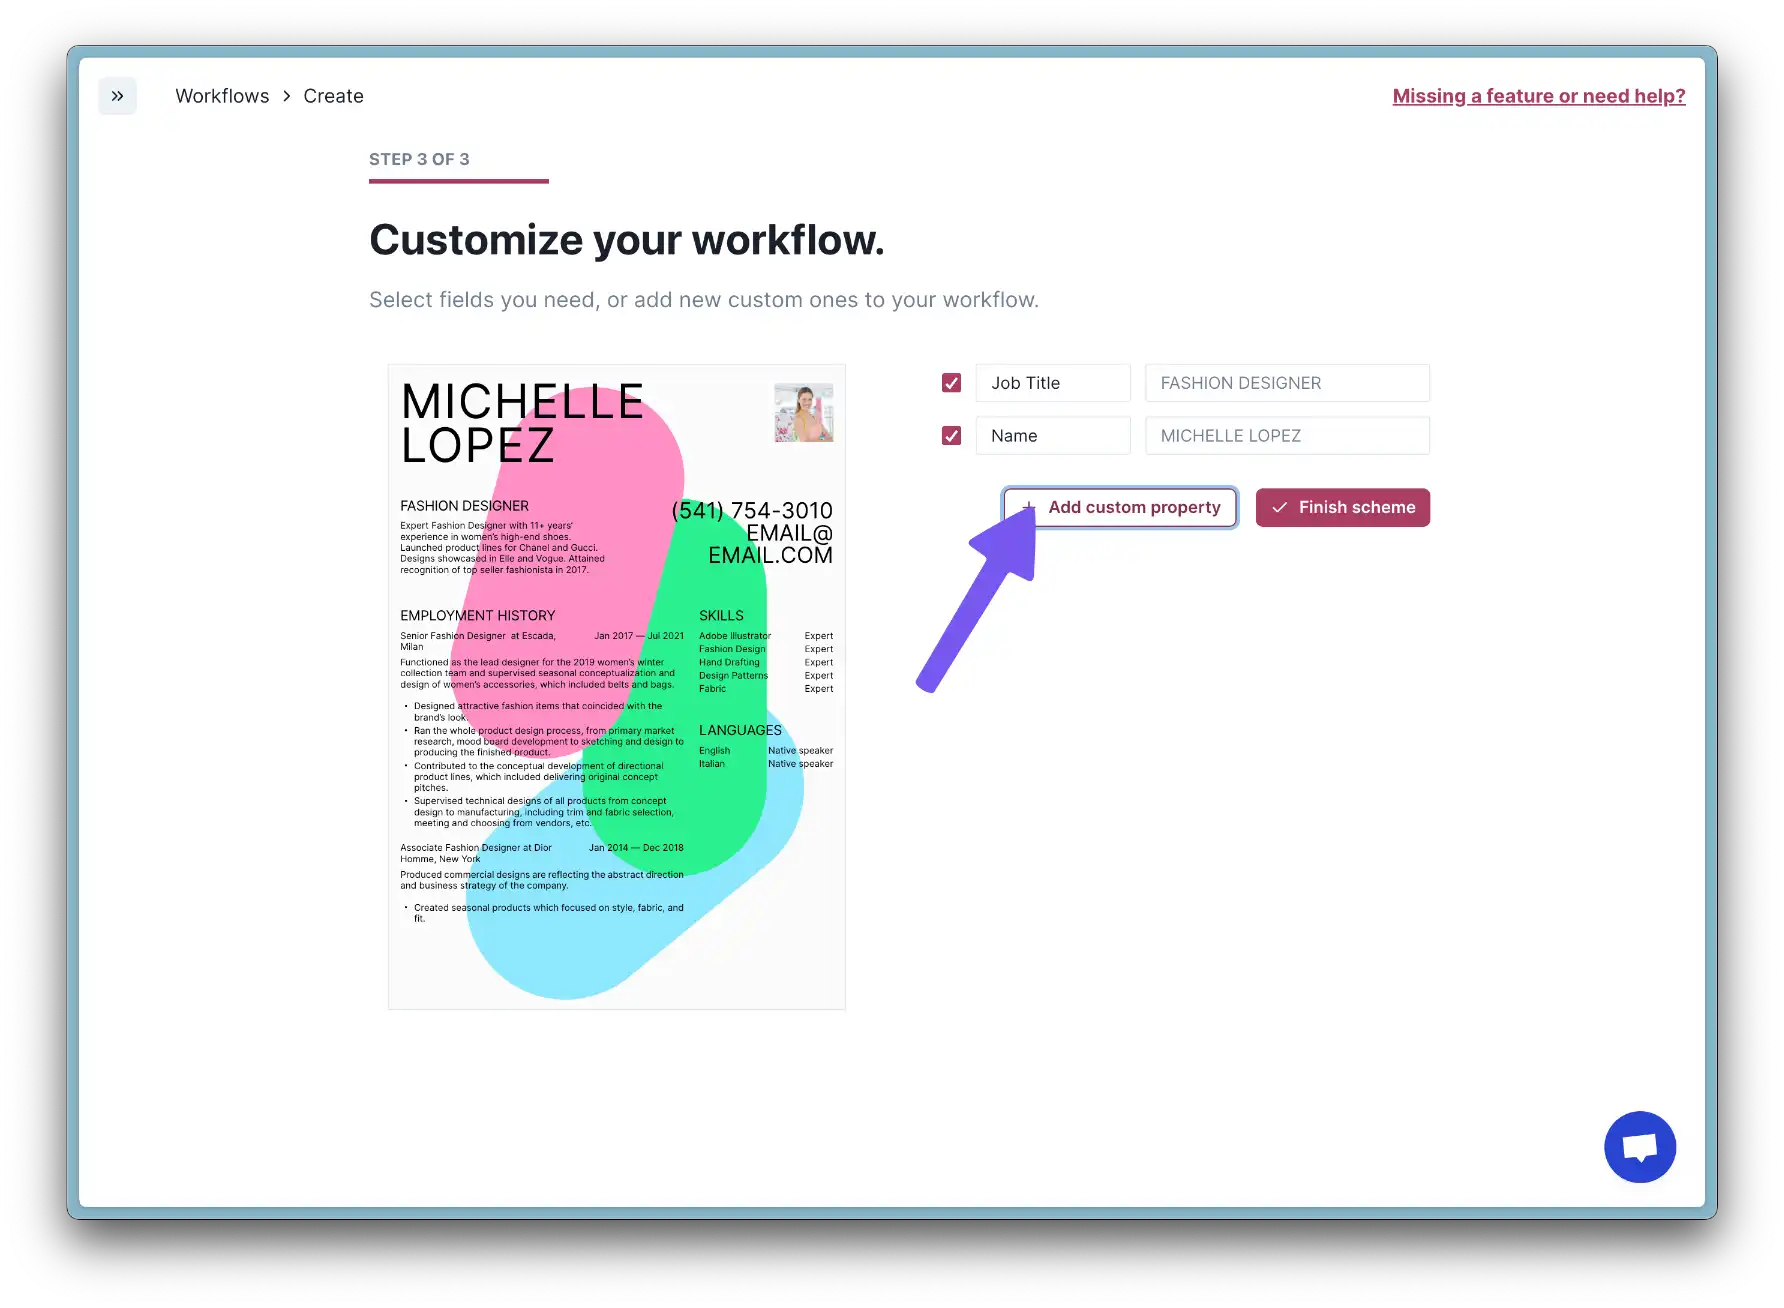
- First, add a field name (which should be a unique string). We will use "email". In the next field, you can specify instructions for our AI Processor. Click "Add" to confirm.
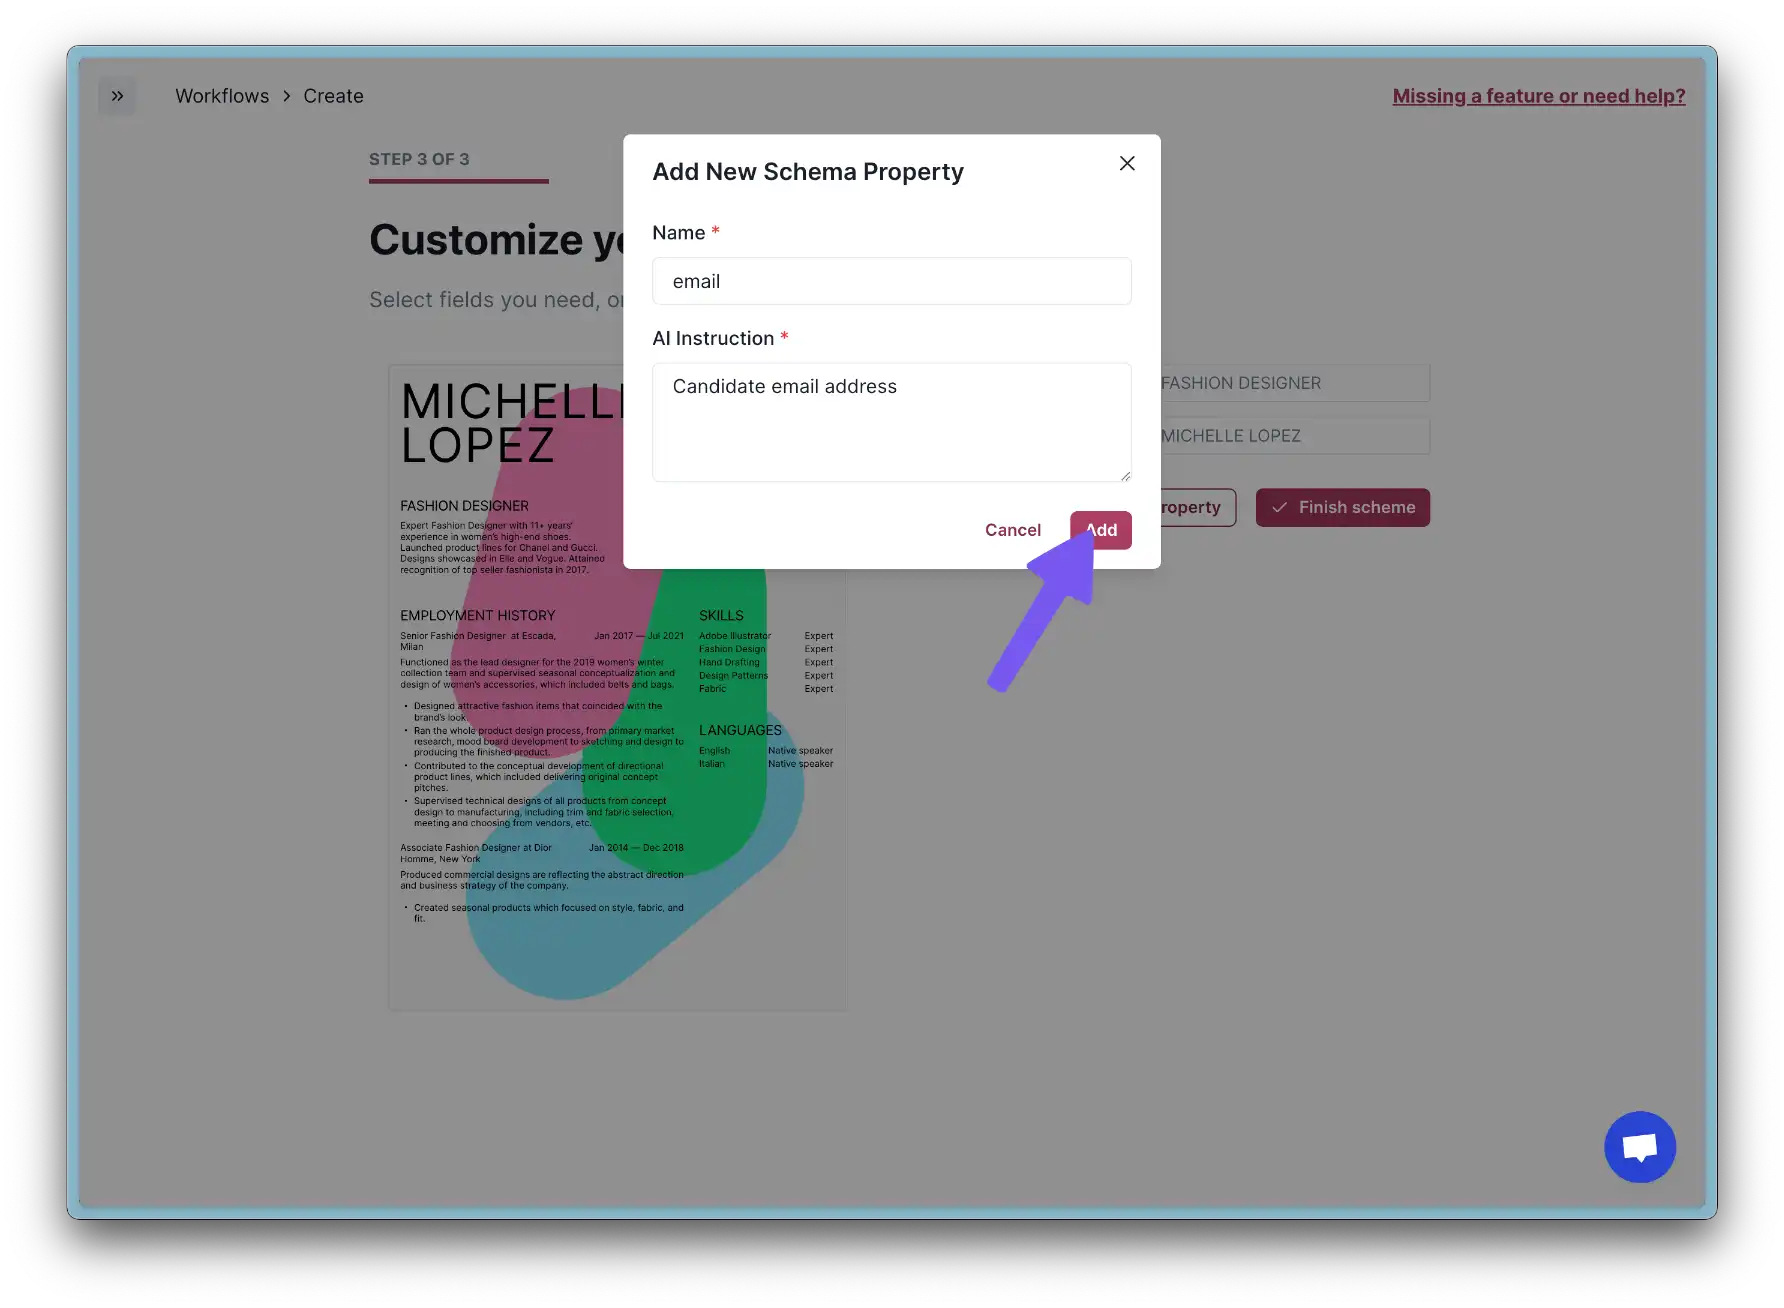
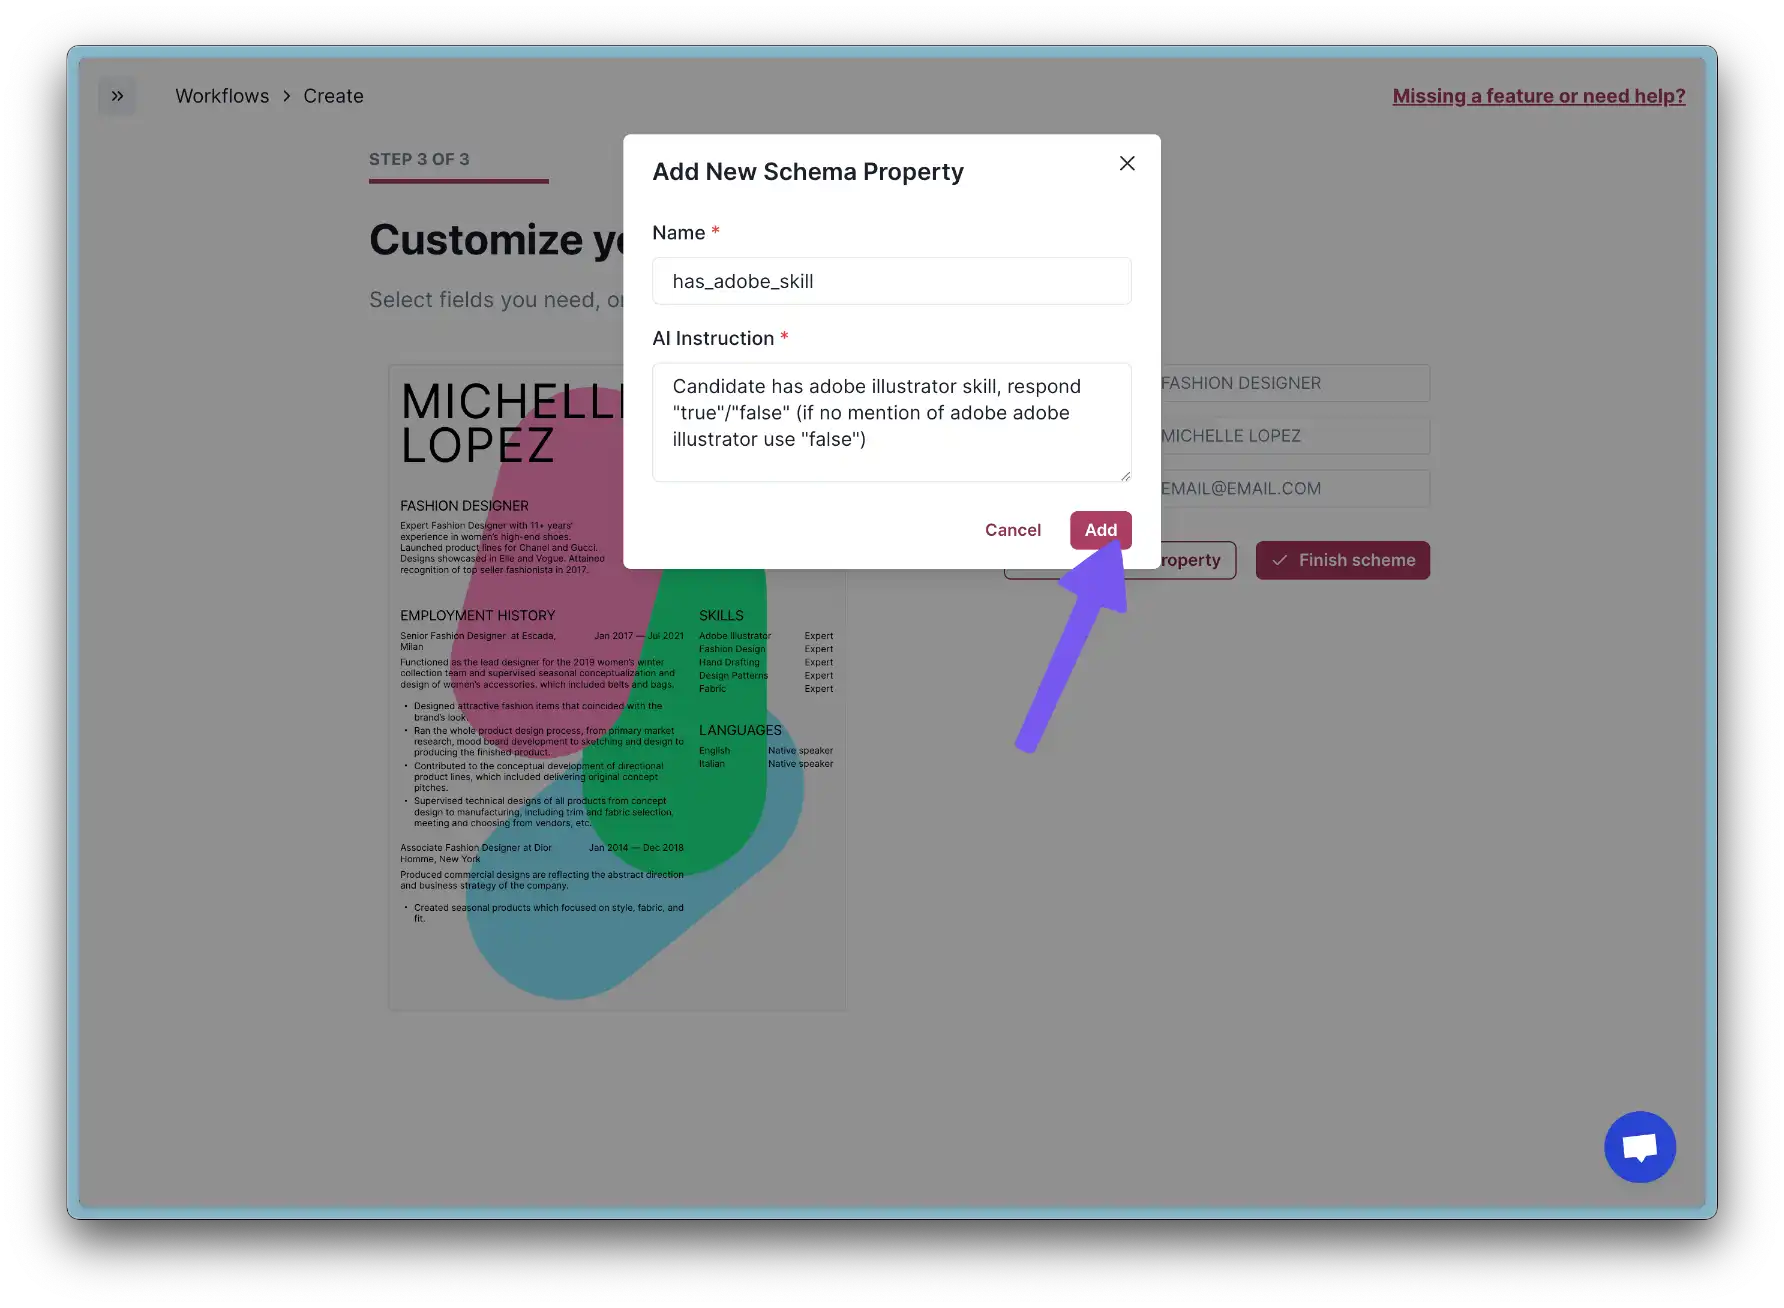
- After processing, let's add one more property with a bit more complexity. You can specify almost anything in the Instruction field.
- Click "Finish scheme" to complete the process. Don't worry, you'll be able to modify it later if needed.
Now you have a fully functional workflow. In the next step, we'll set up Airtable to store the processed data.
Step 2: Creating the Airtable Base for Processed Data
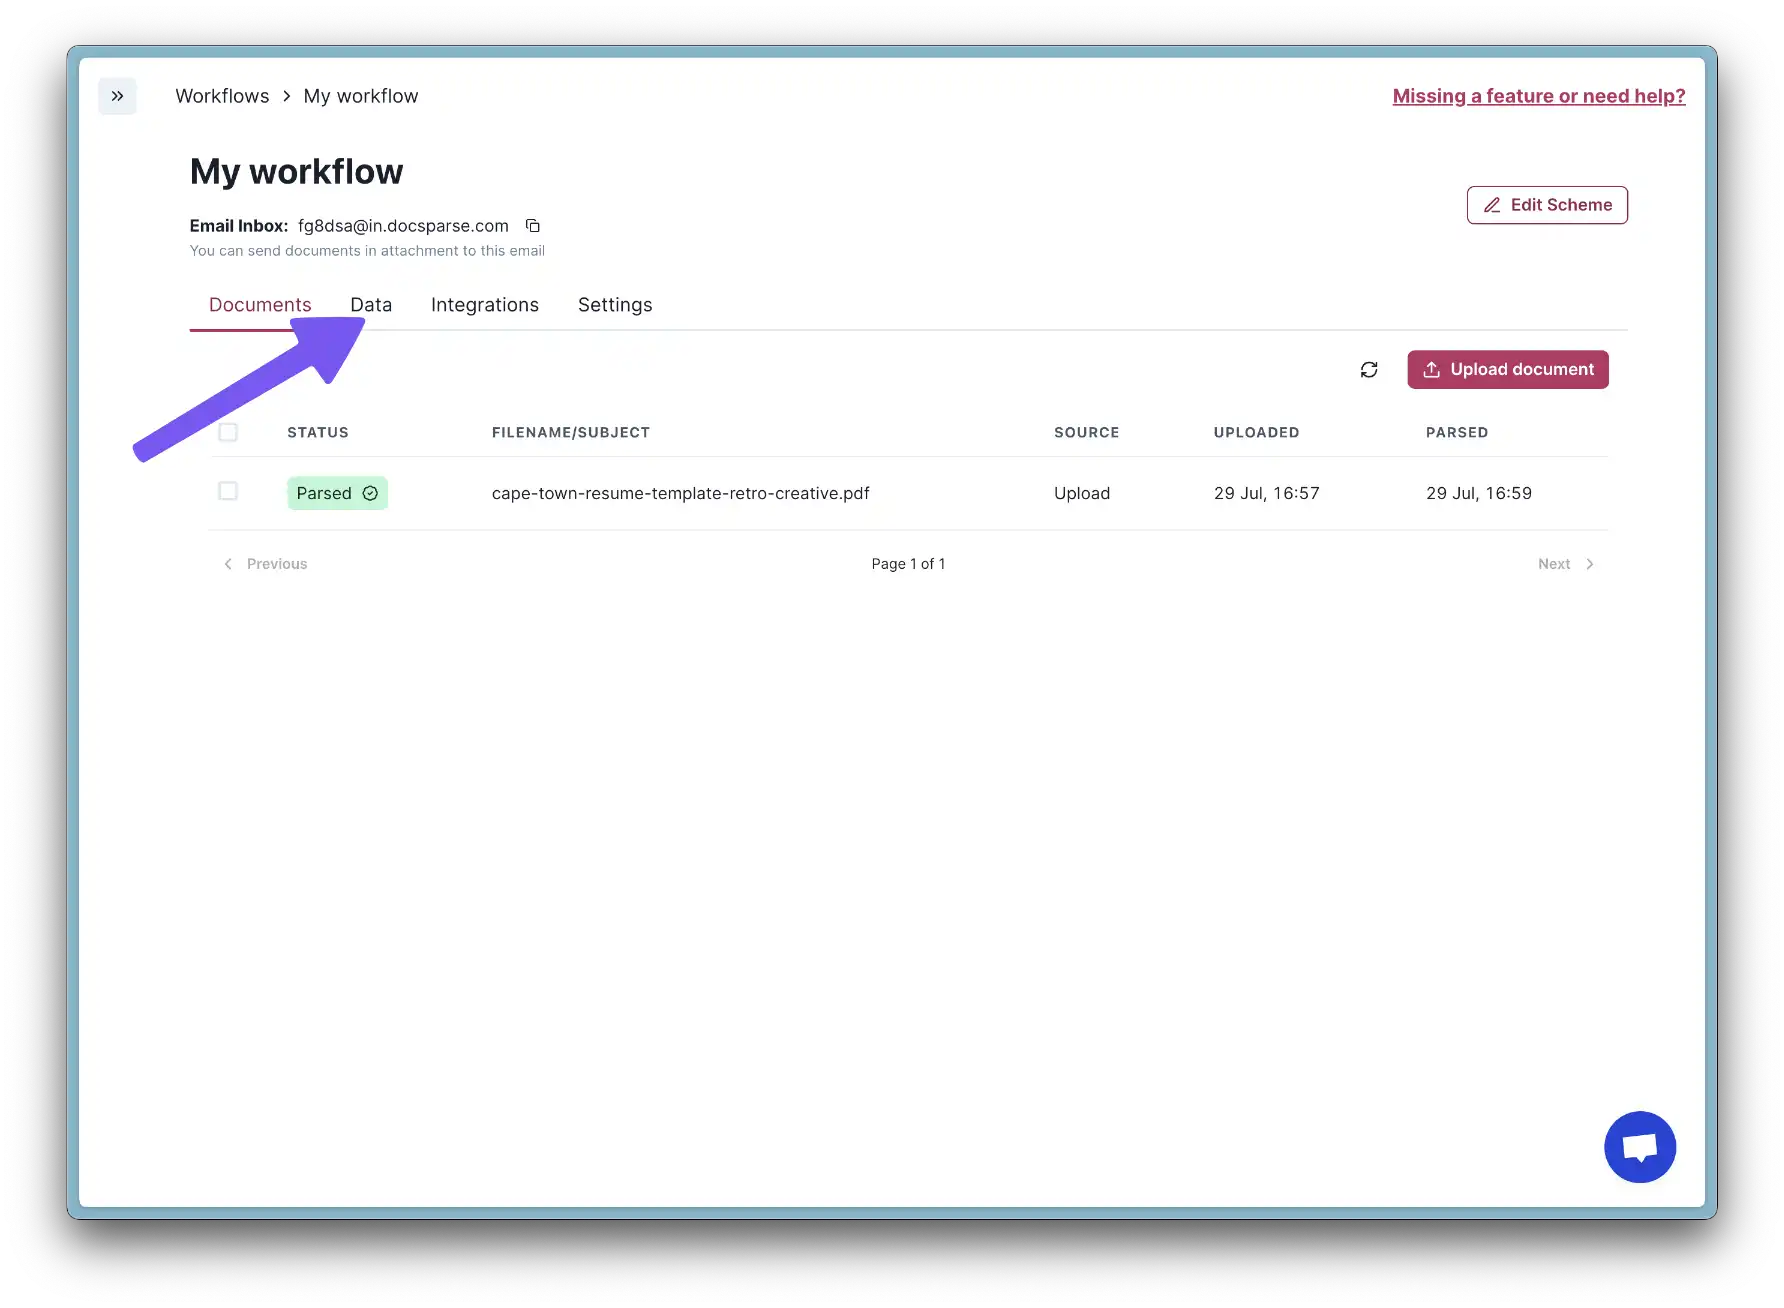
- Log into your Airtable account and create a new Table. If you're not sure how to do this, check out this step-by-step guide.
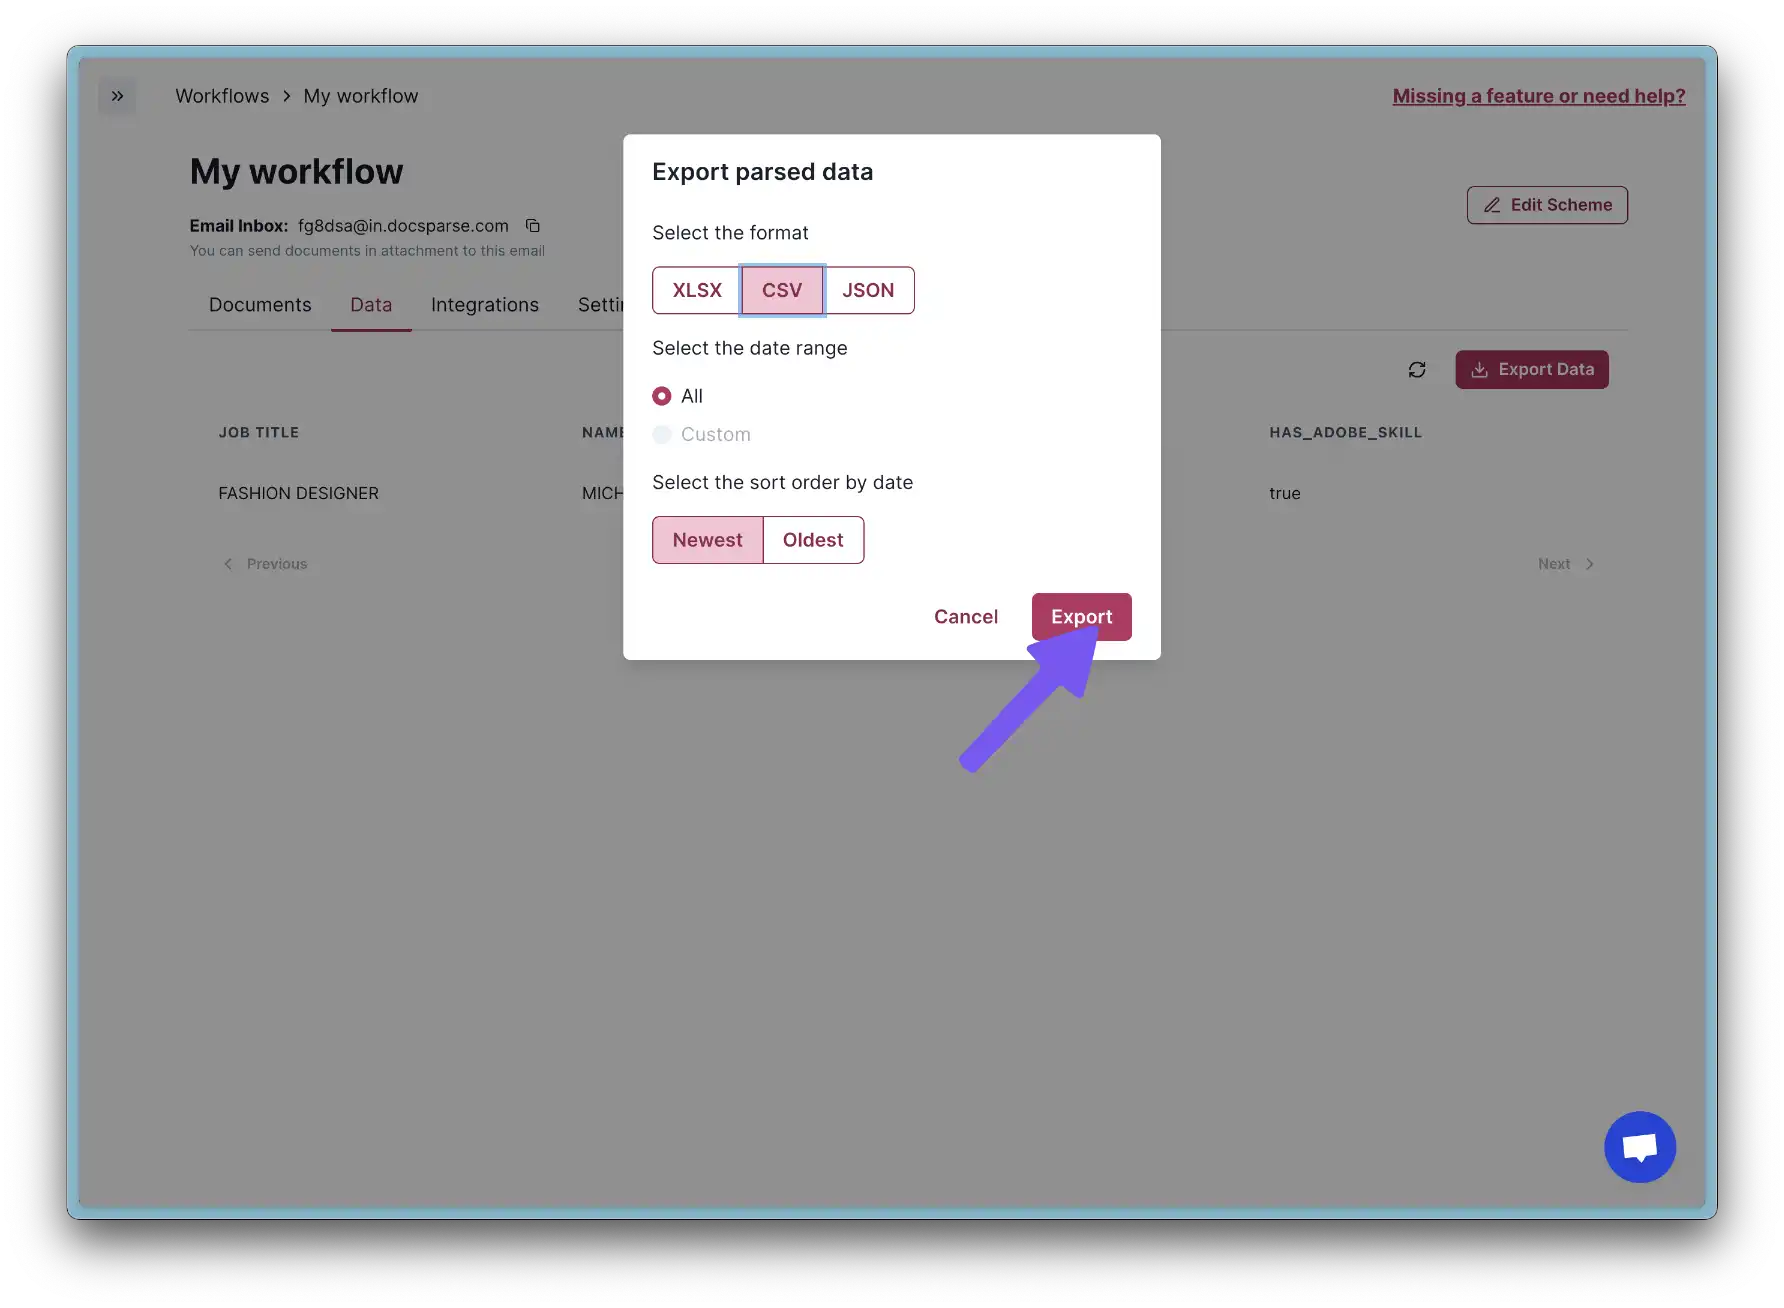
- Go to DocsParse Data tab and click "Export" to download the processed data.
- Select "CSV" as the file format and click "Export"
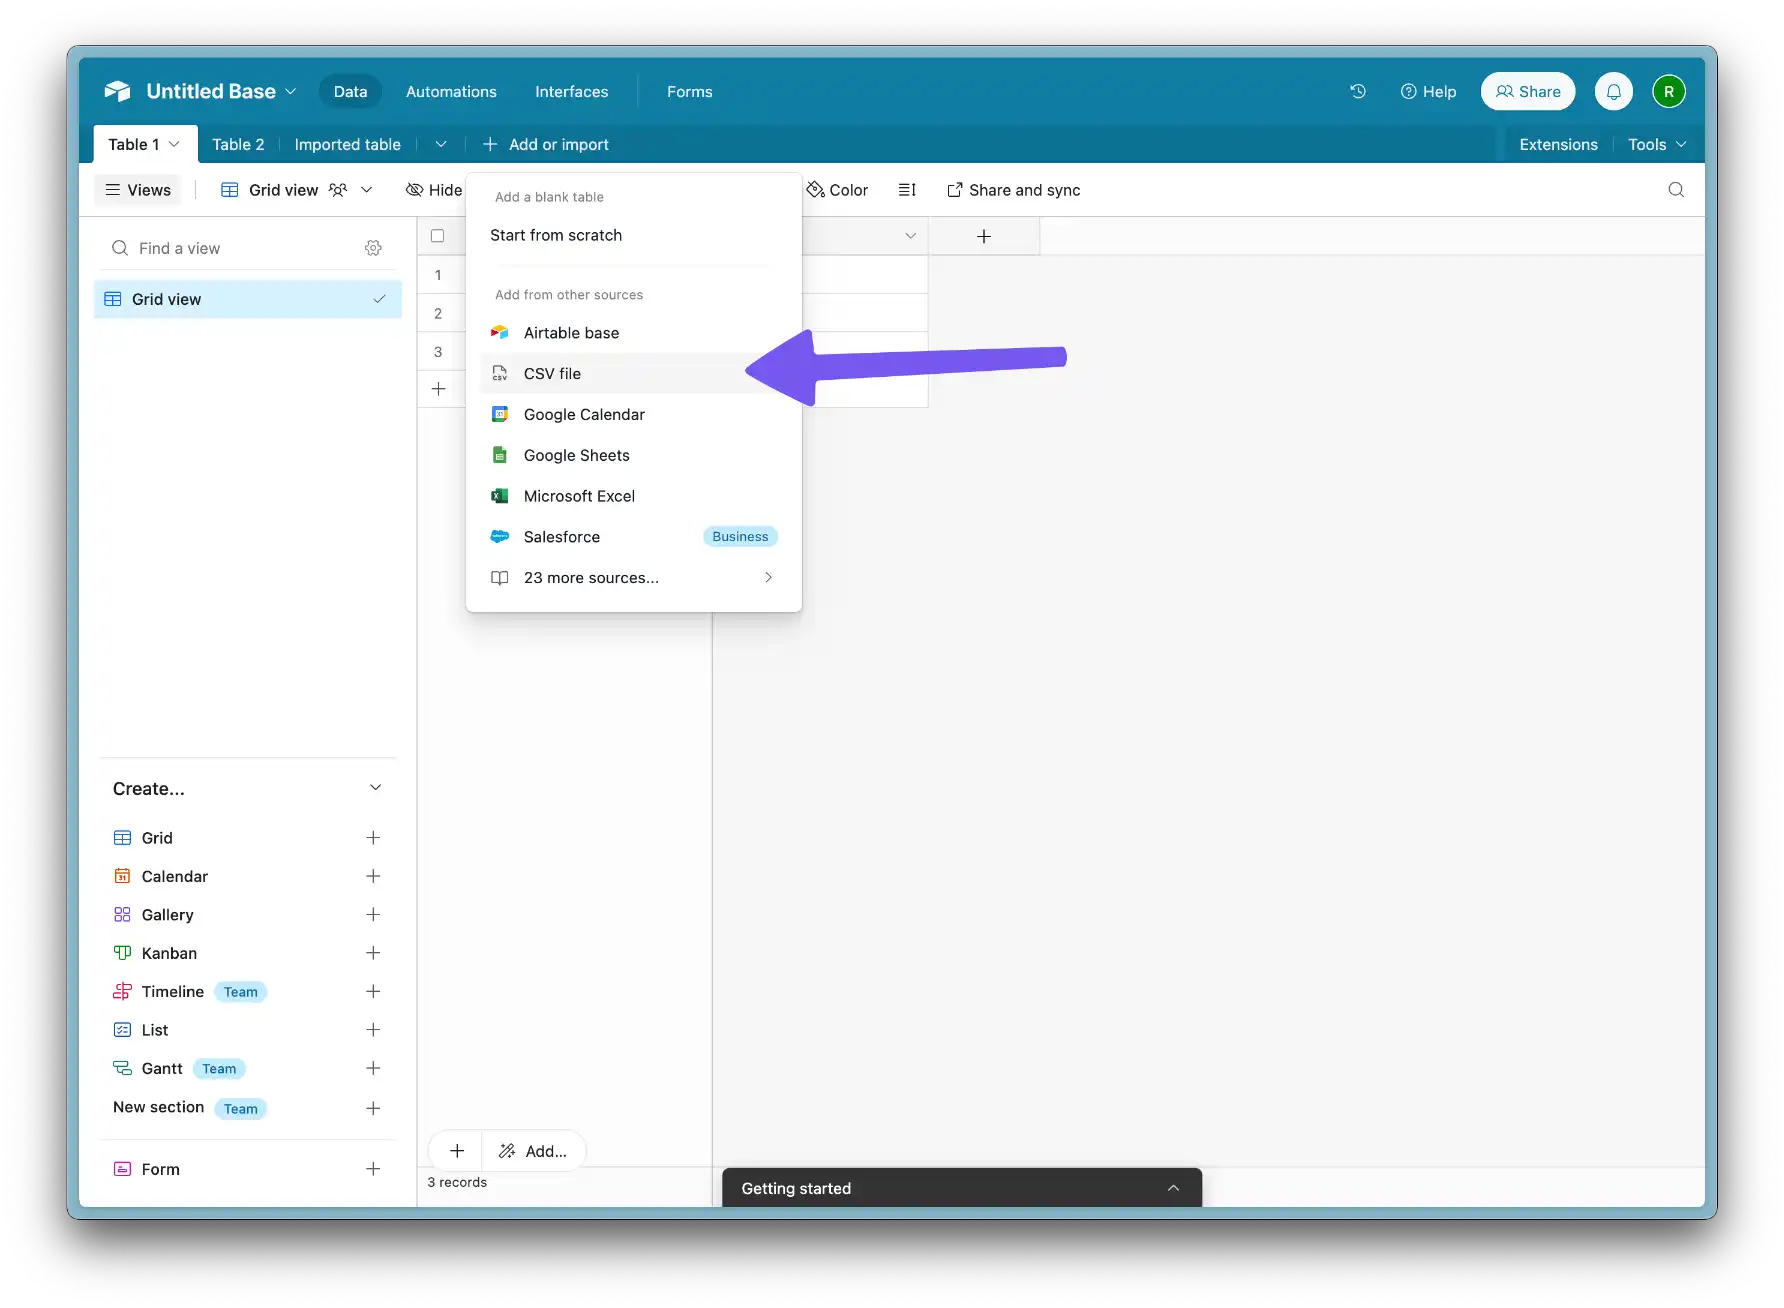
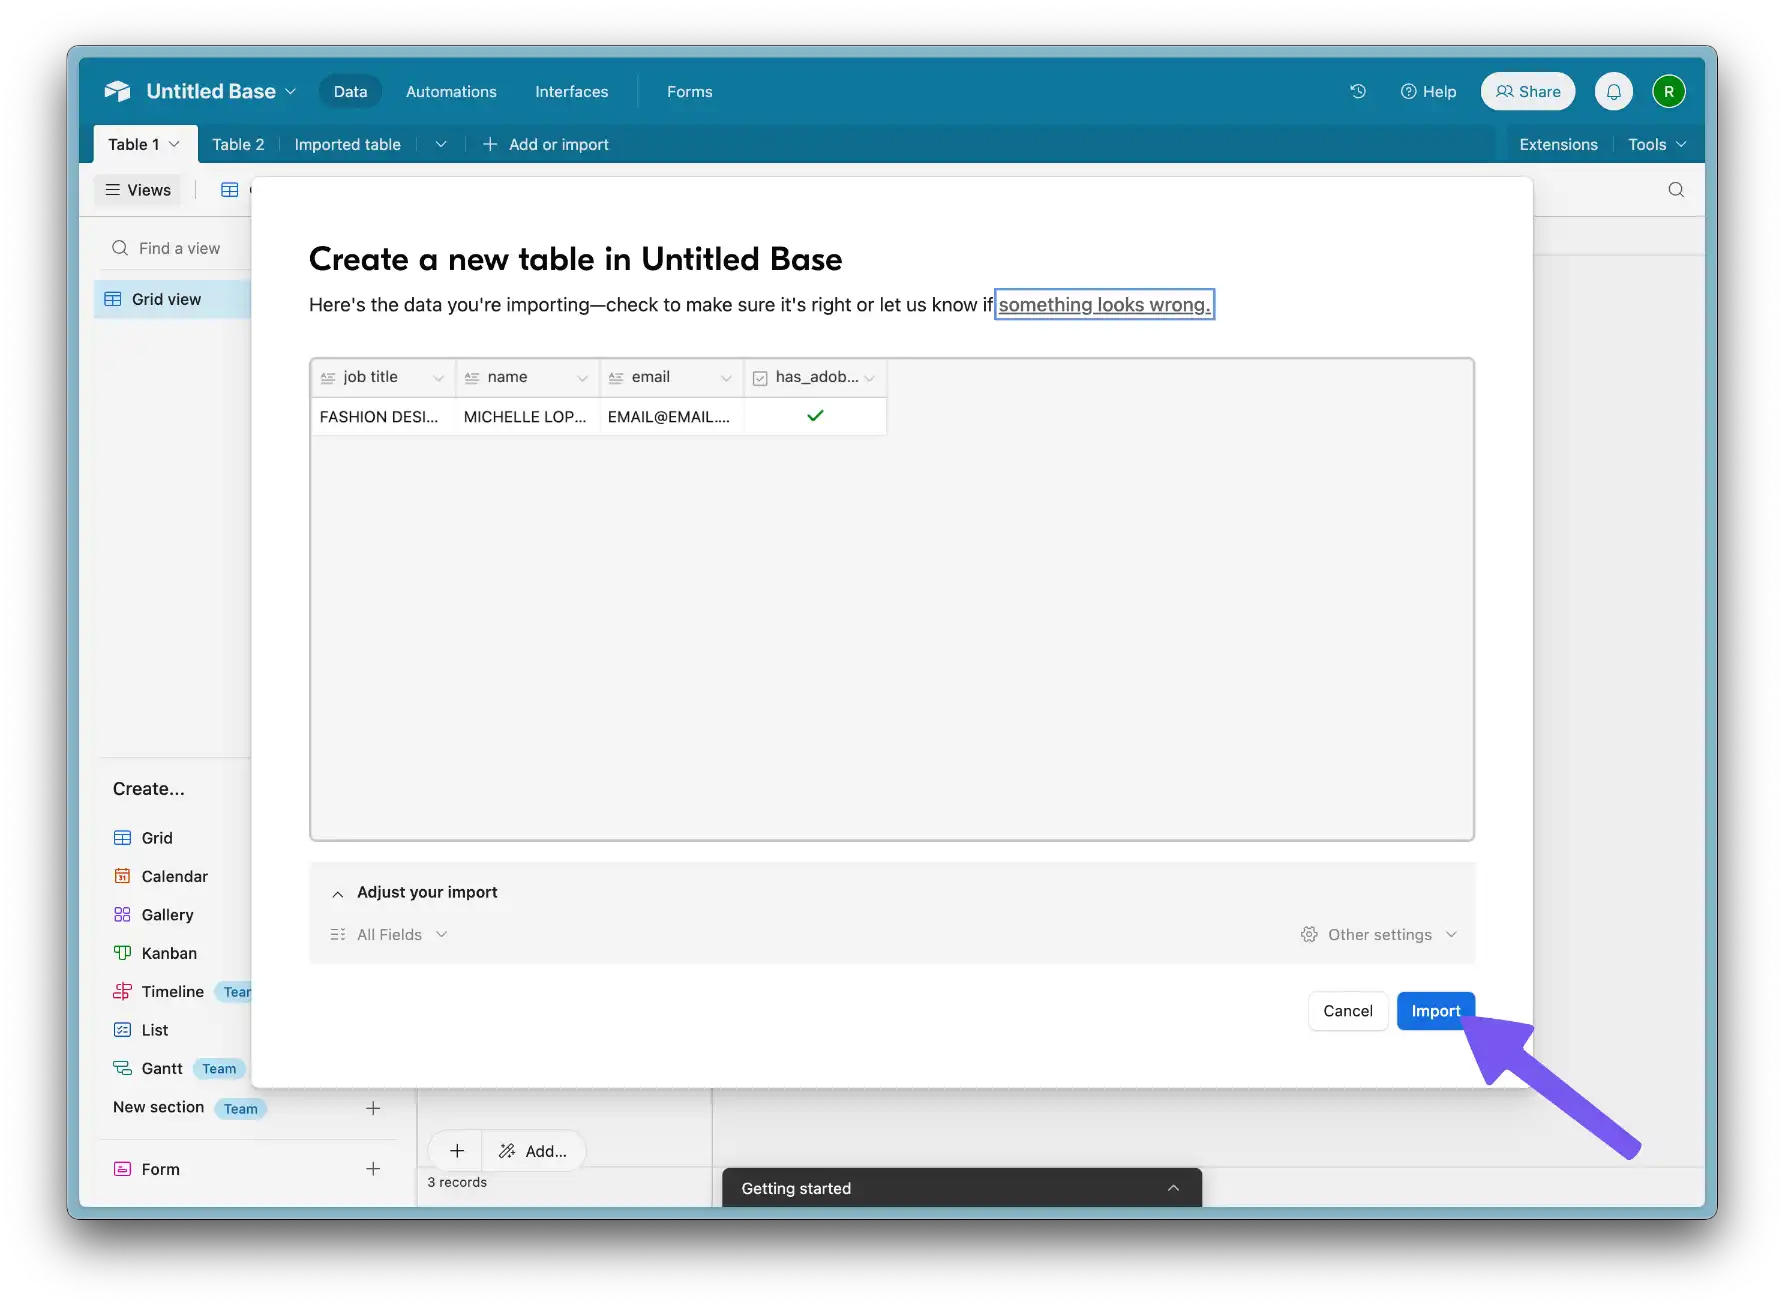
- Go to the Airtable base you created and click "Import" to upload the CSV file.
At this point, you've successfully set up the structure for your Airtable base and have imported the processed data from DocsParse. In the next step, we'll configure Make.com to connect DocsParse and Airtable.
Step 3: Configuring Make.com to Connect DocsParse and Airtable
- Log into your Make account and create a new scenario
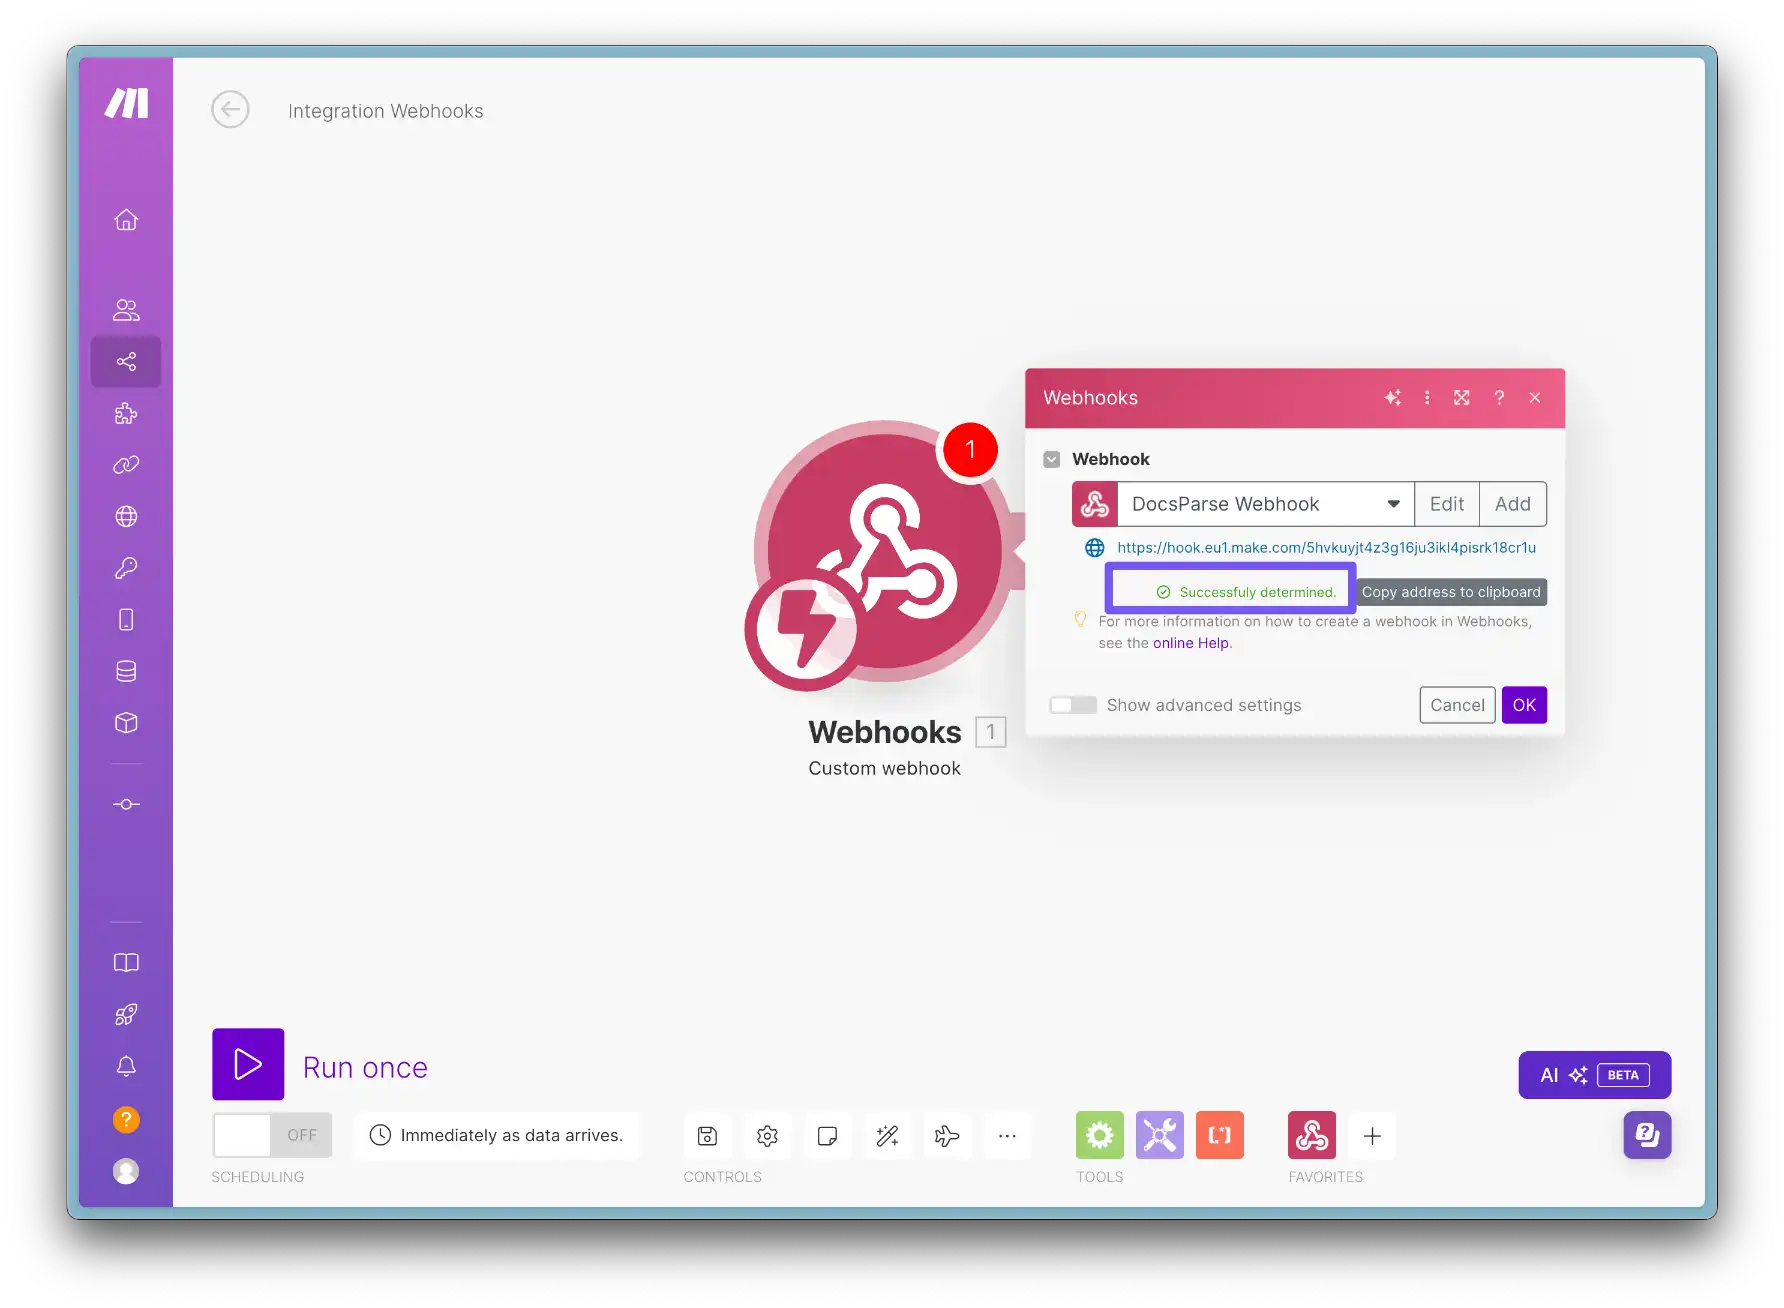
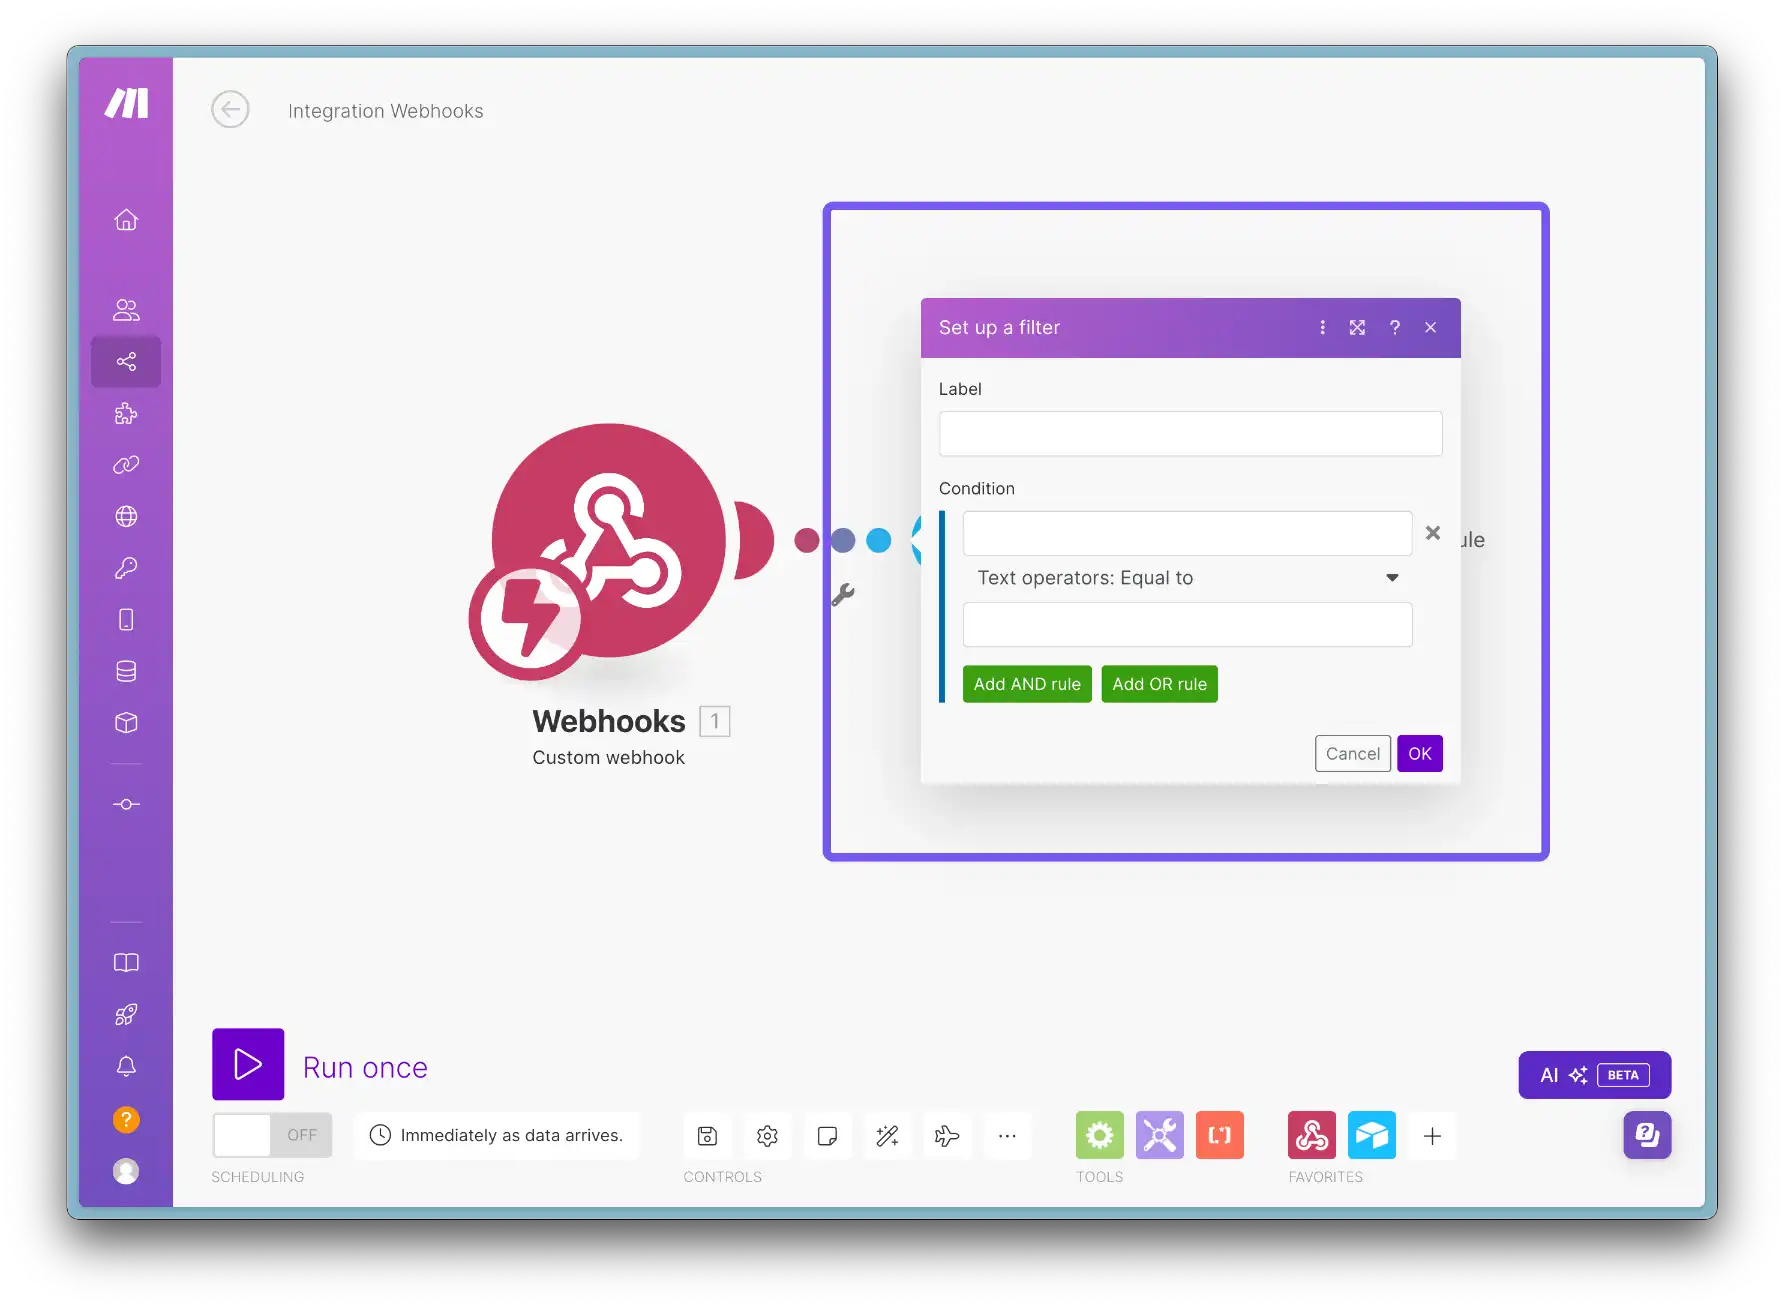
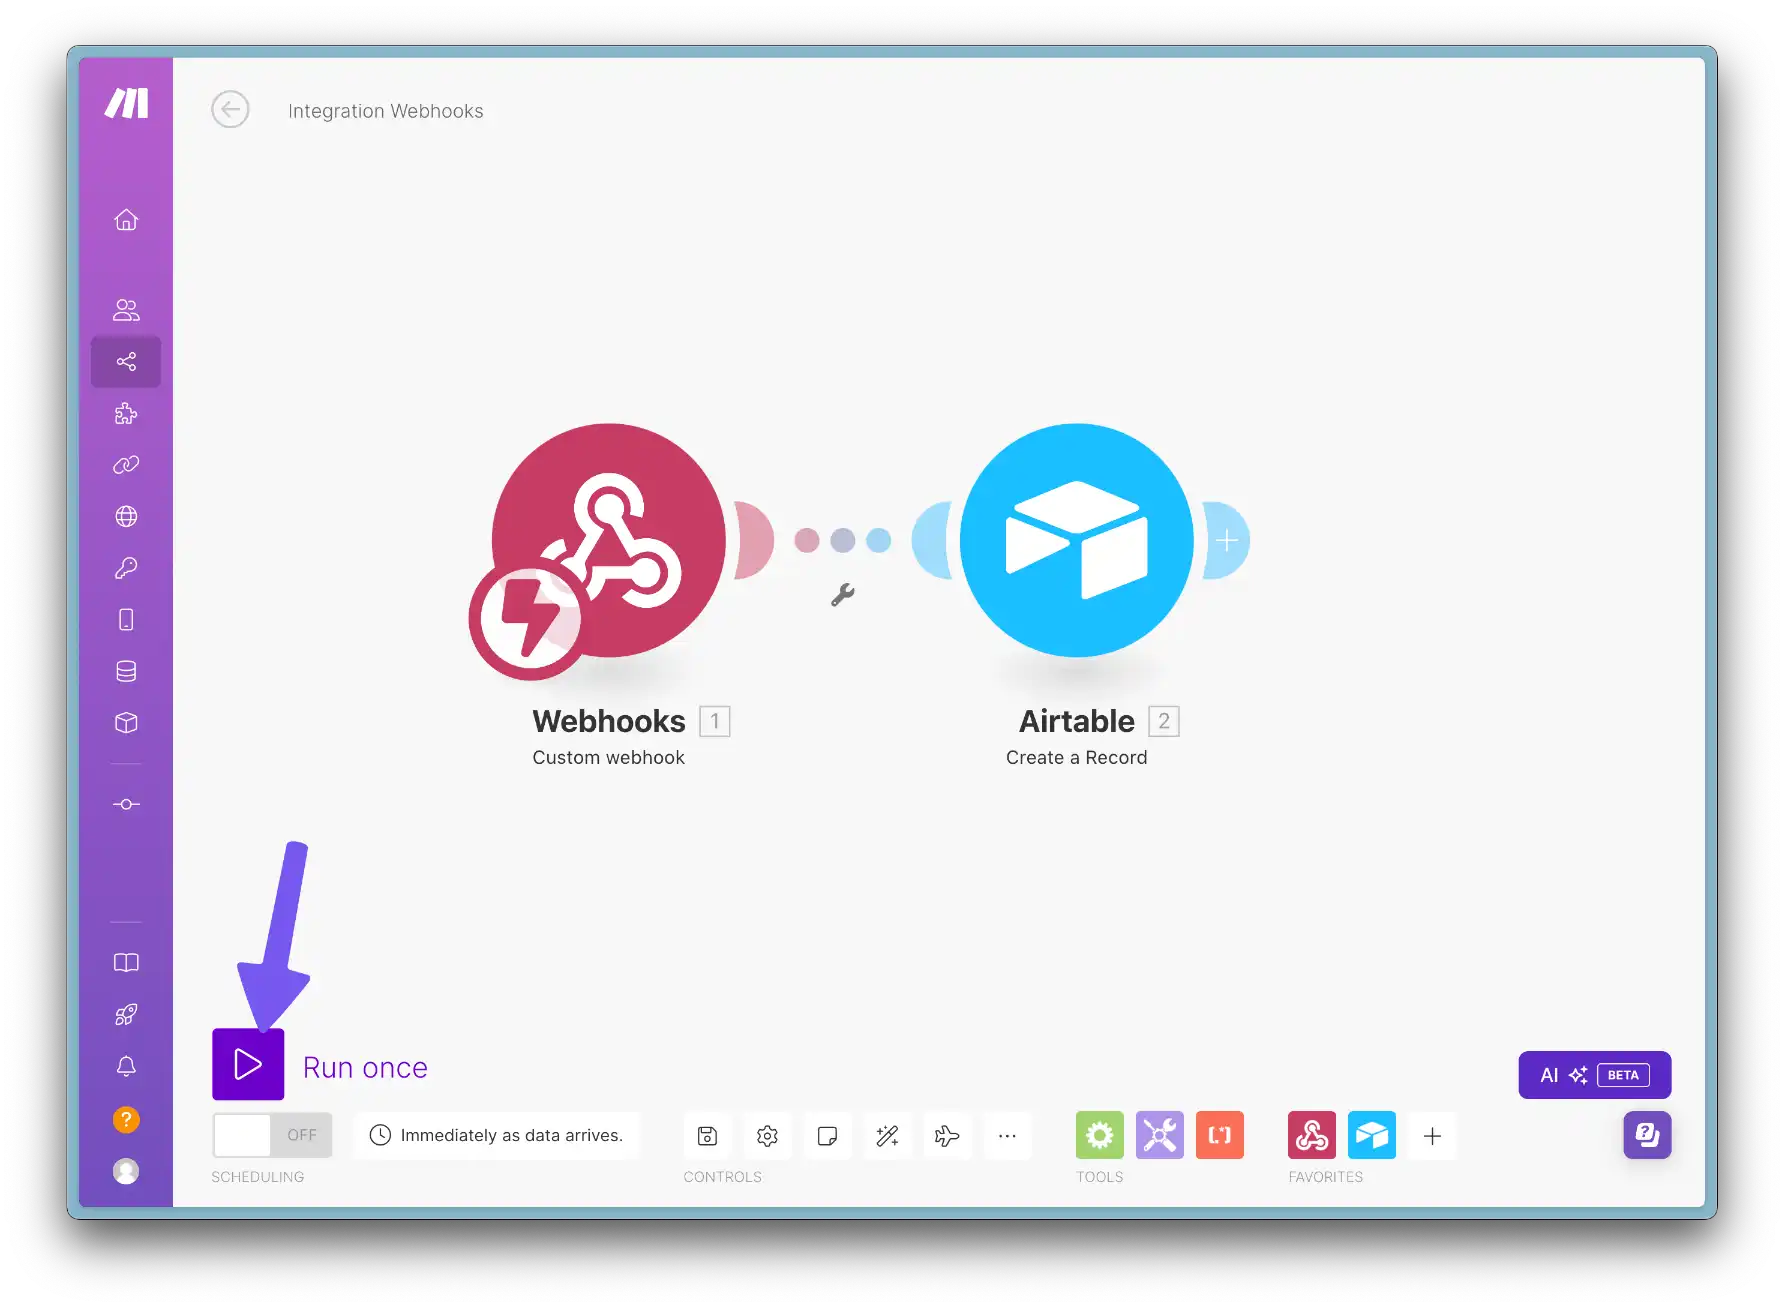
- Click "Add a trigger", select "Webhook" and choose "Custom webhook"
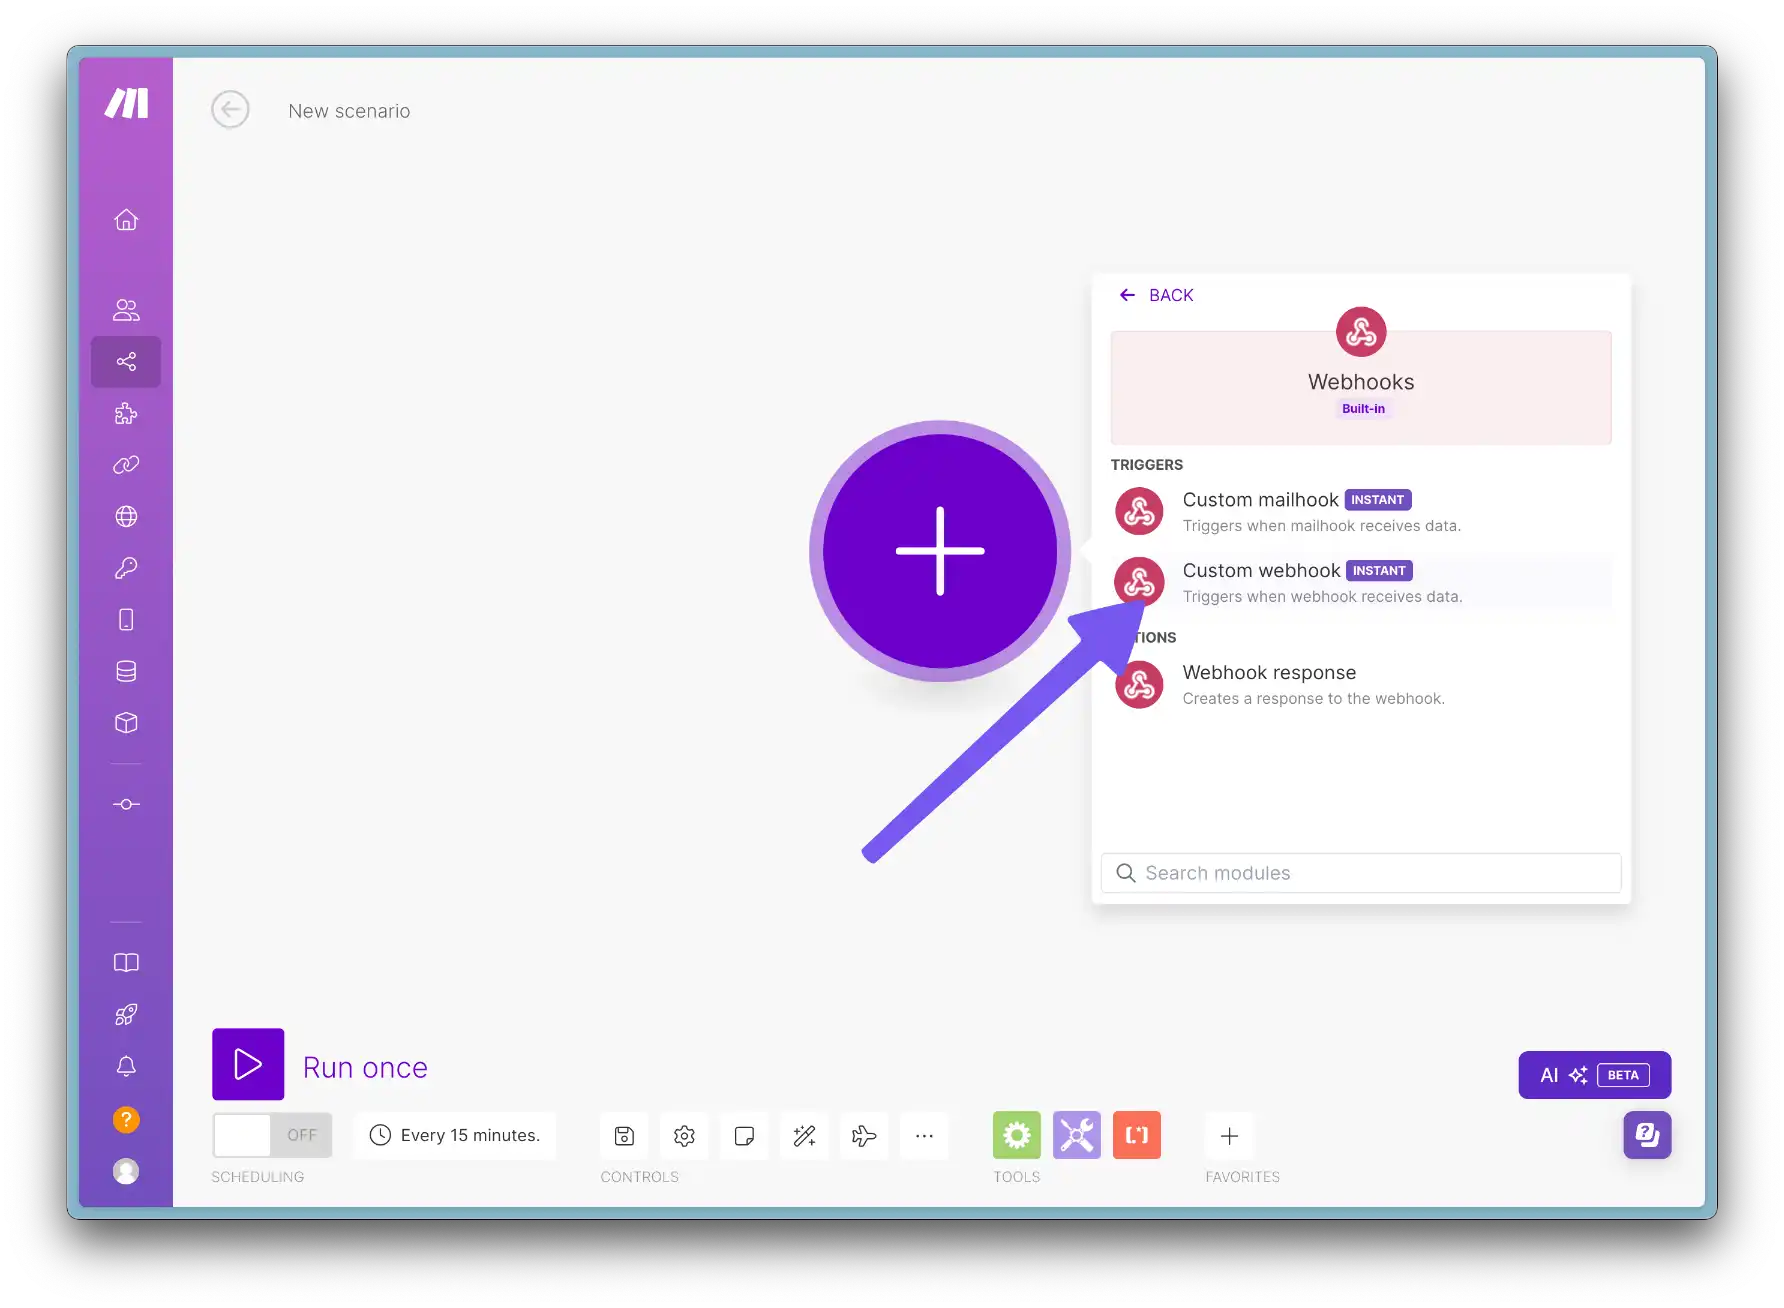
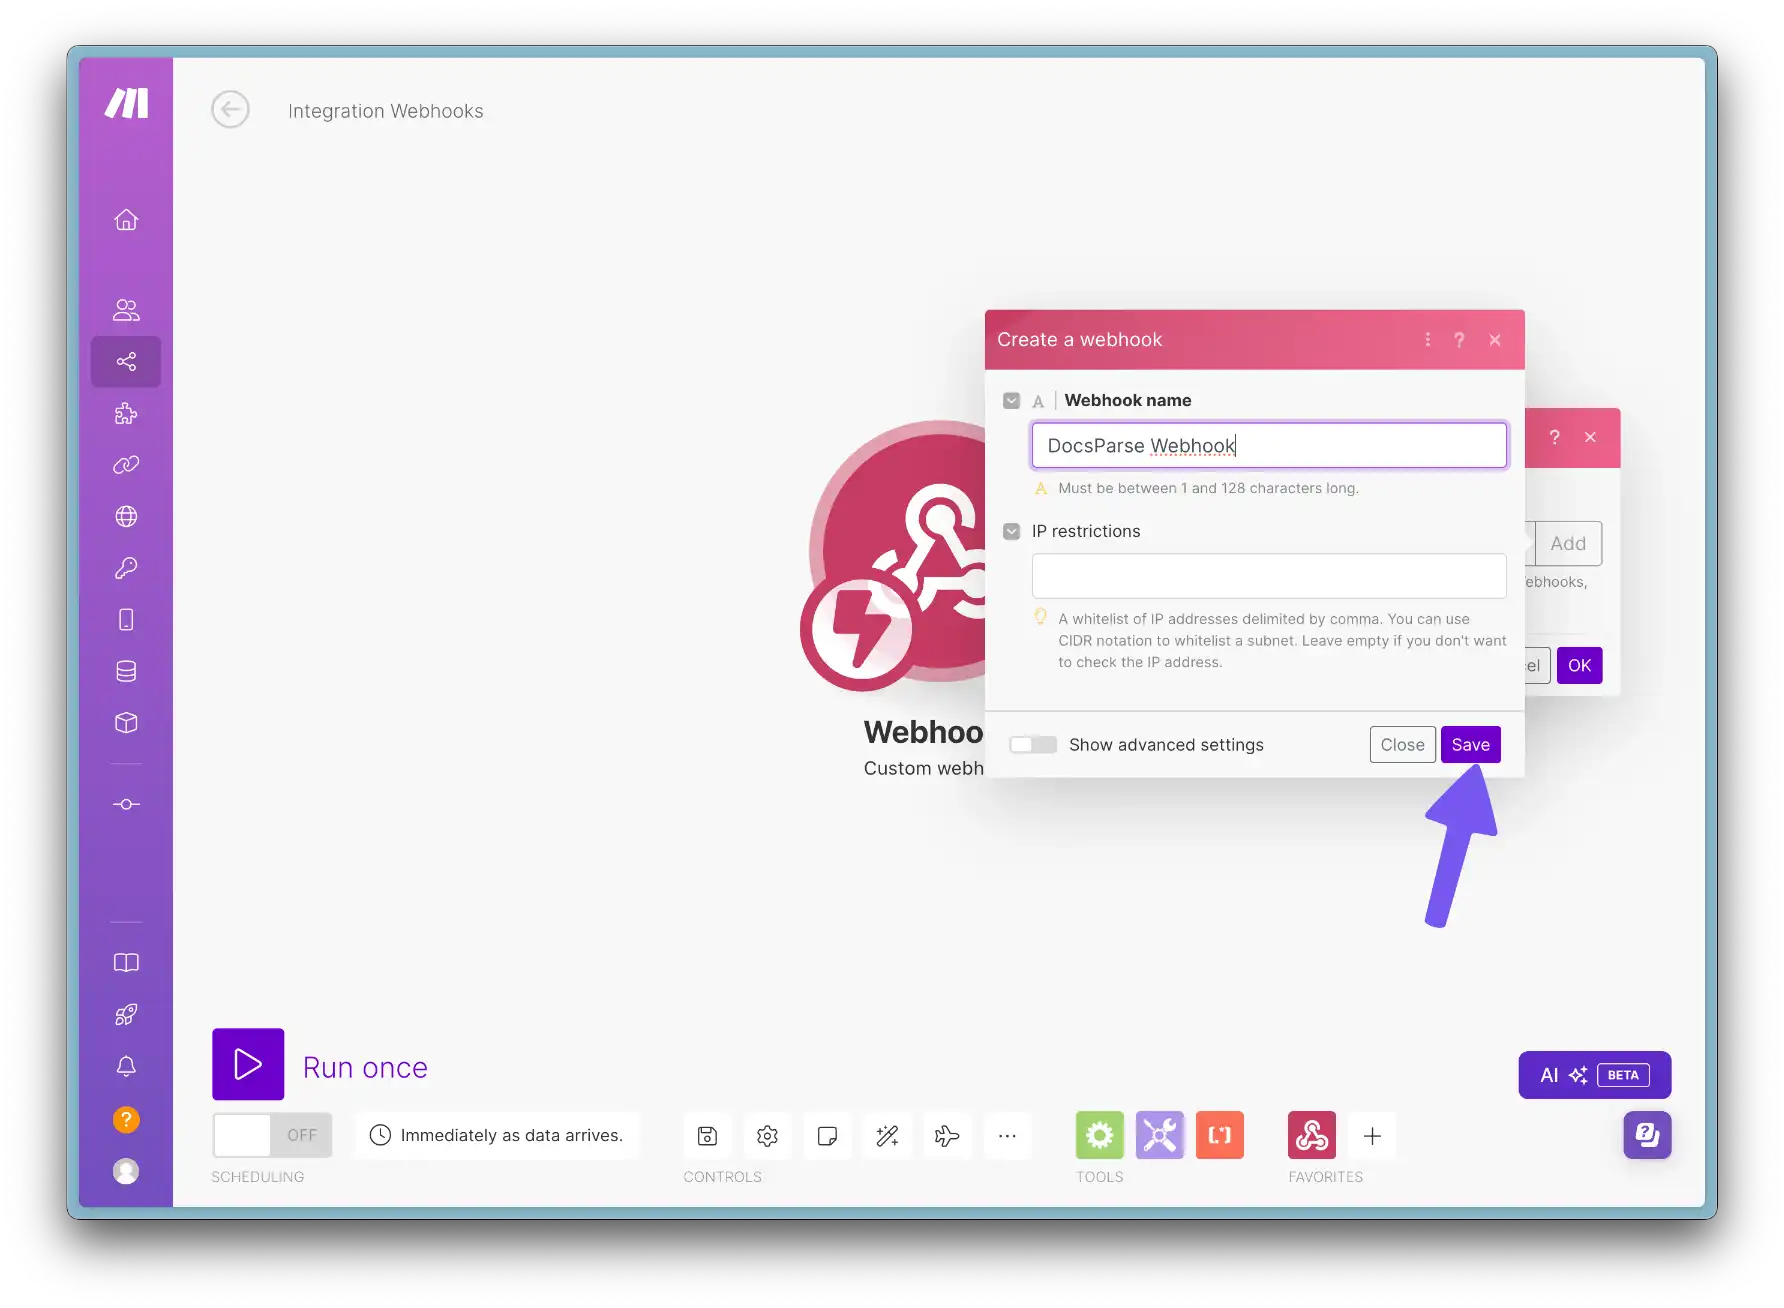
- Enter webhook name and click "Save"
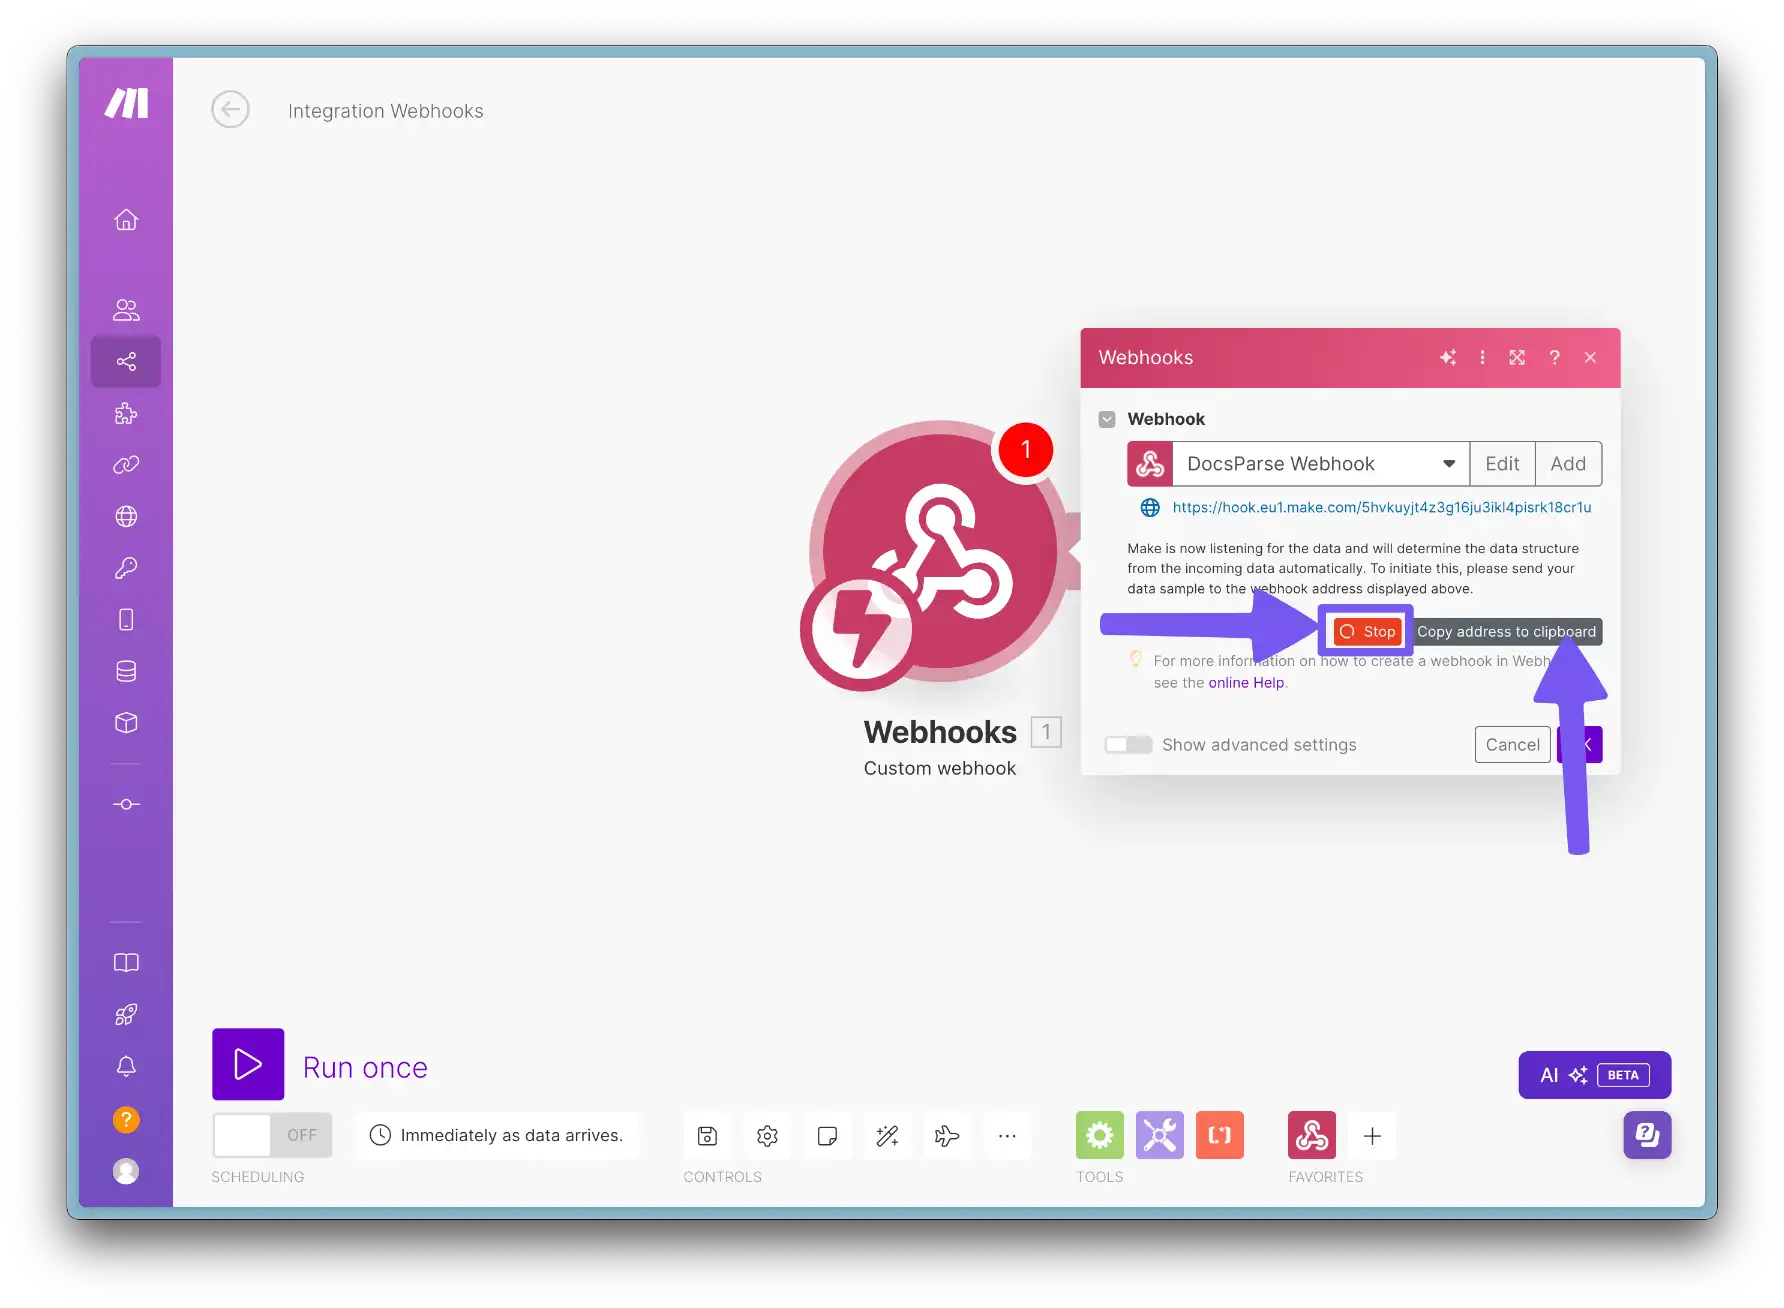
- Make sure that Redetermining data is active ("Stop" button with loader) and copy webhook URL
- Go to DocsParse Integrations tab and add new webhook
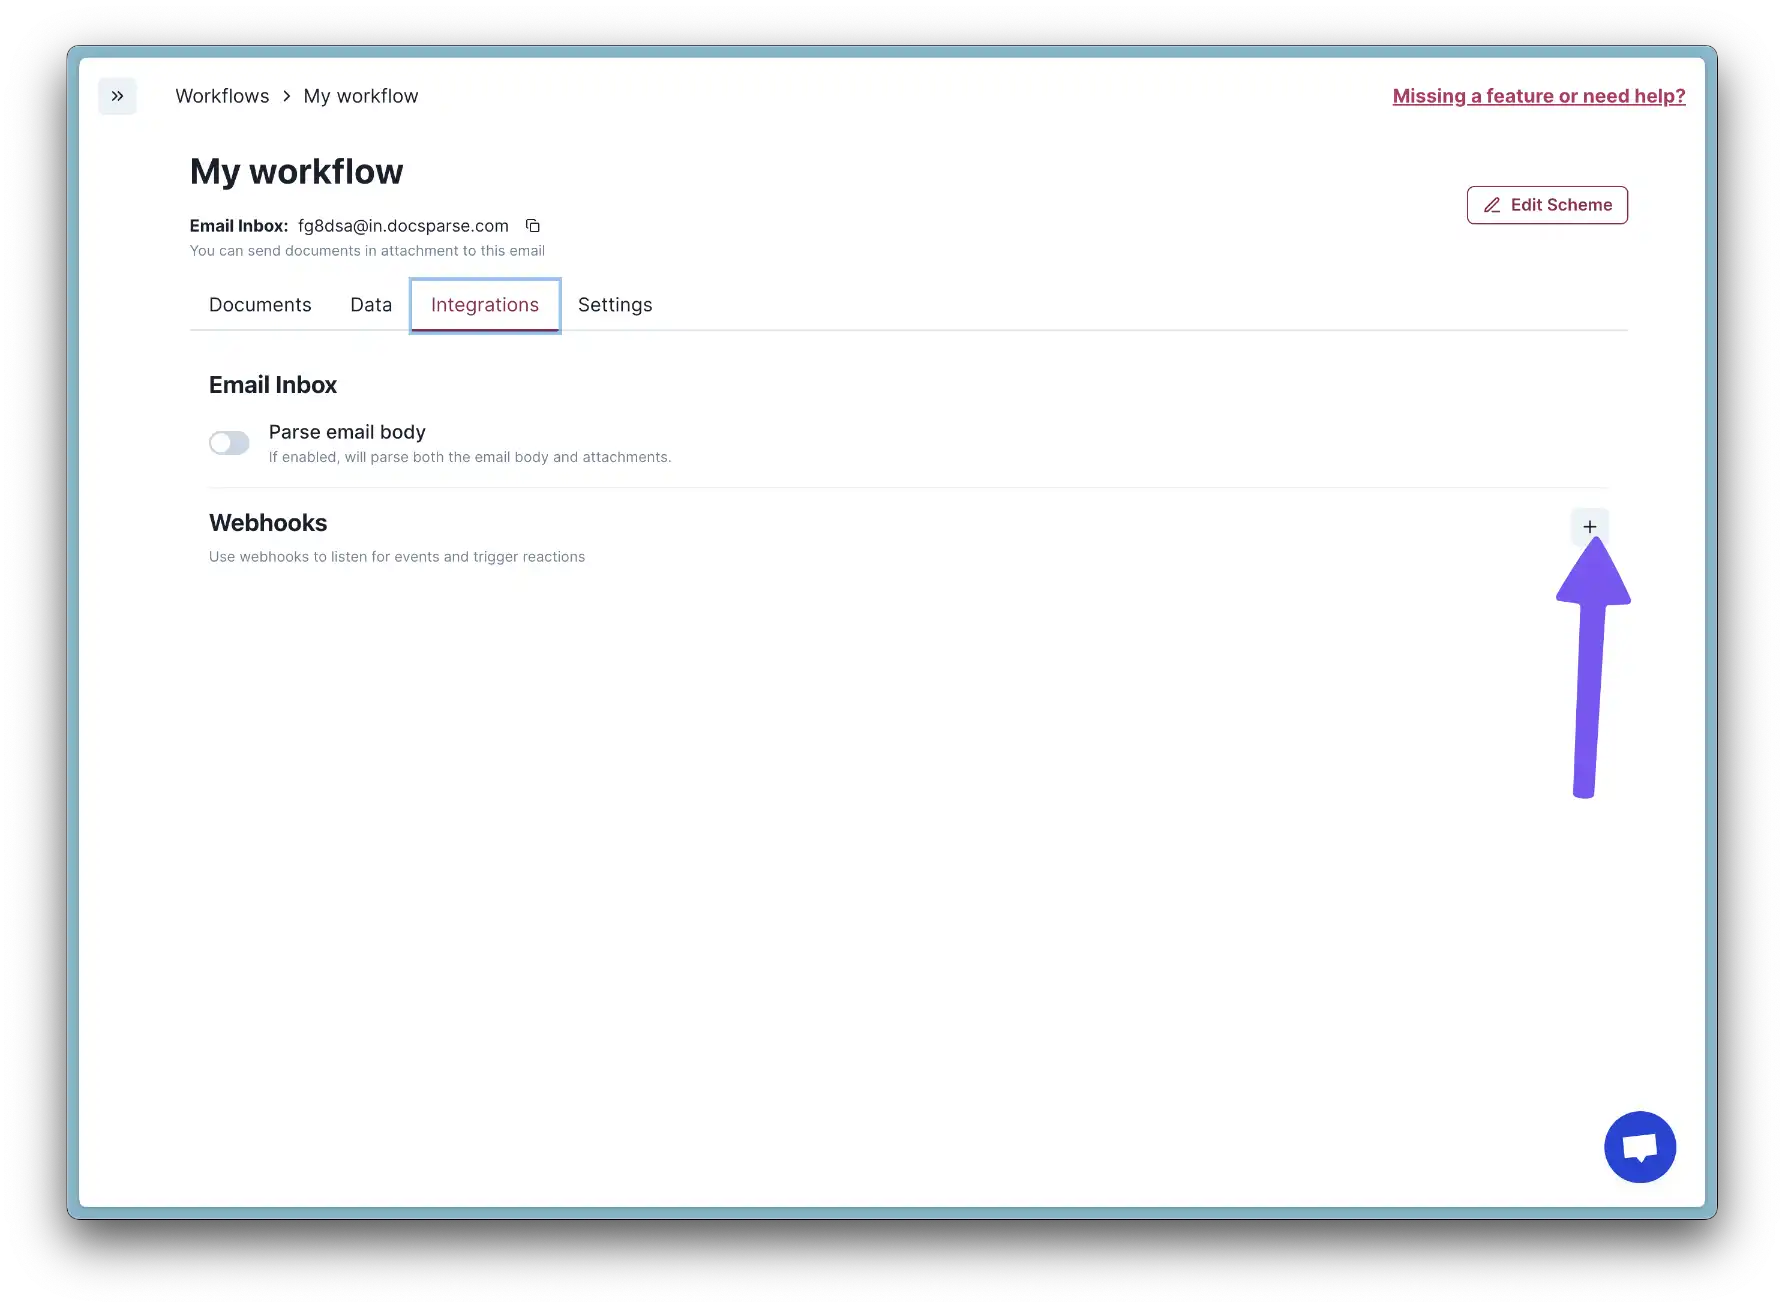
- Enter webhook name, paste the webhook URL, and click "Add"
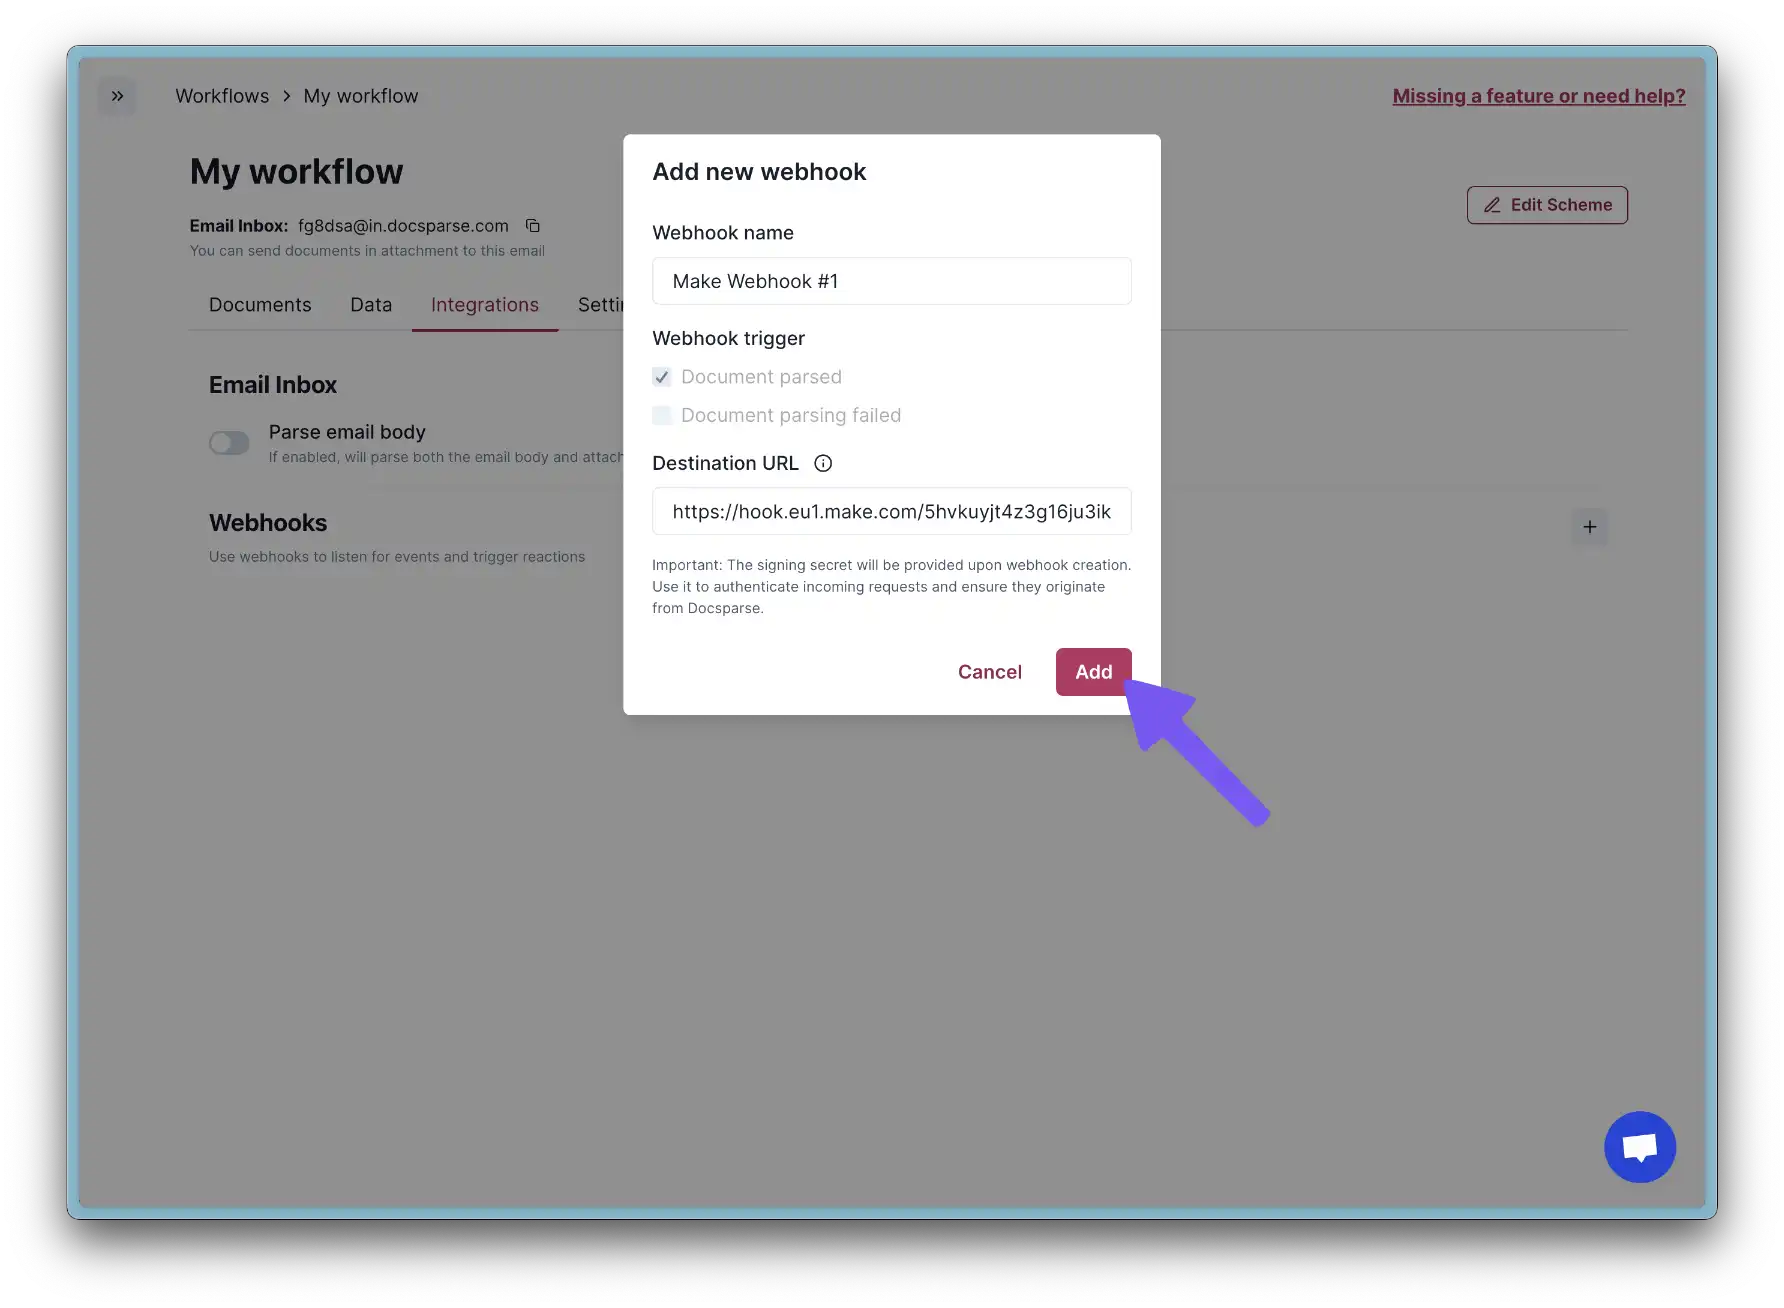
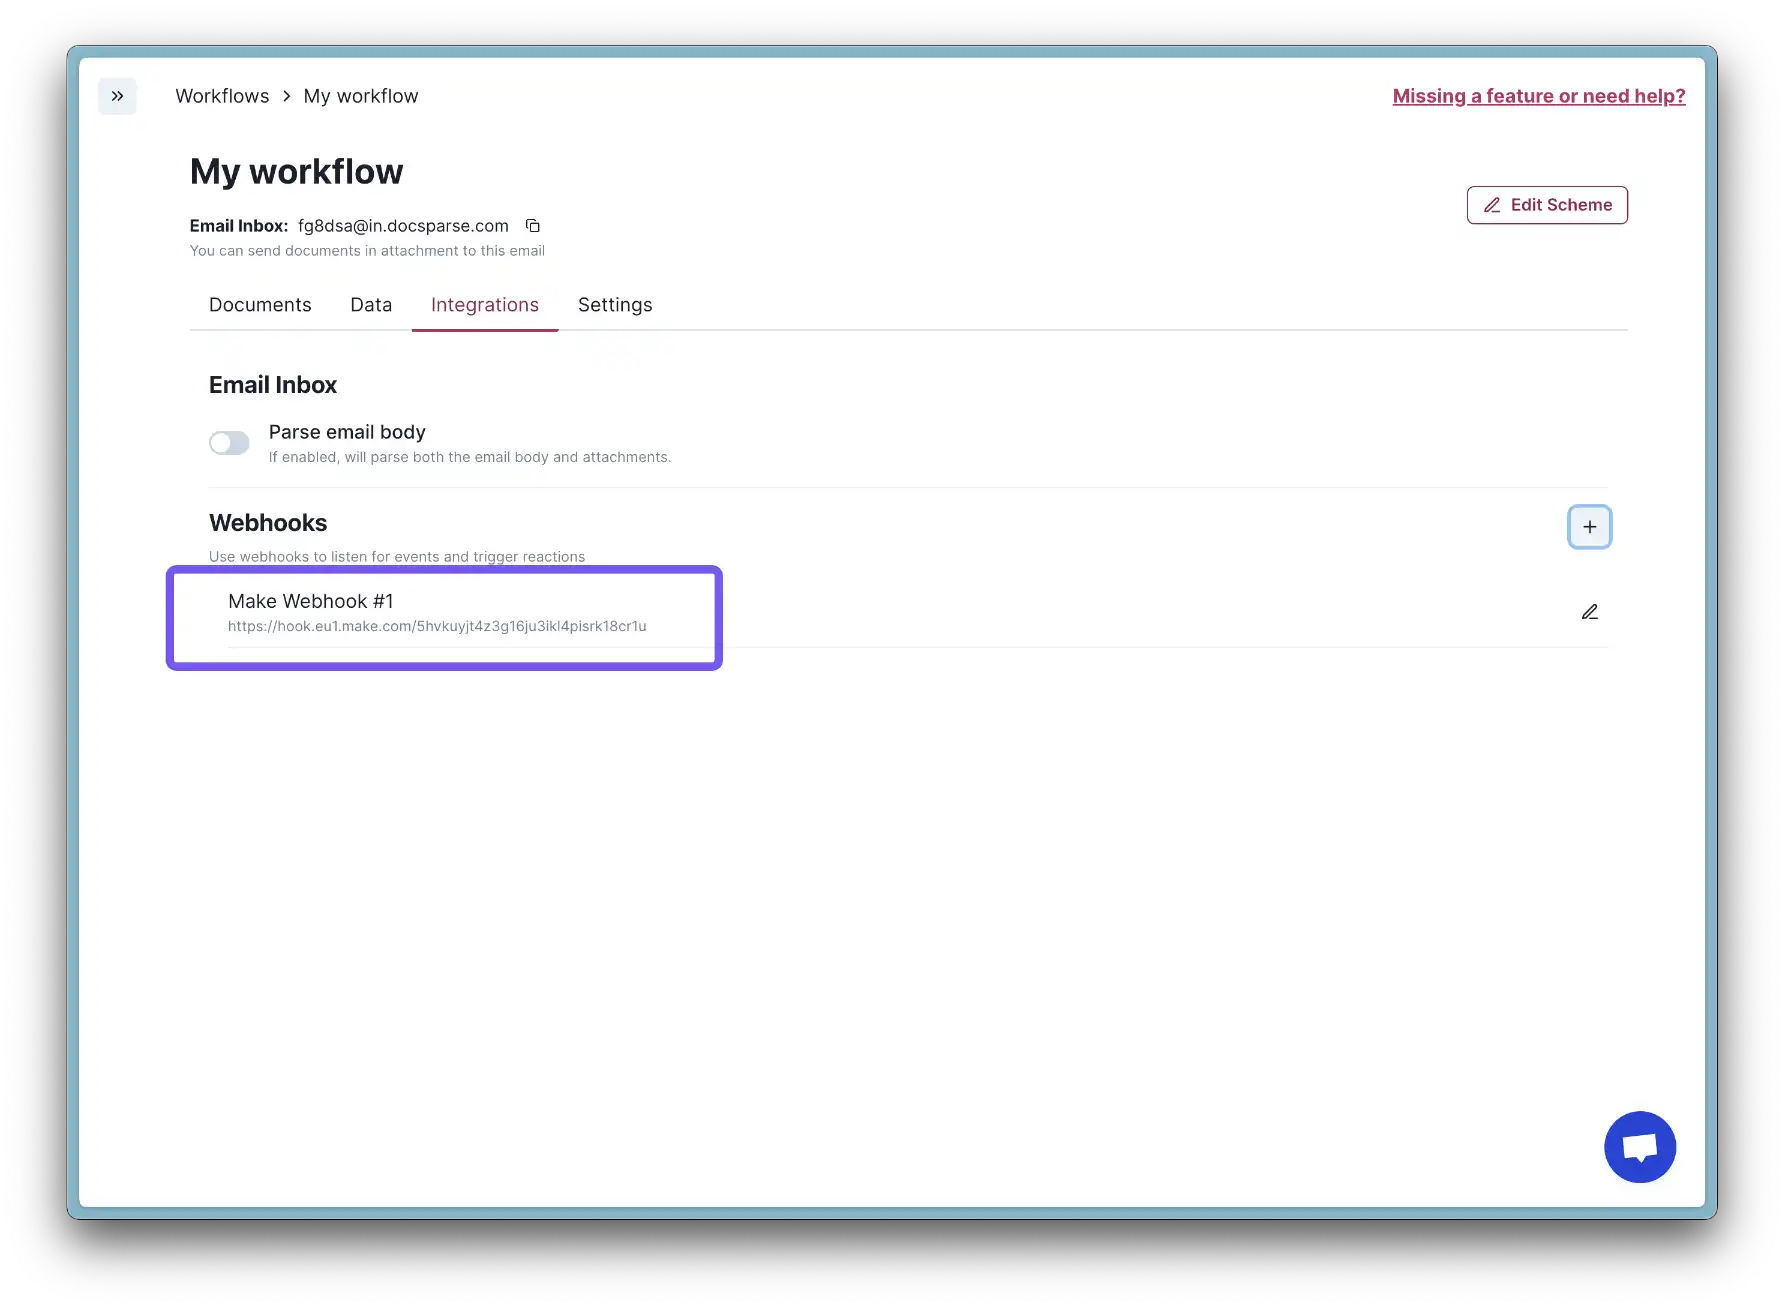
- New webhook should appear in the list.
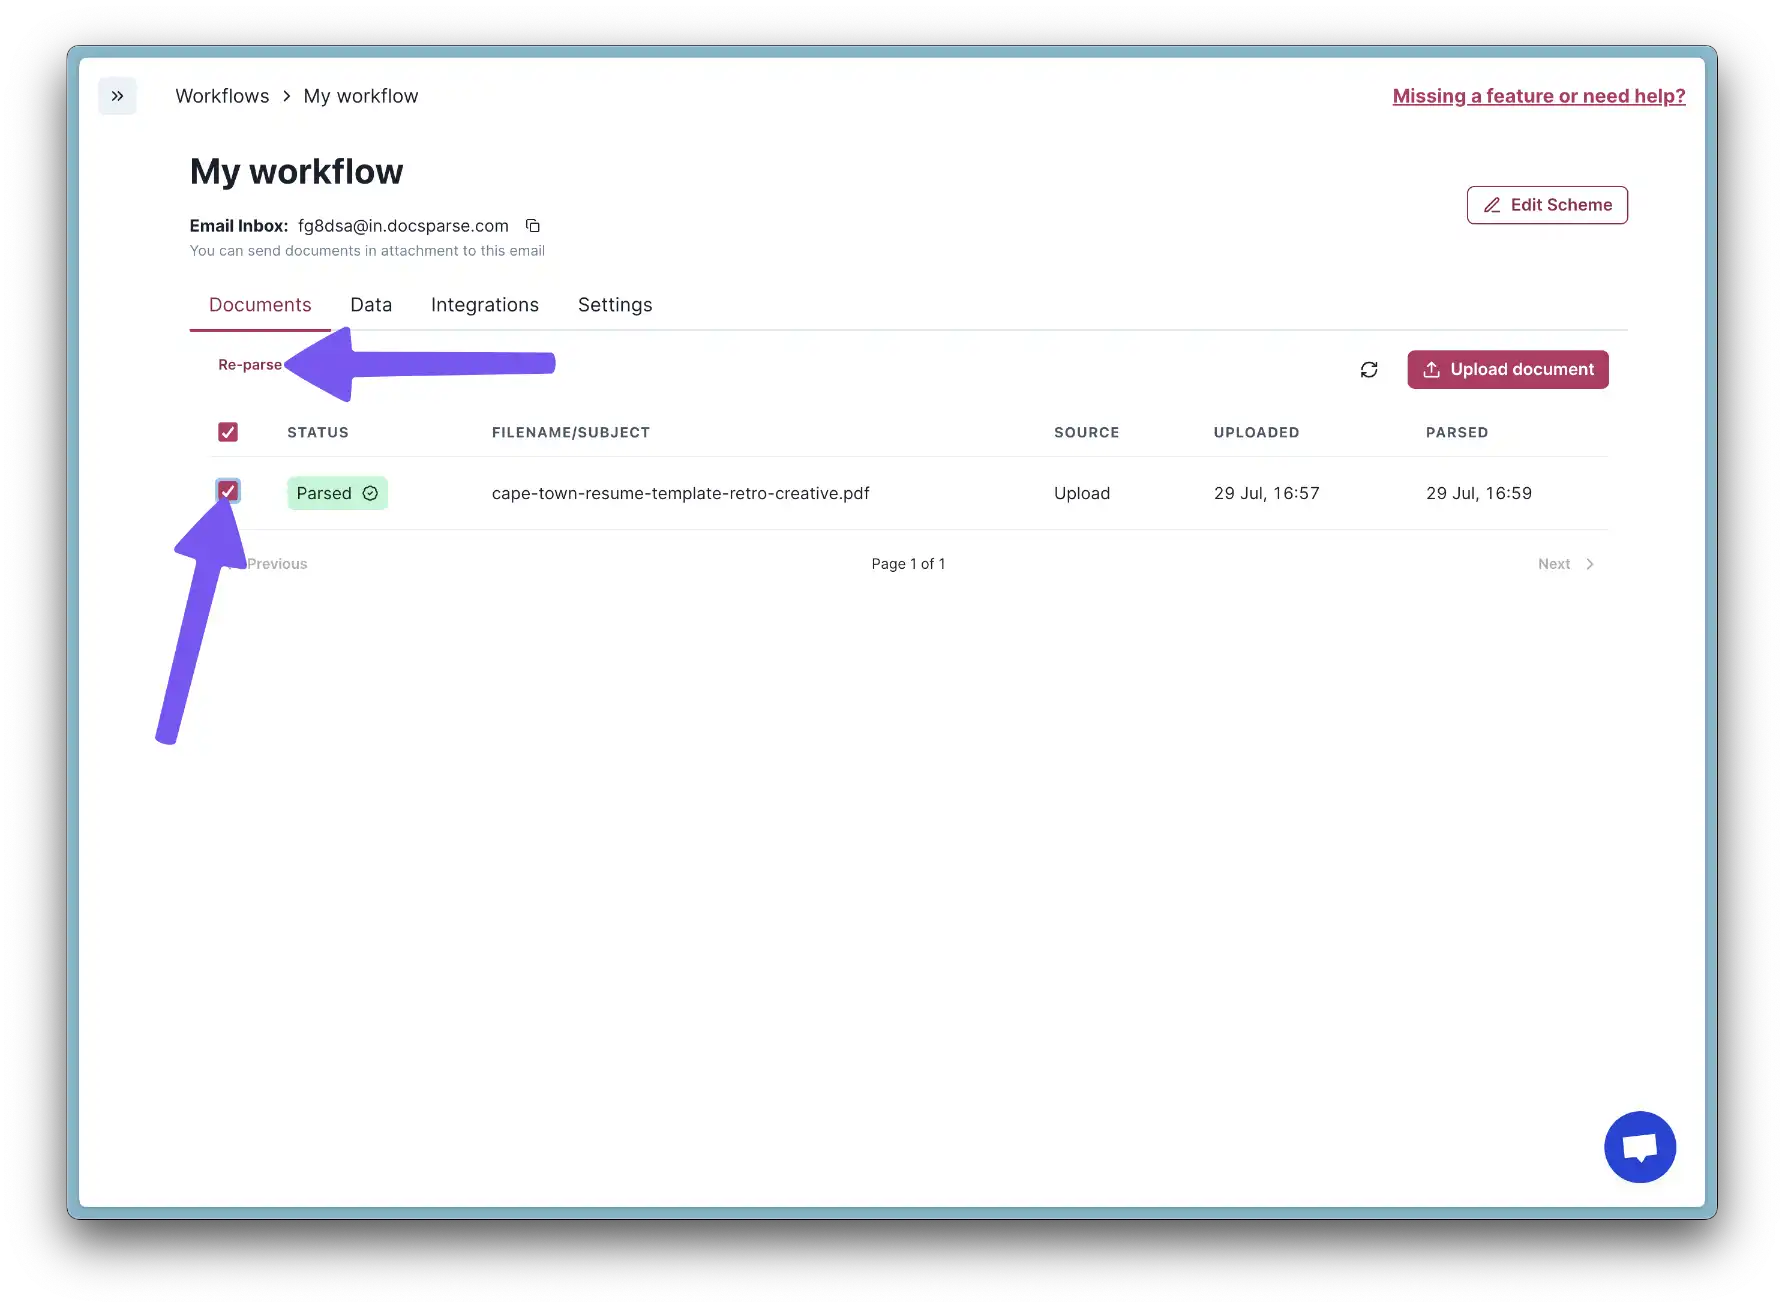
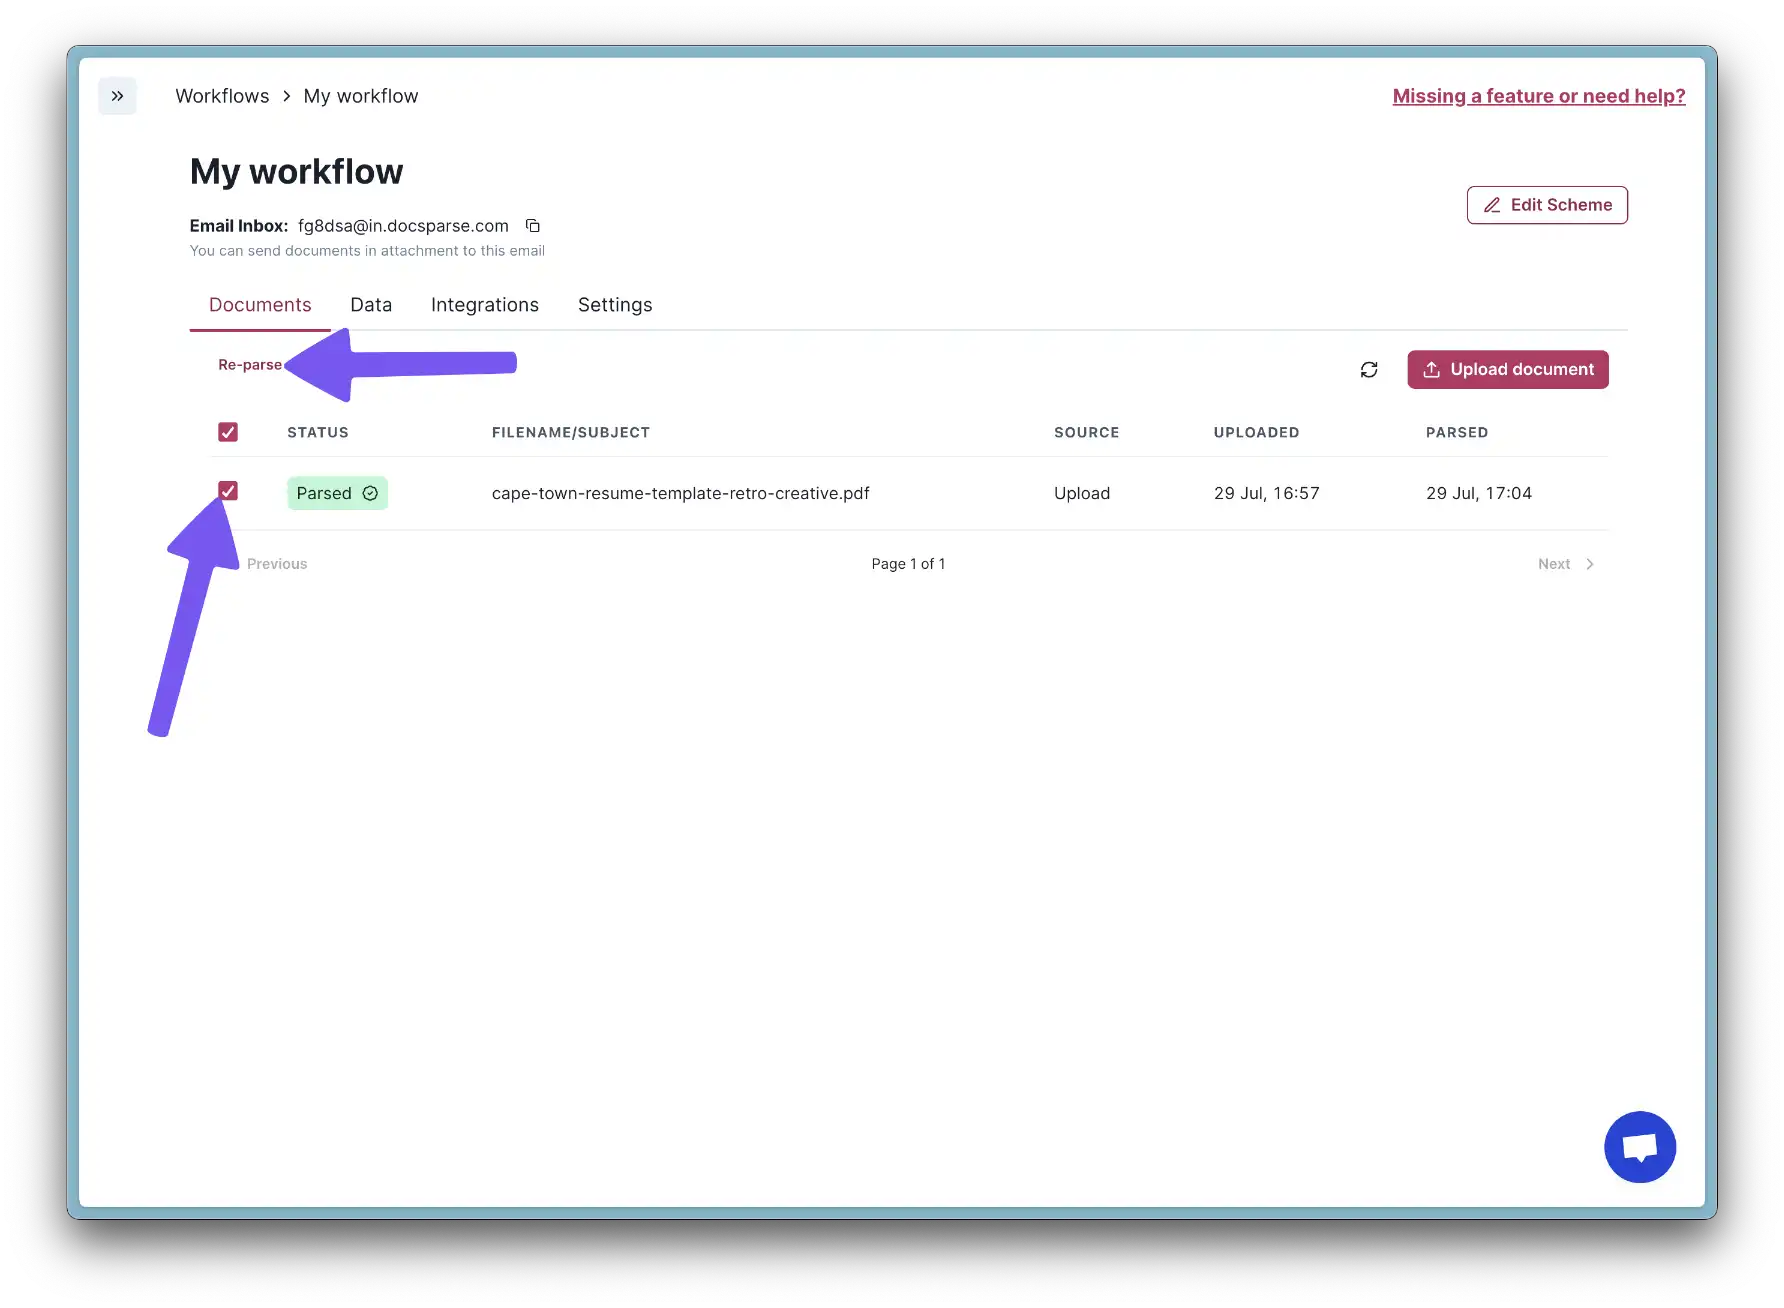
- Go to Documents tab, select the document you want to process, and click "Re-parse"
- Switch back to Make, you will see that determining was successfully completed.
- Now let's add Airtable as a destination. Click the plus button and select "Airtable". Choose Create a Record.
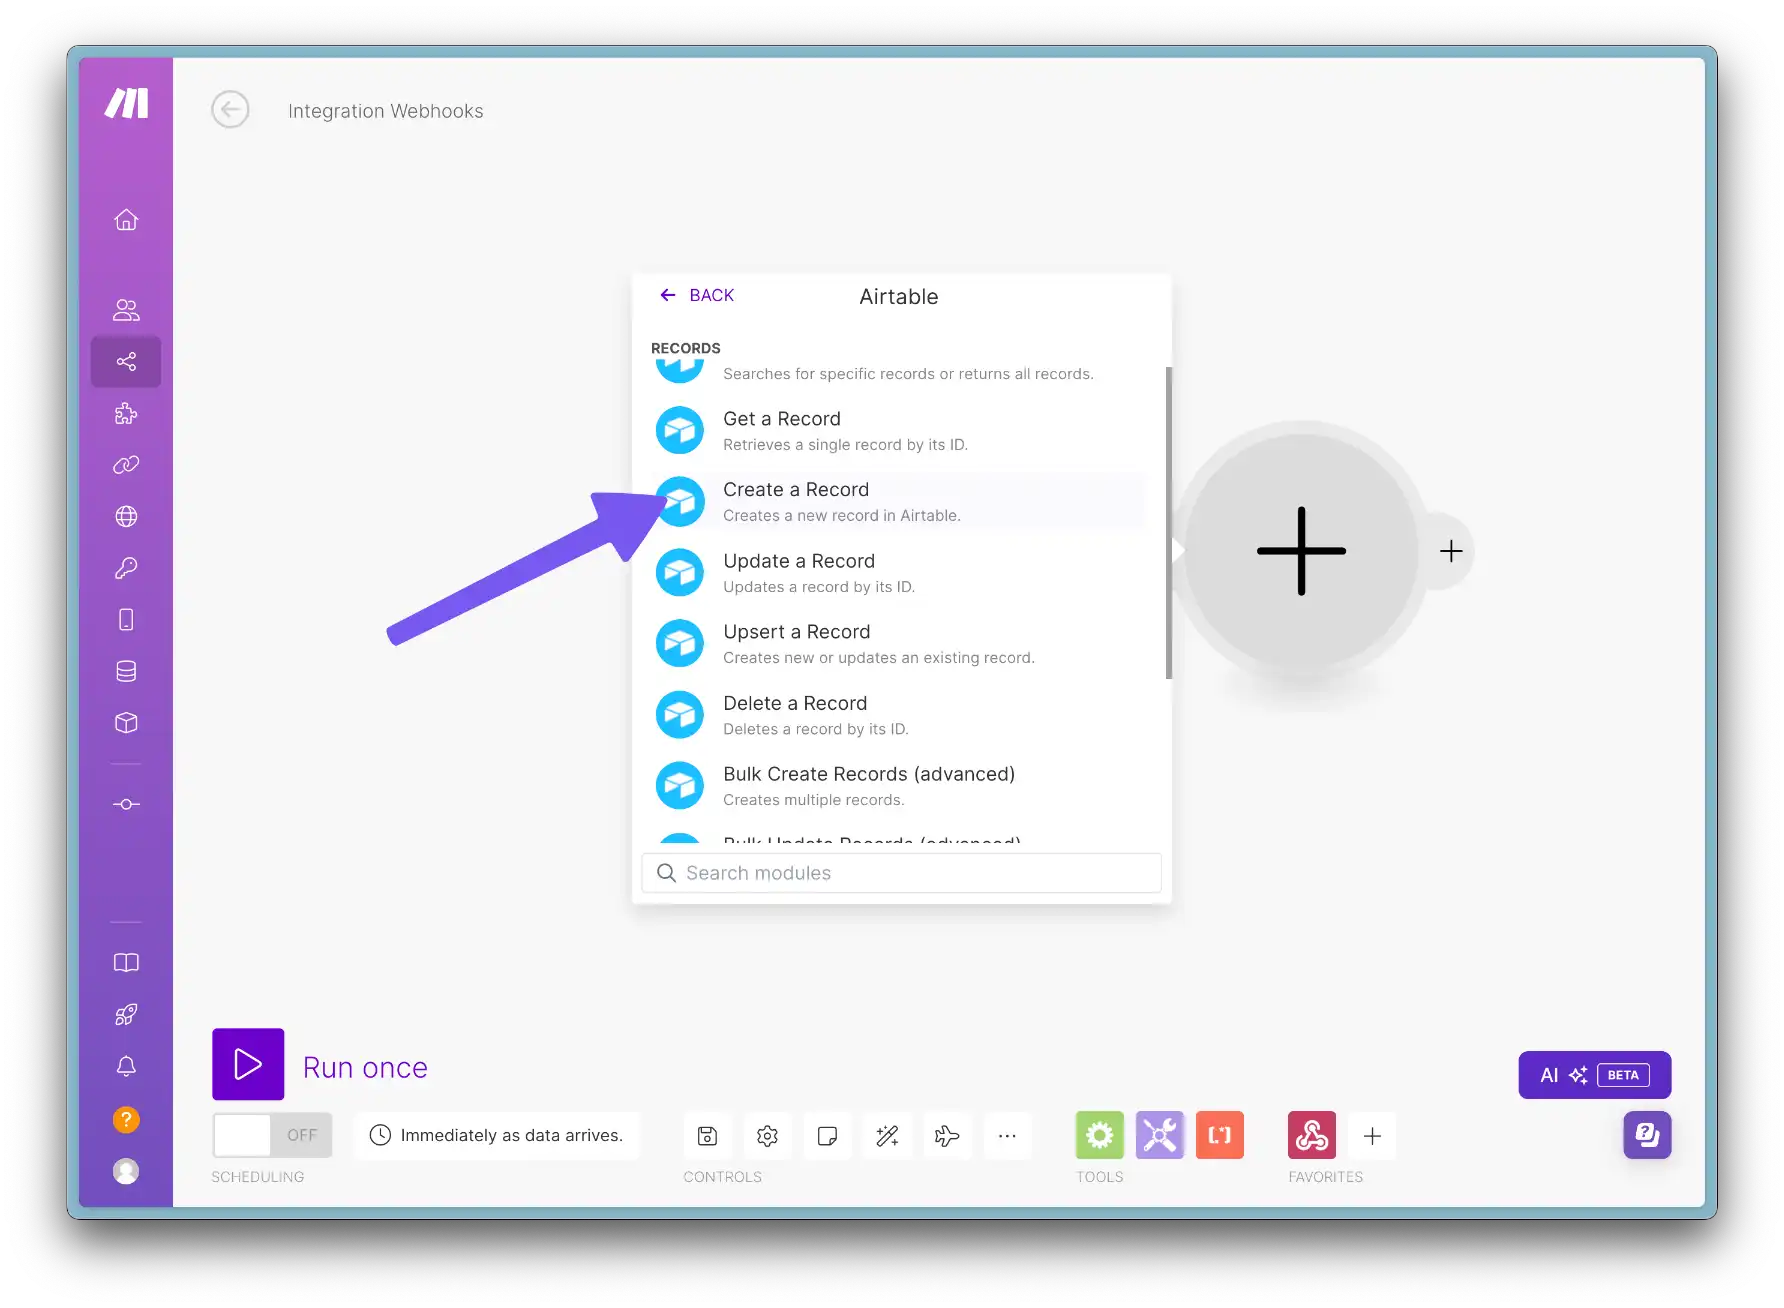
- Find your base and table in the relevant dropdowns.
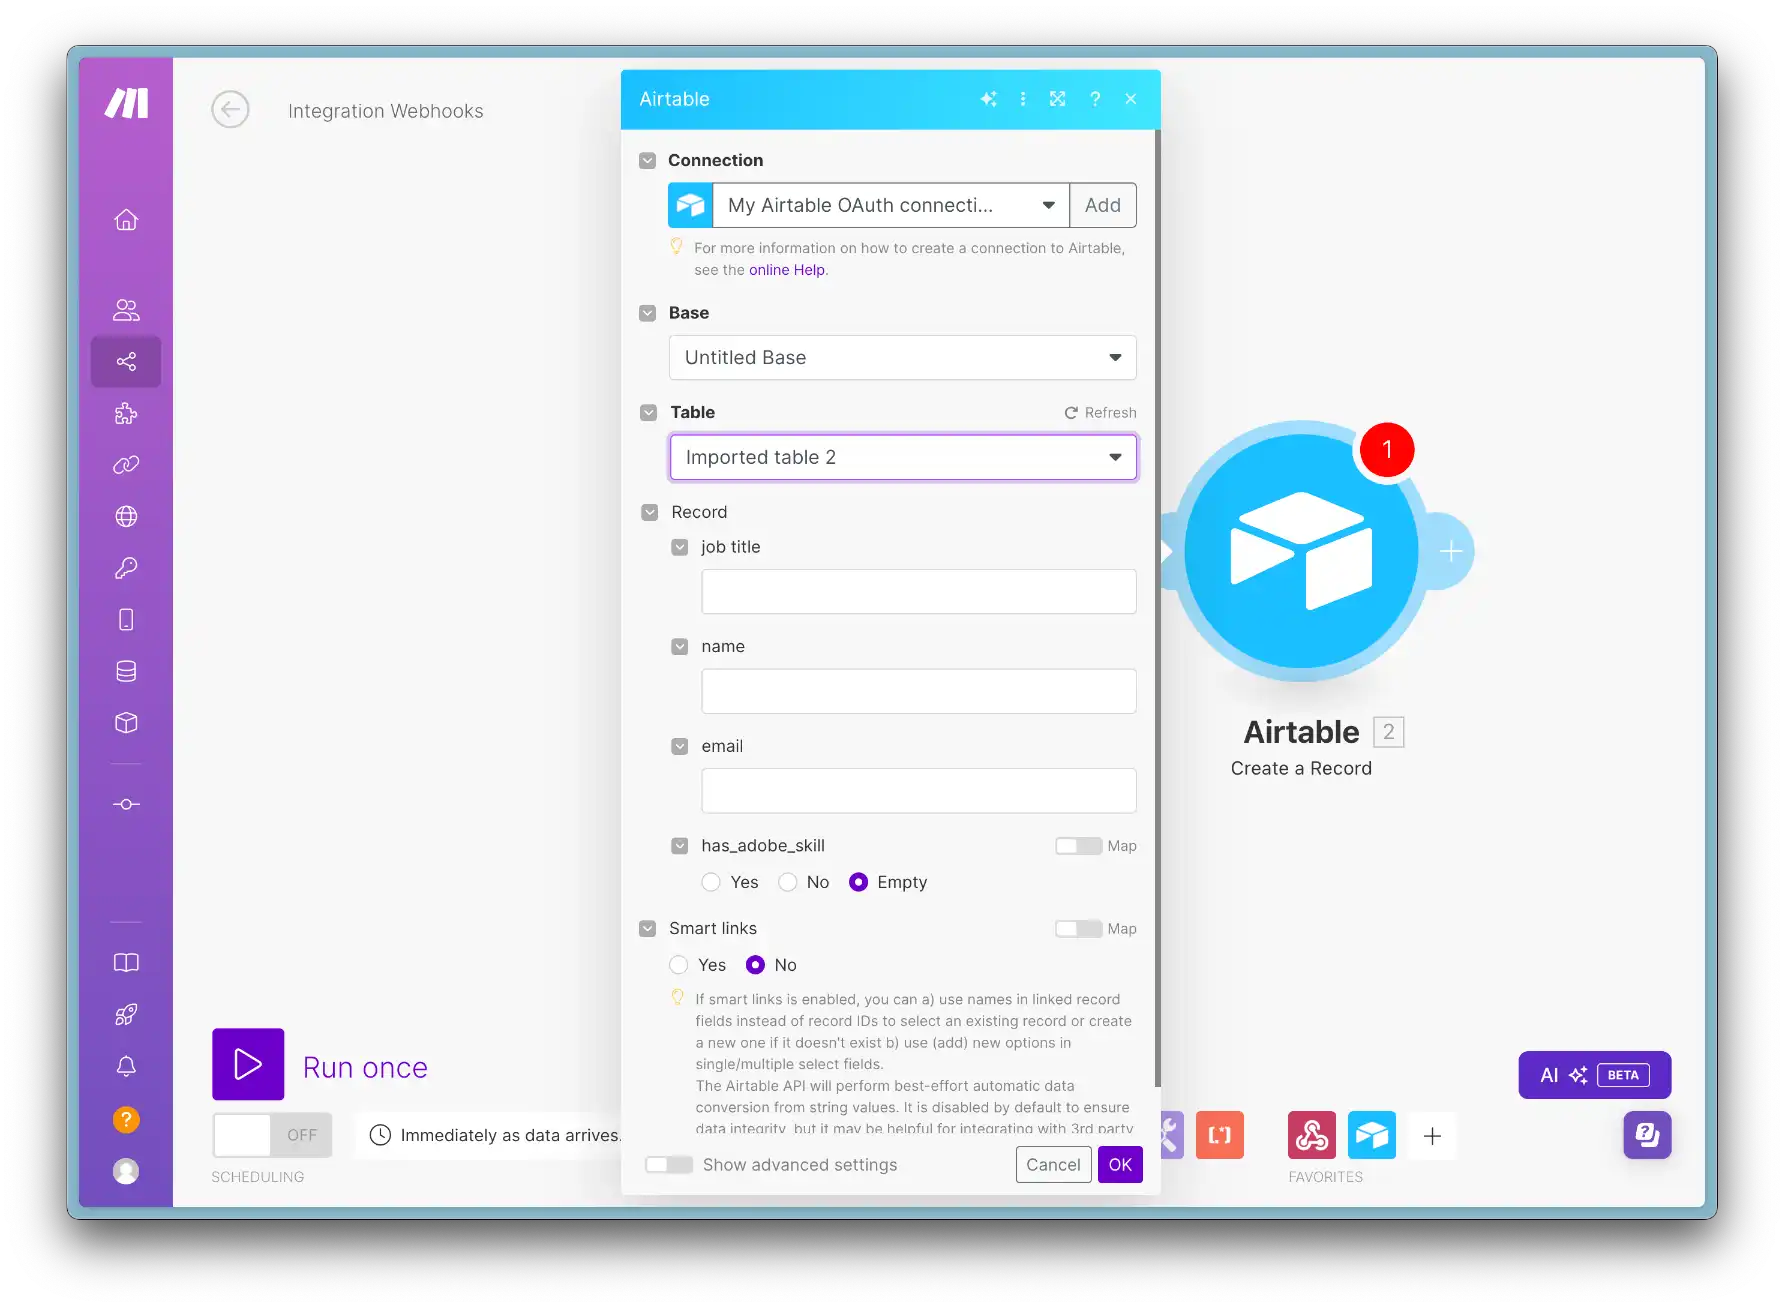
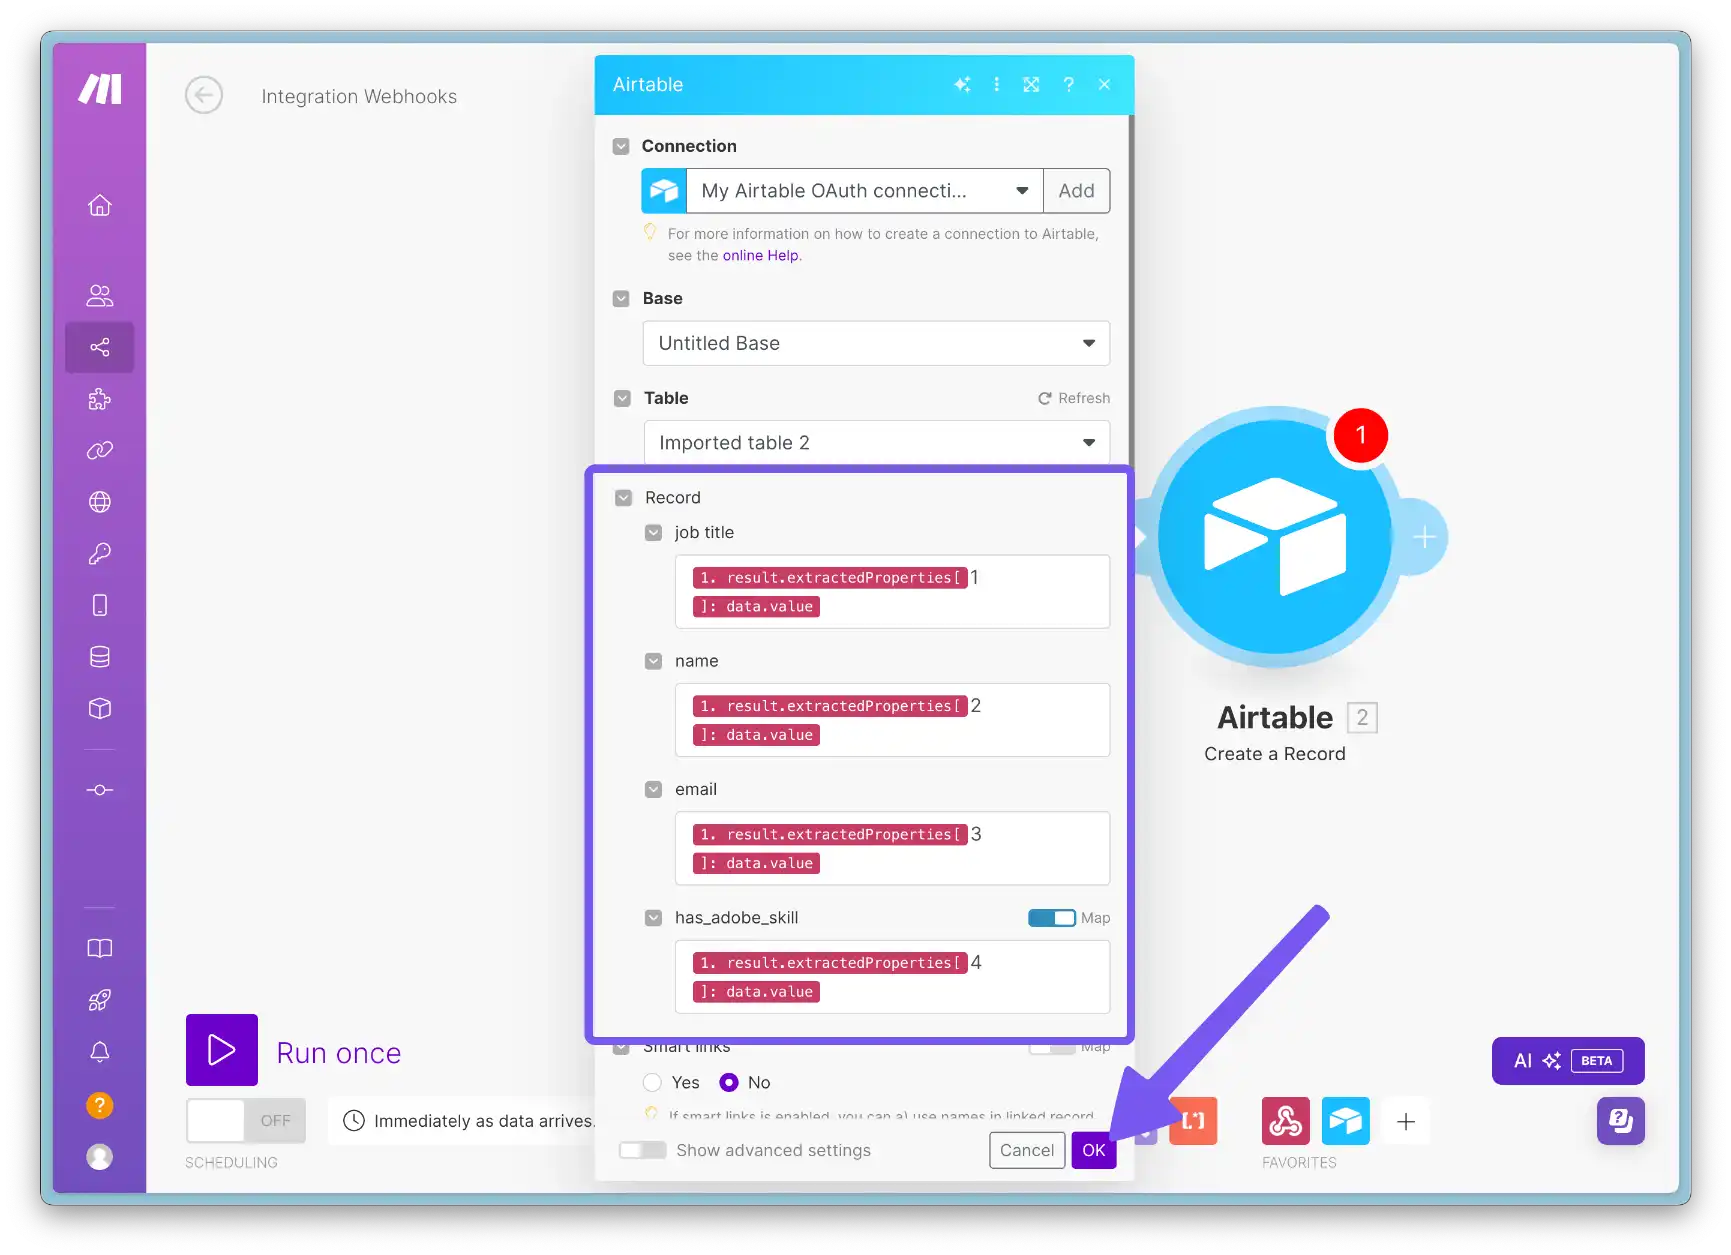
- Now you need to fill out the fields with DocsParse response data. Make sure to add an index for each column.
Example: "1. result.extractedProperties[{NUMBER_OF_FIELD}]: data.value" where NUMBER_OF_FIELD is the index of the field in the response.
- (Optionally) You can set up filters or other logic to process your data before adding it to Airtable. For example, you can add a filter to only process documents with an "email" property and so on.
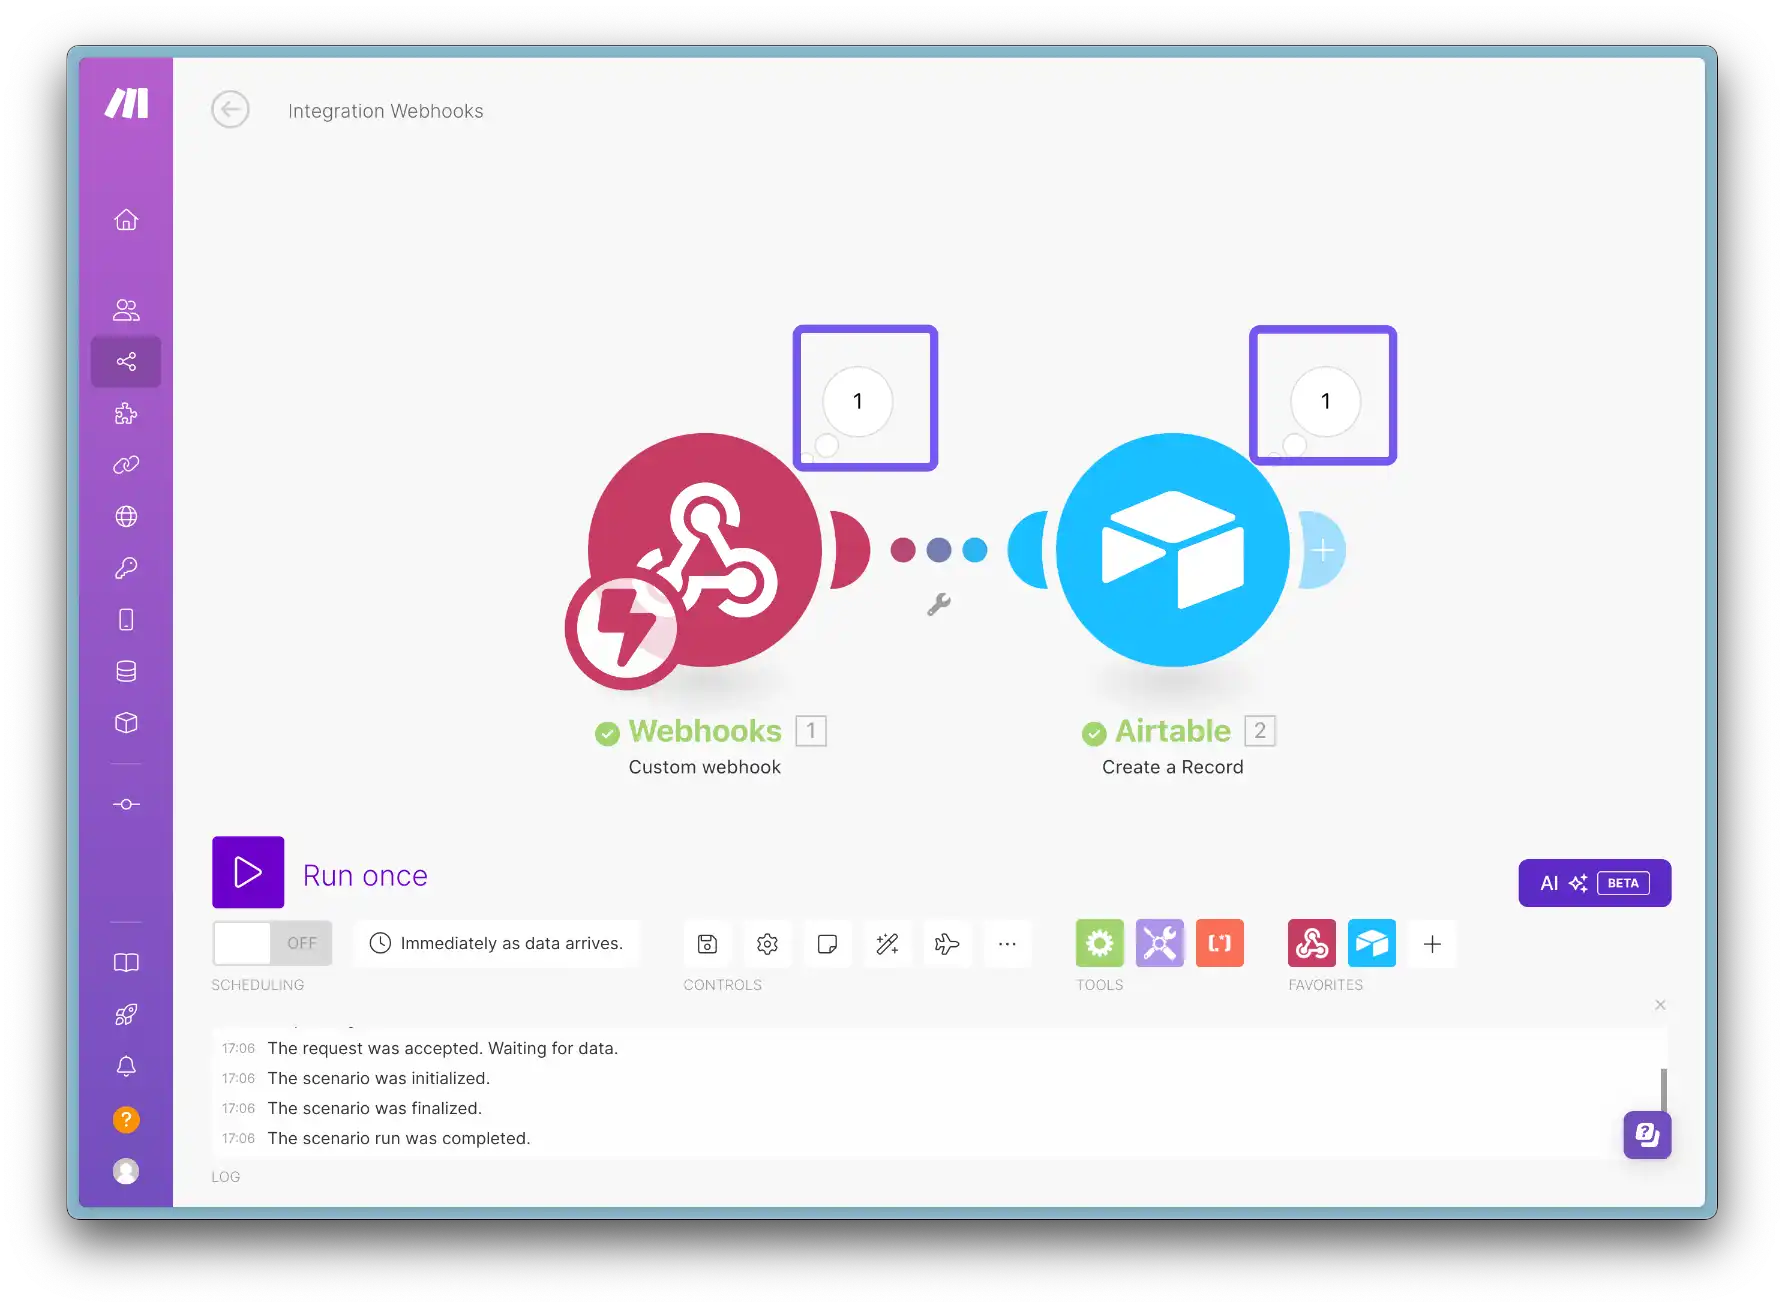
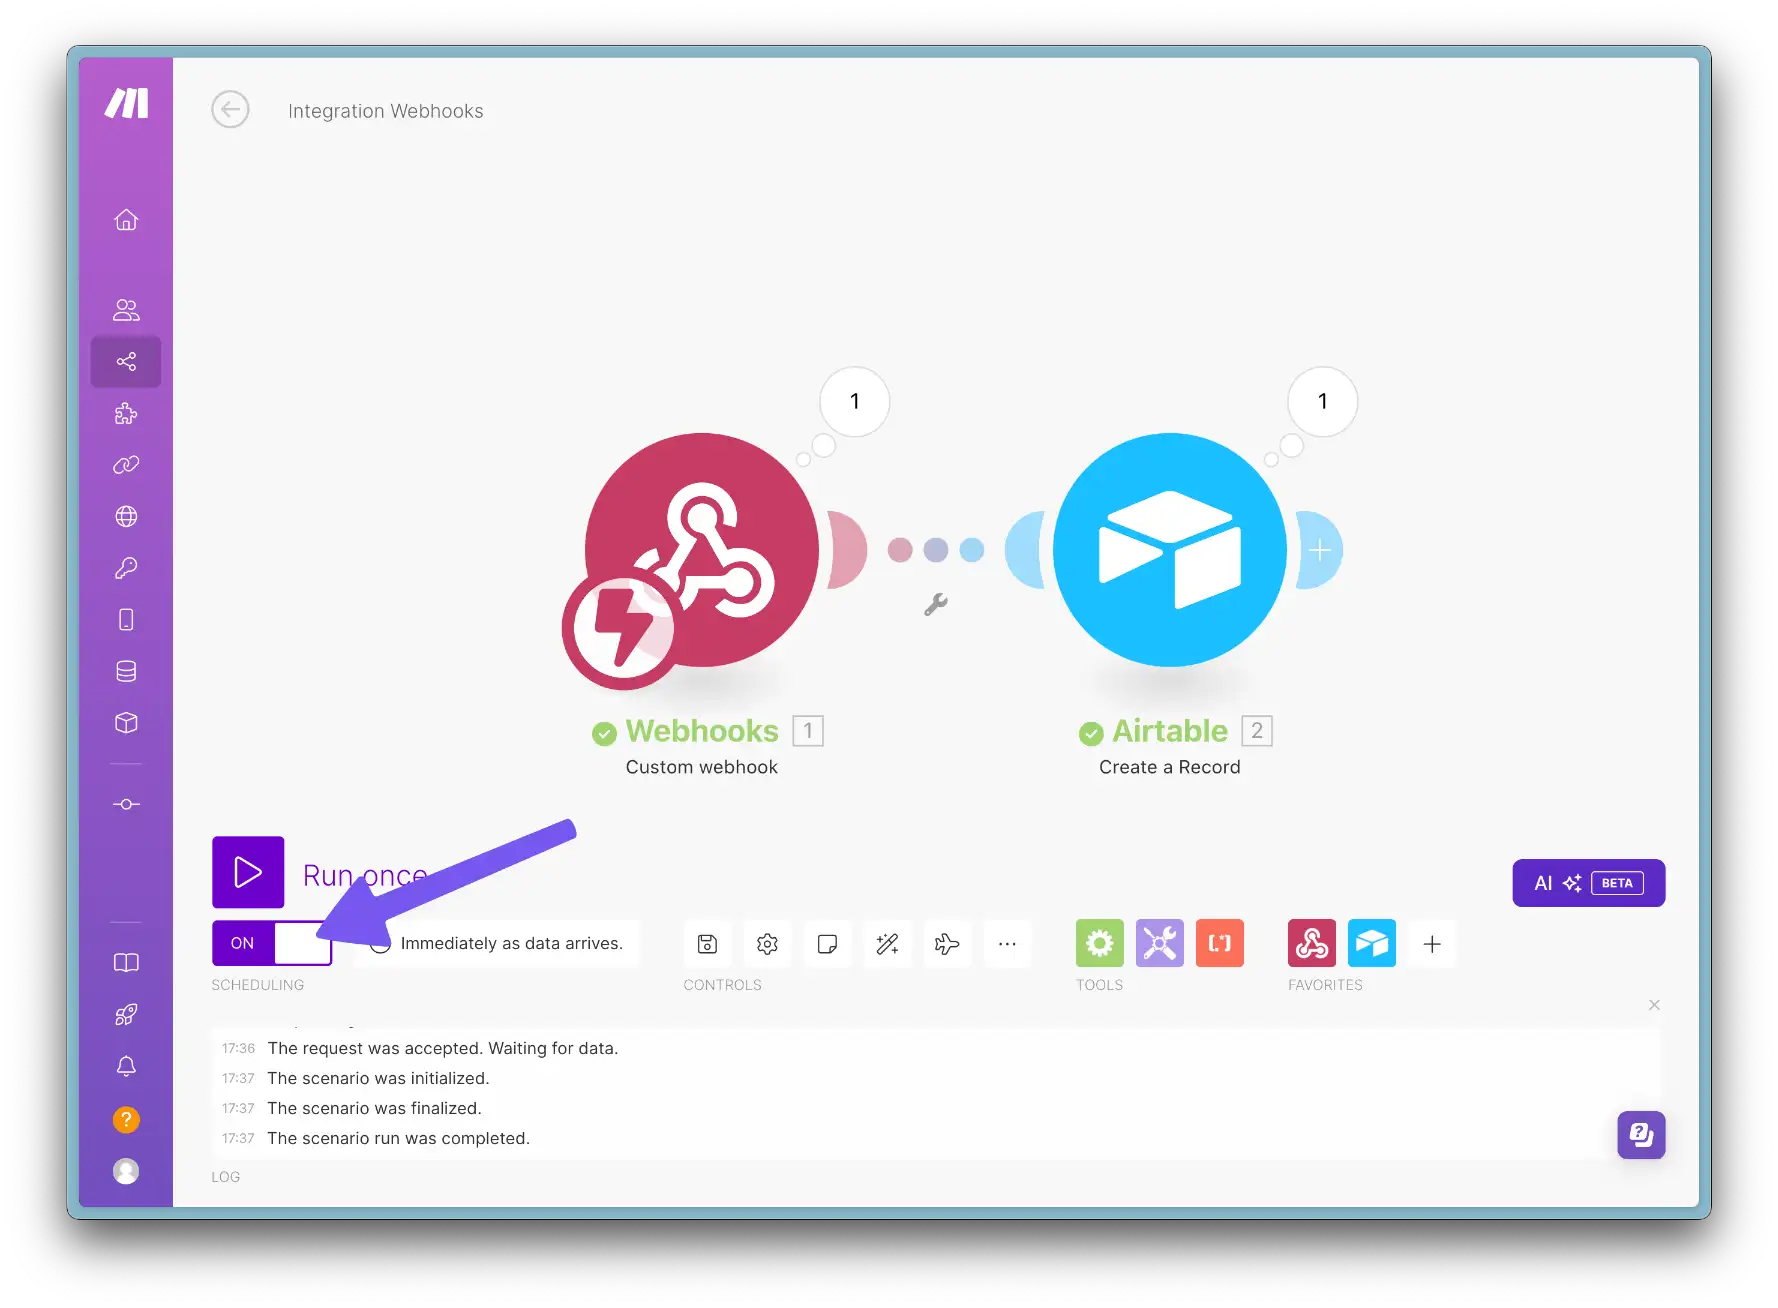
- Let's test the connection. Click "Run once" and switch back to DocsParse. To re-parse the document as we did earlier, click "Re-parse".
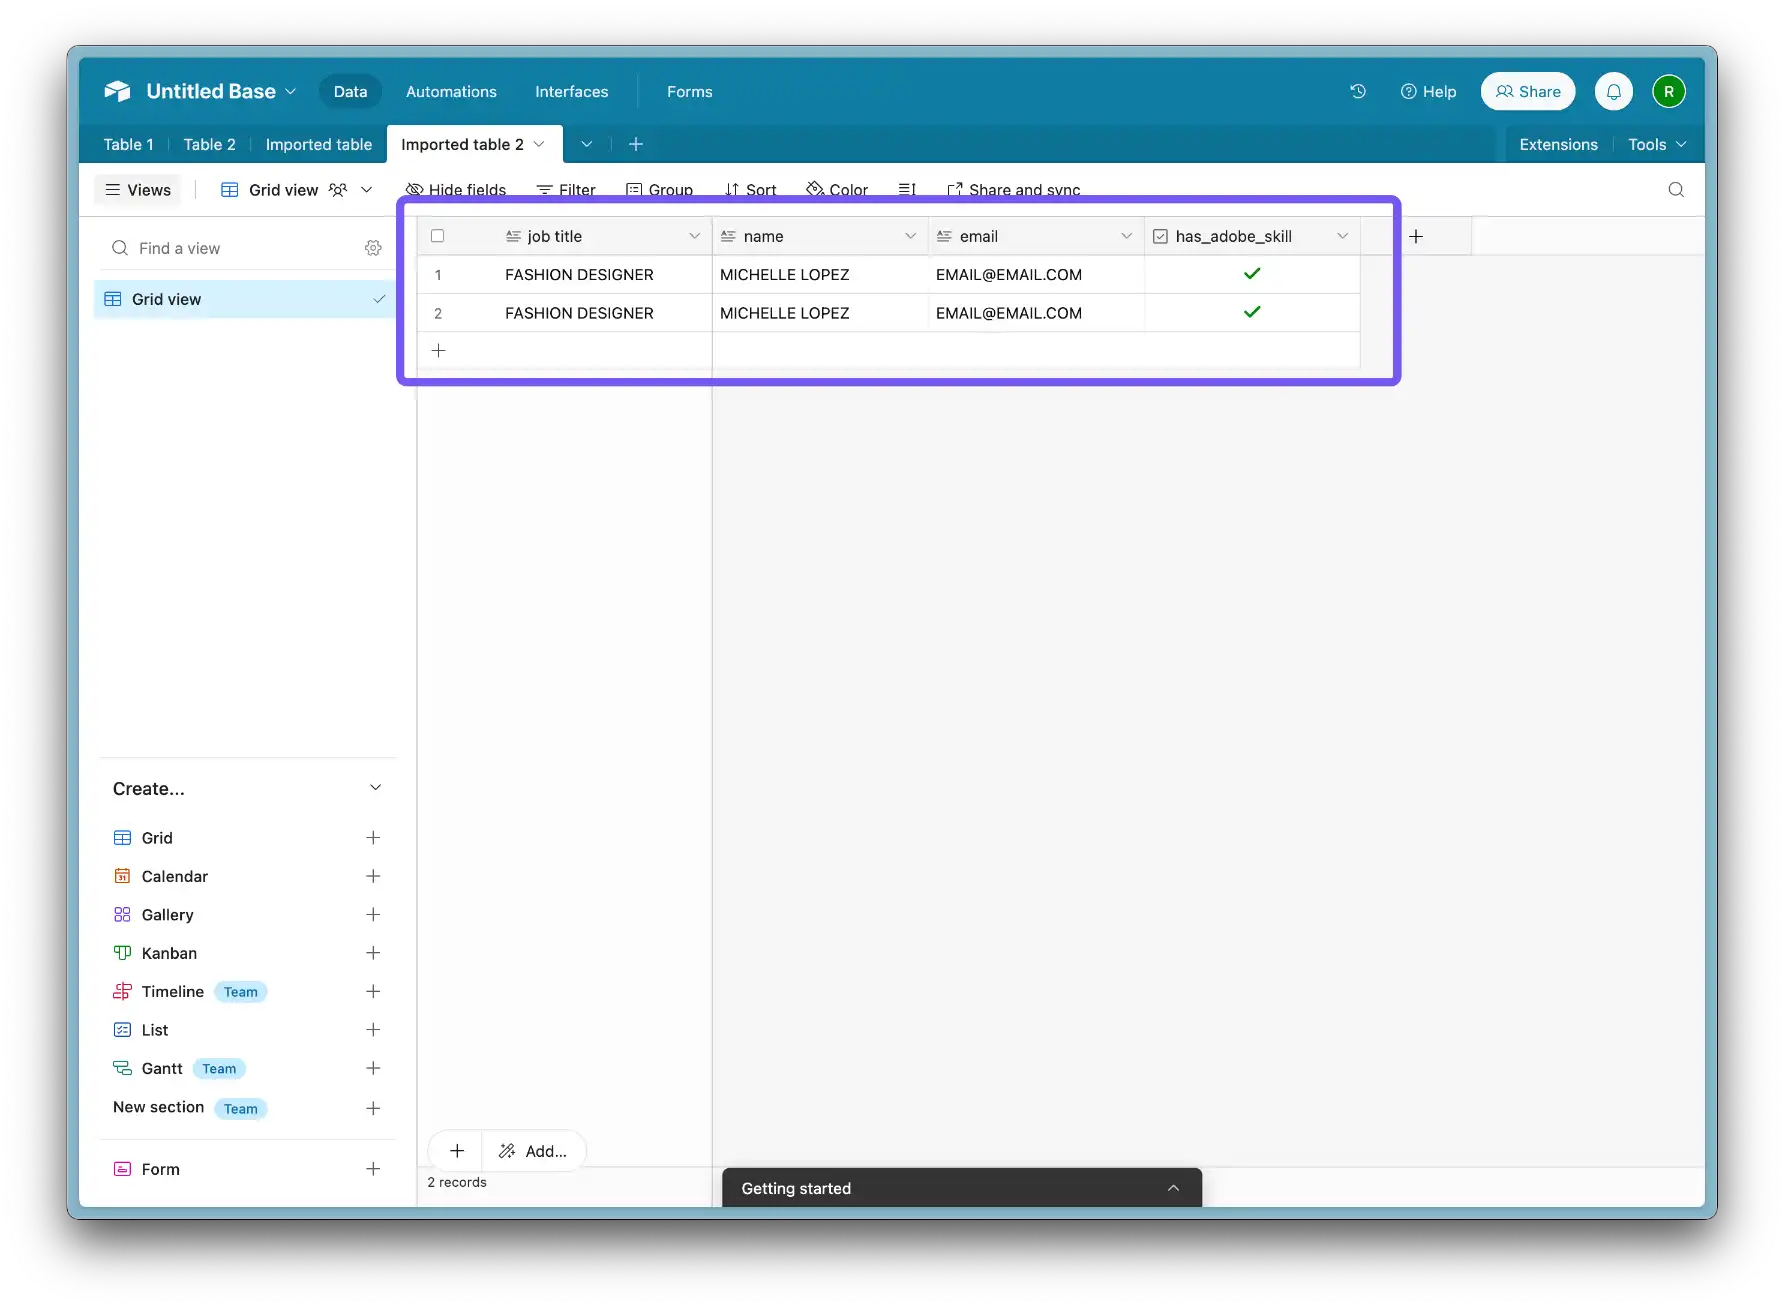
- Now in Make, you should see processed data. And the same in Airtable.
- If everythings works well, active the scenario and you're done.
Step 4: Setting up Gmail Forwarding to DocsParse Workflow Inbox
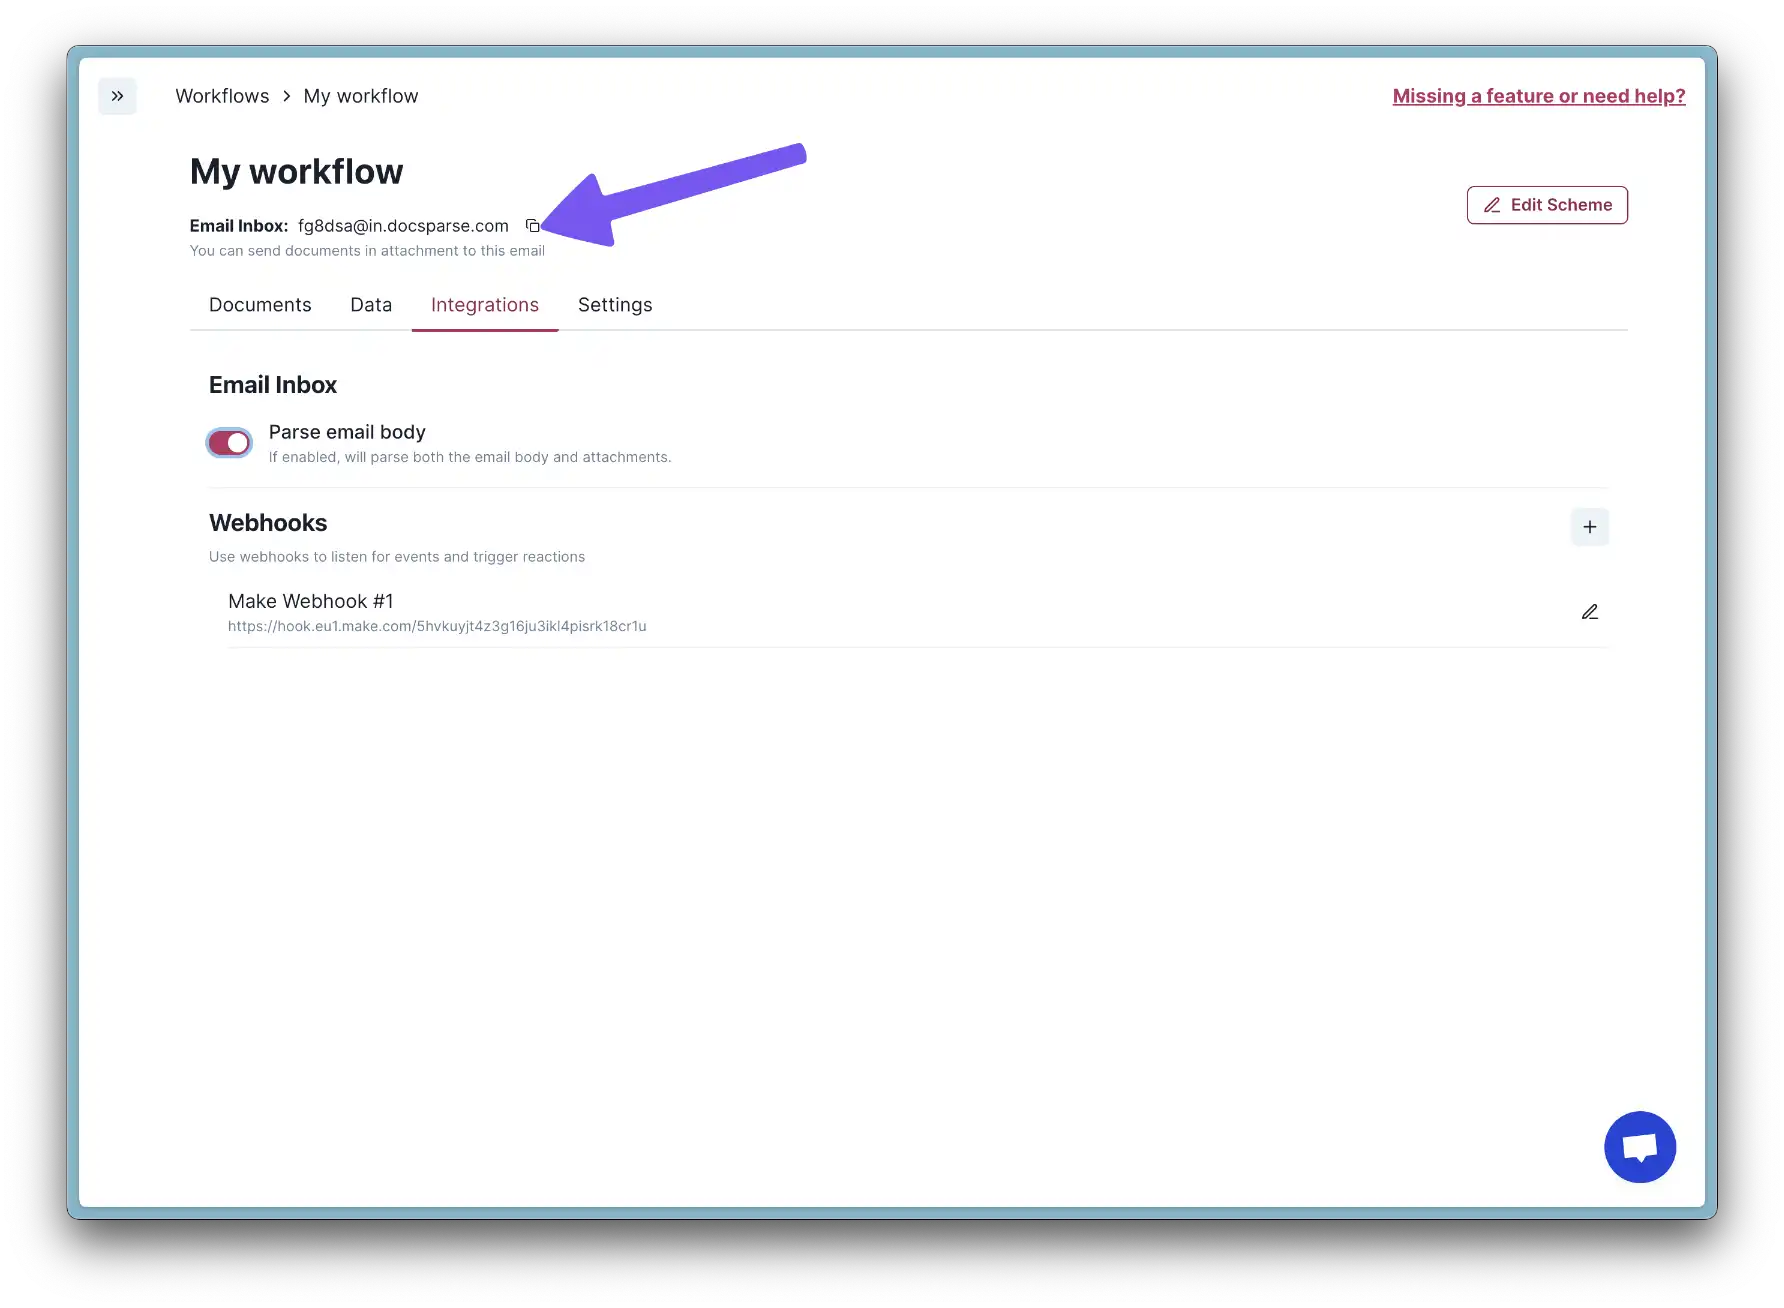
- First, let's switch to DocsParse and copy our Workflow Inbox email address.
- Then, log into your Gmail account
- Go to Settings > Forwarding and POP/IMAP
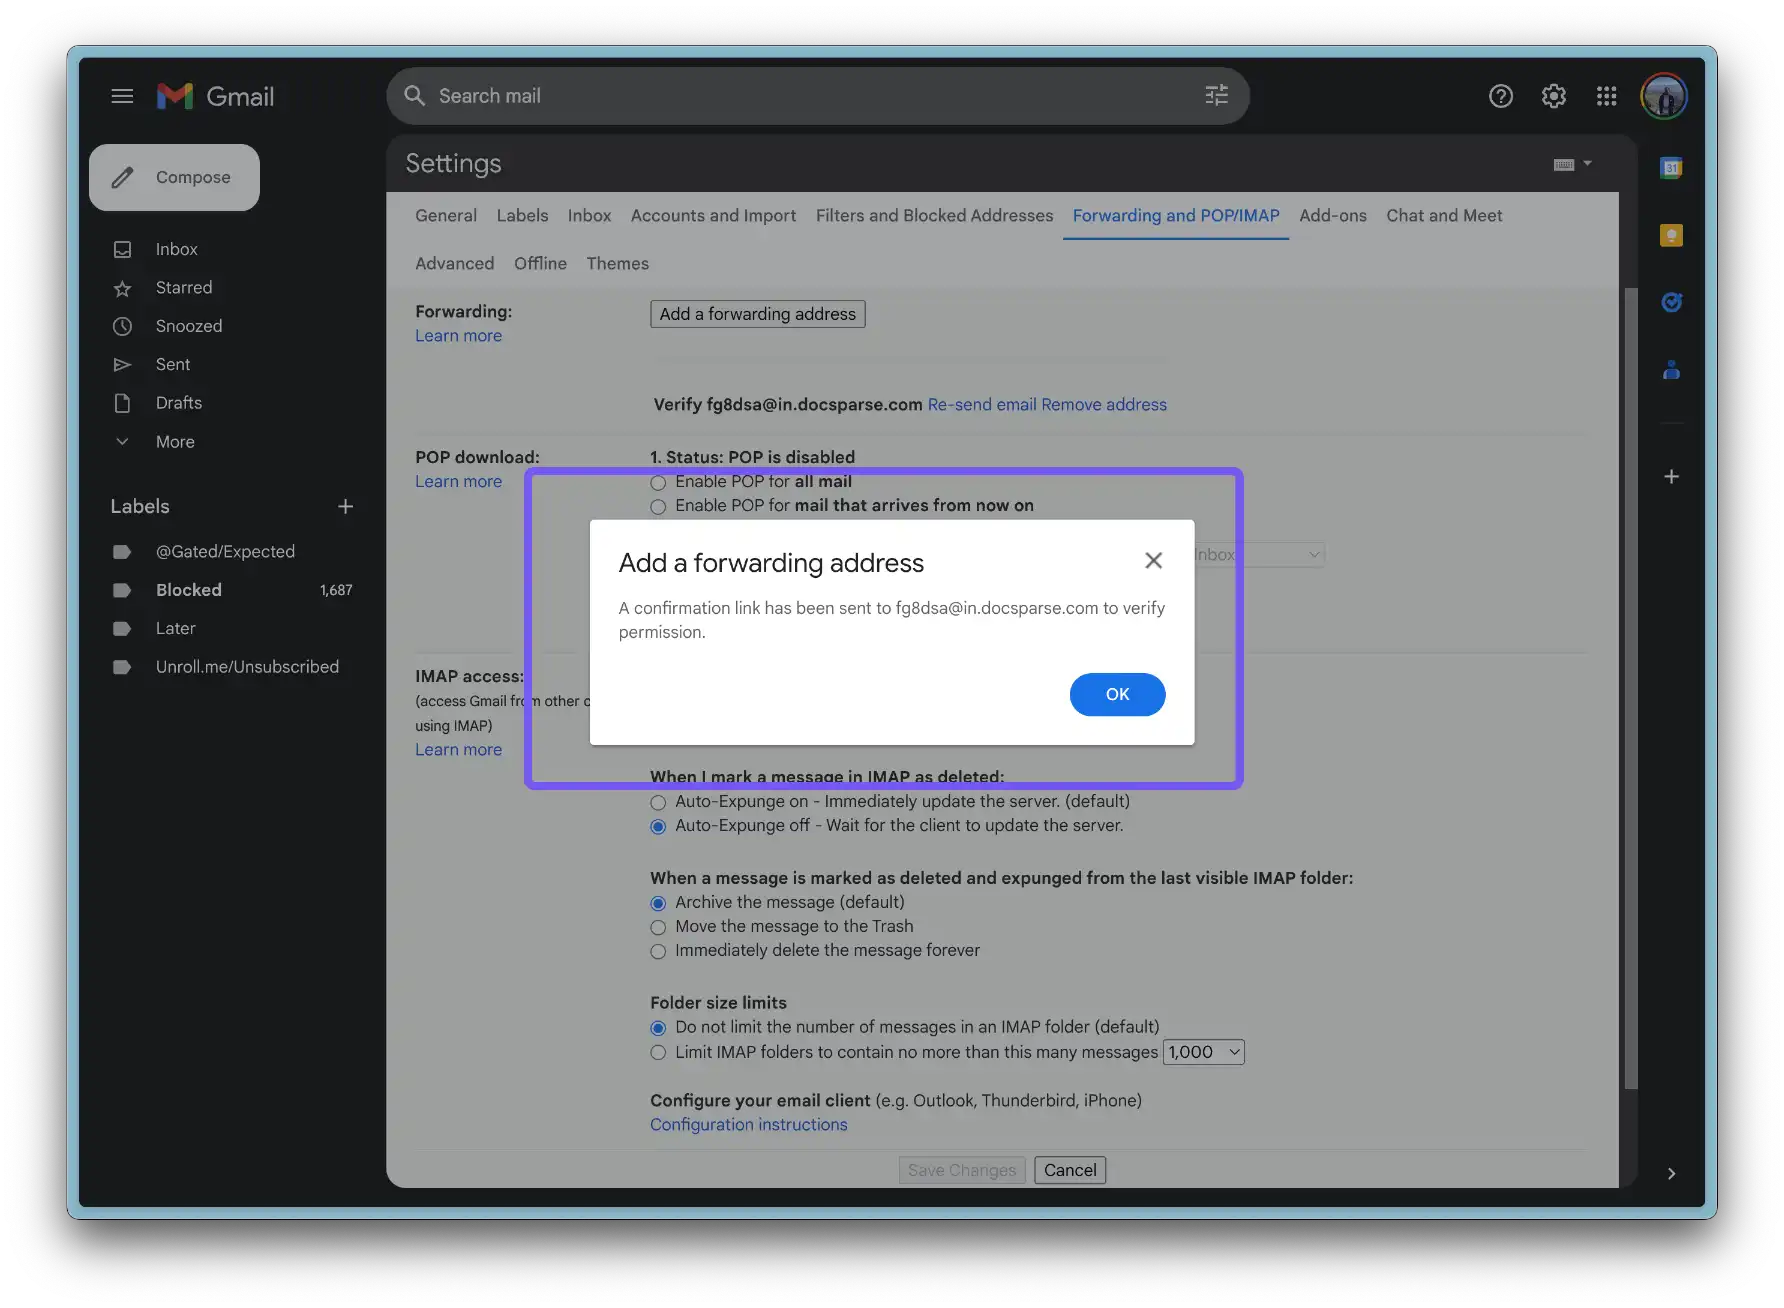
- Click on 'Add a forwarding address'

- Enter your DocsParse Workflow Inbox email address
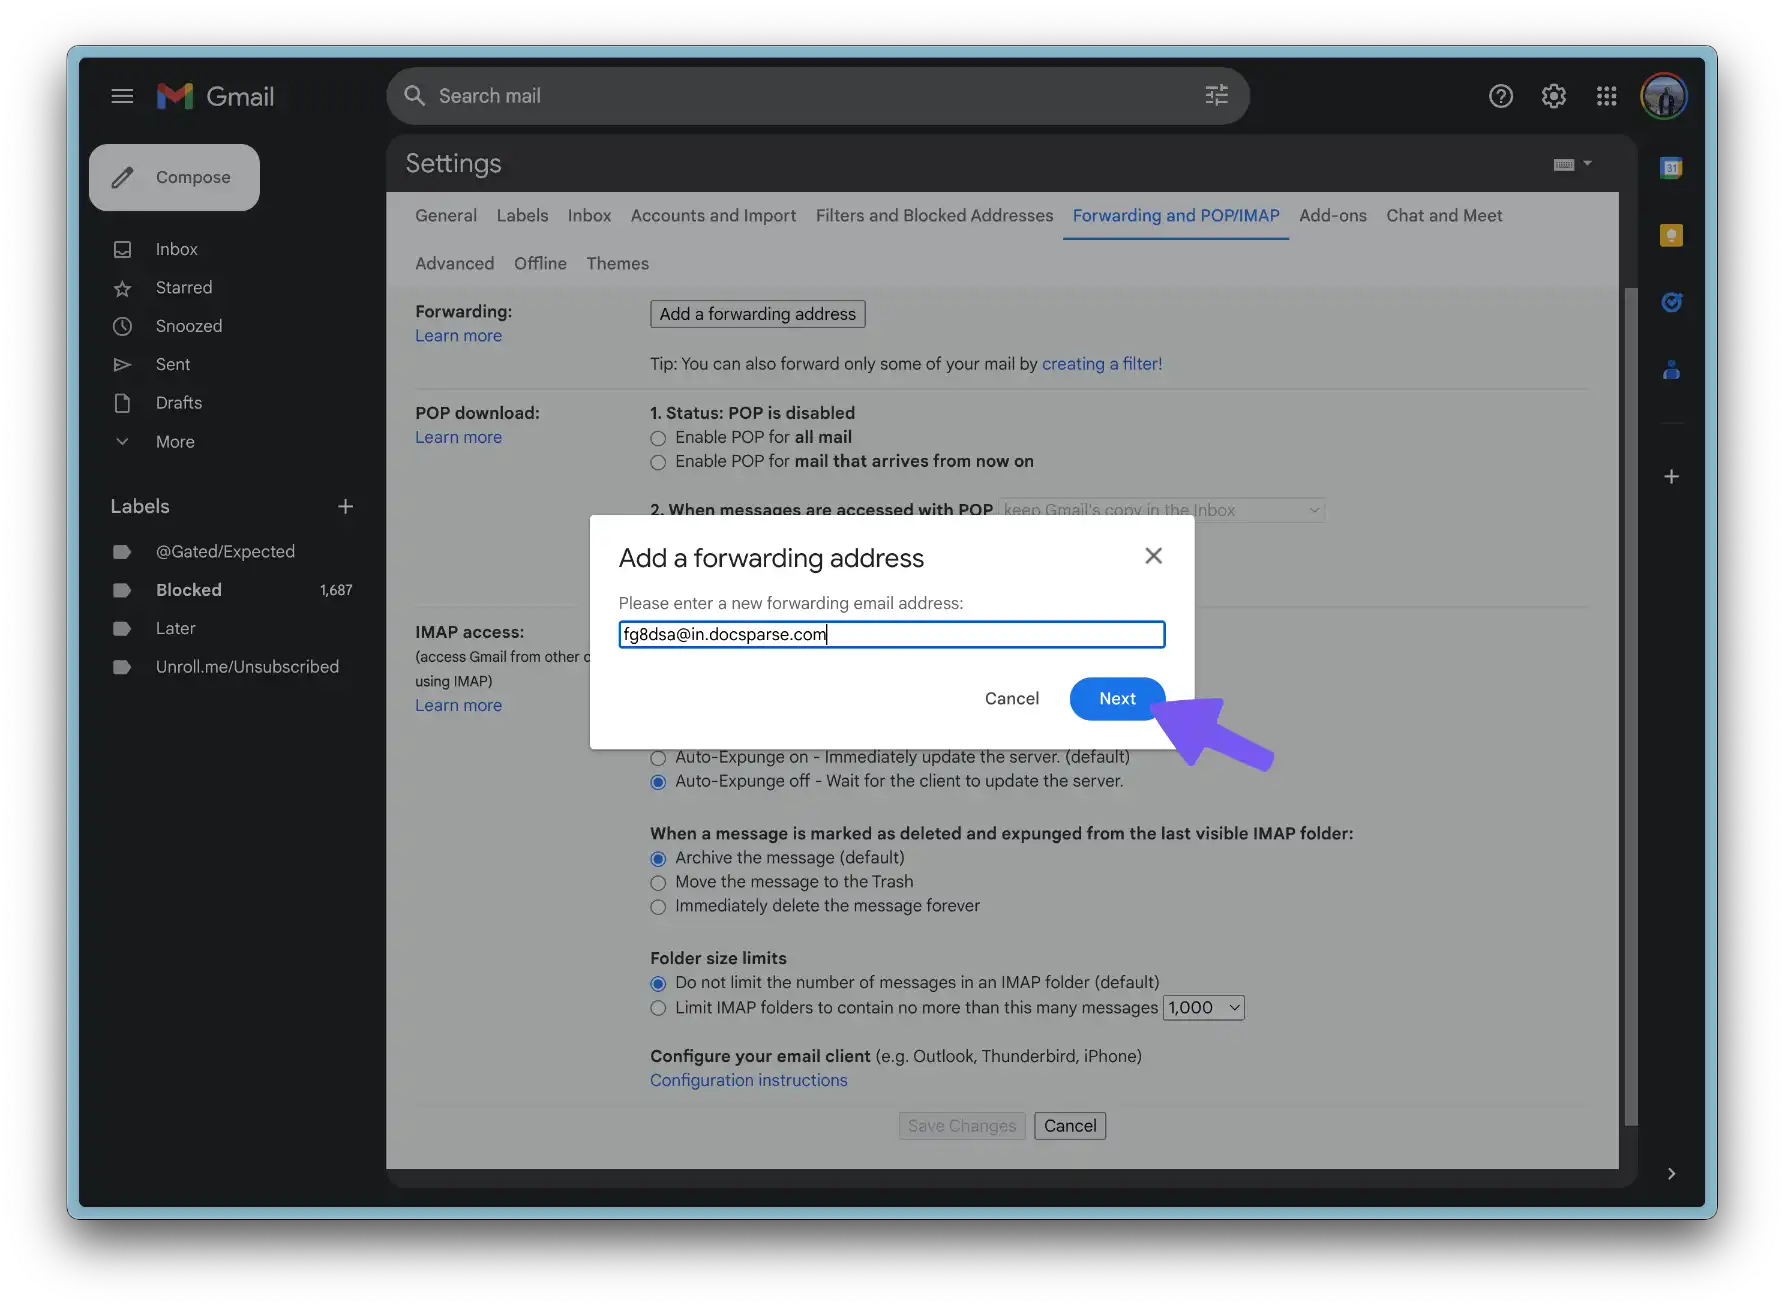
- At this point, you will need to verify your DocsParse Workflow Inbox email address.
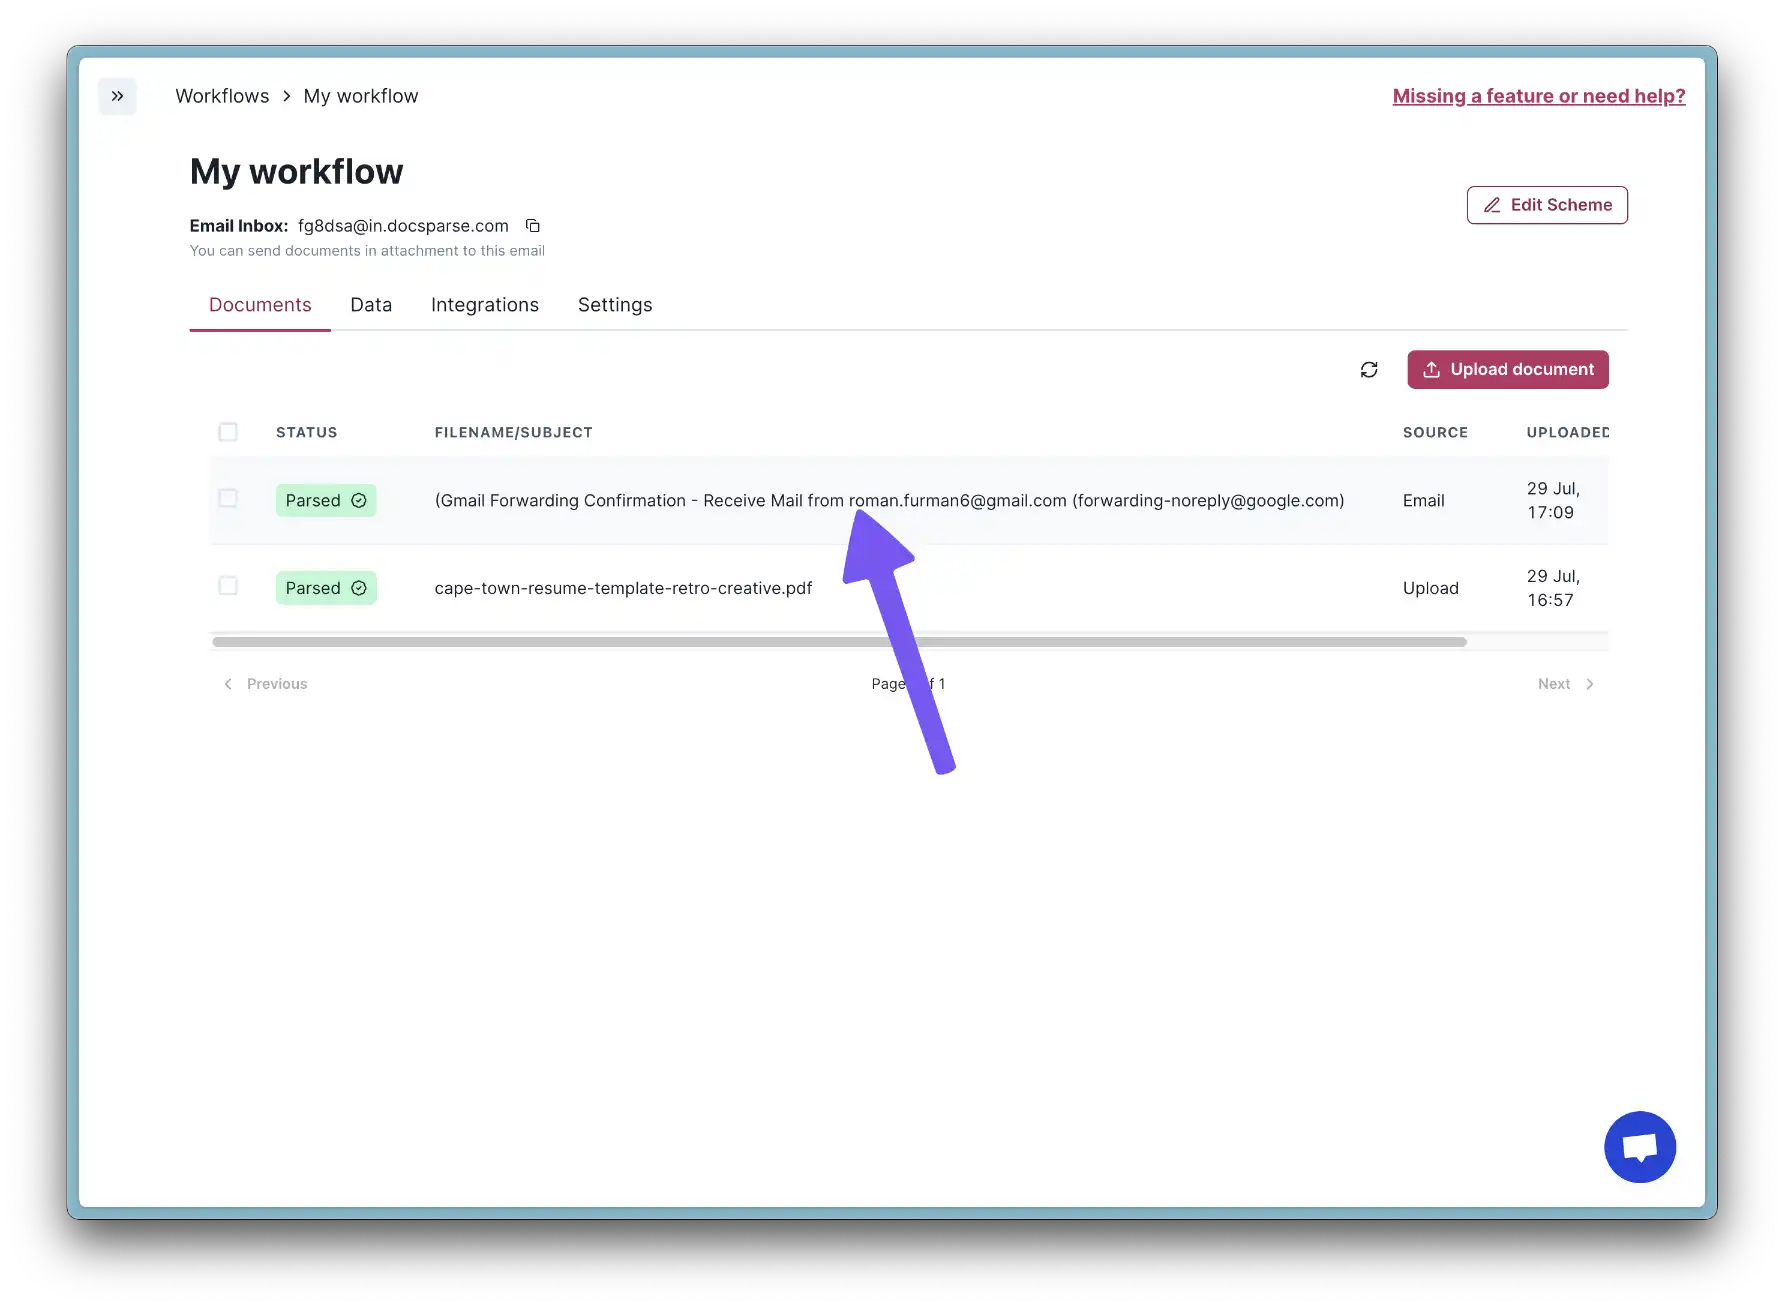
- Go to DocsParse, you will see that a new email has been received. Click on it.
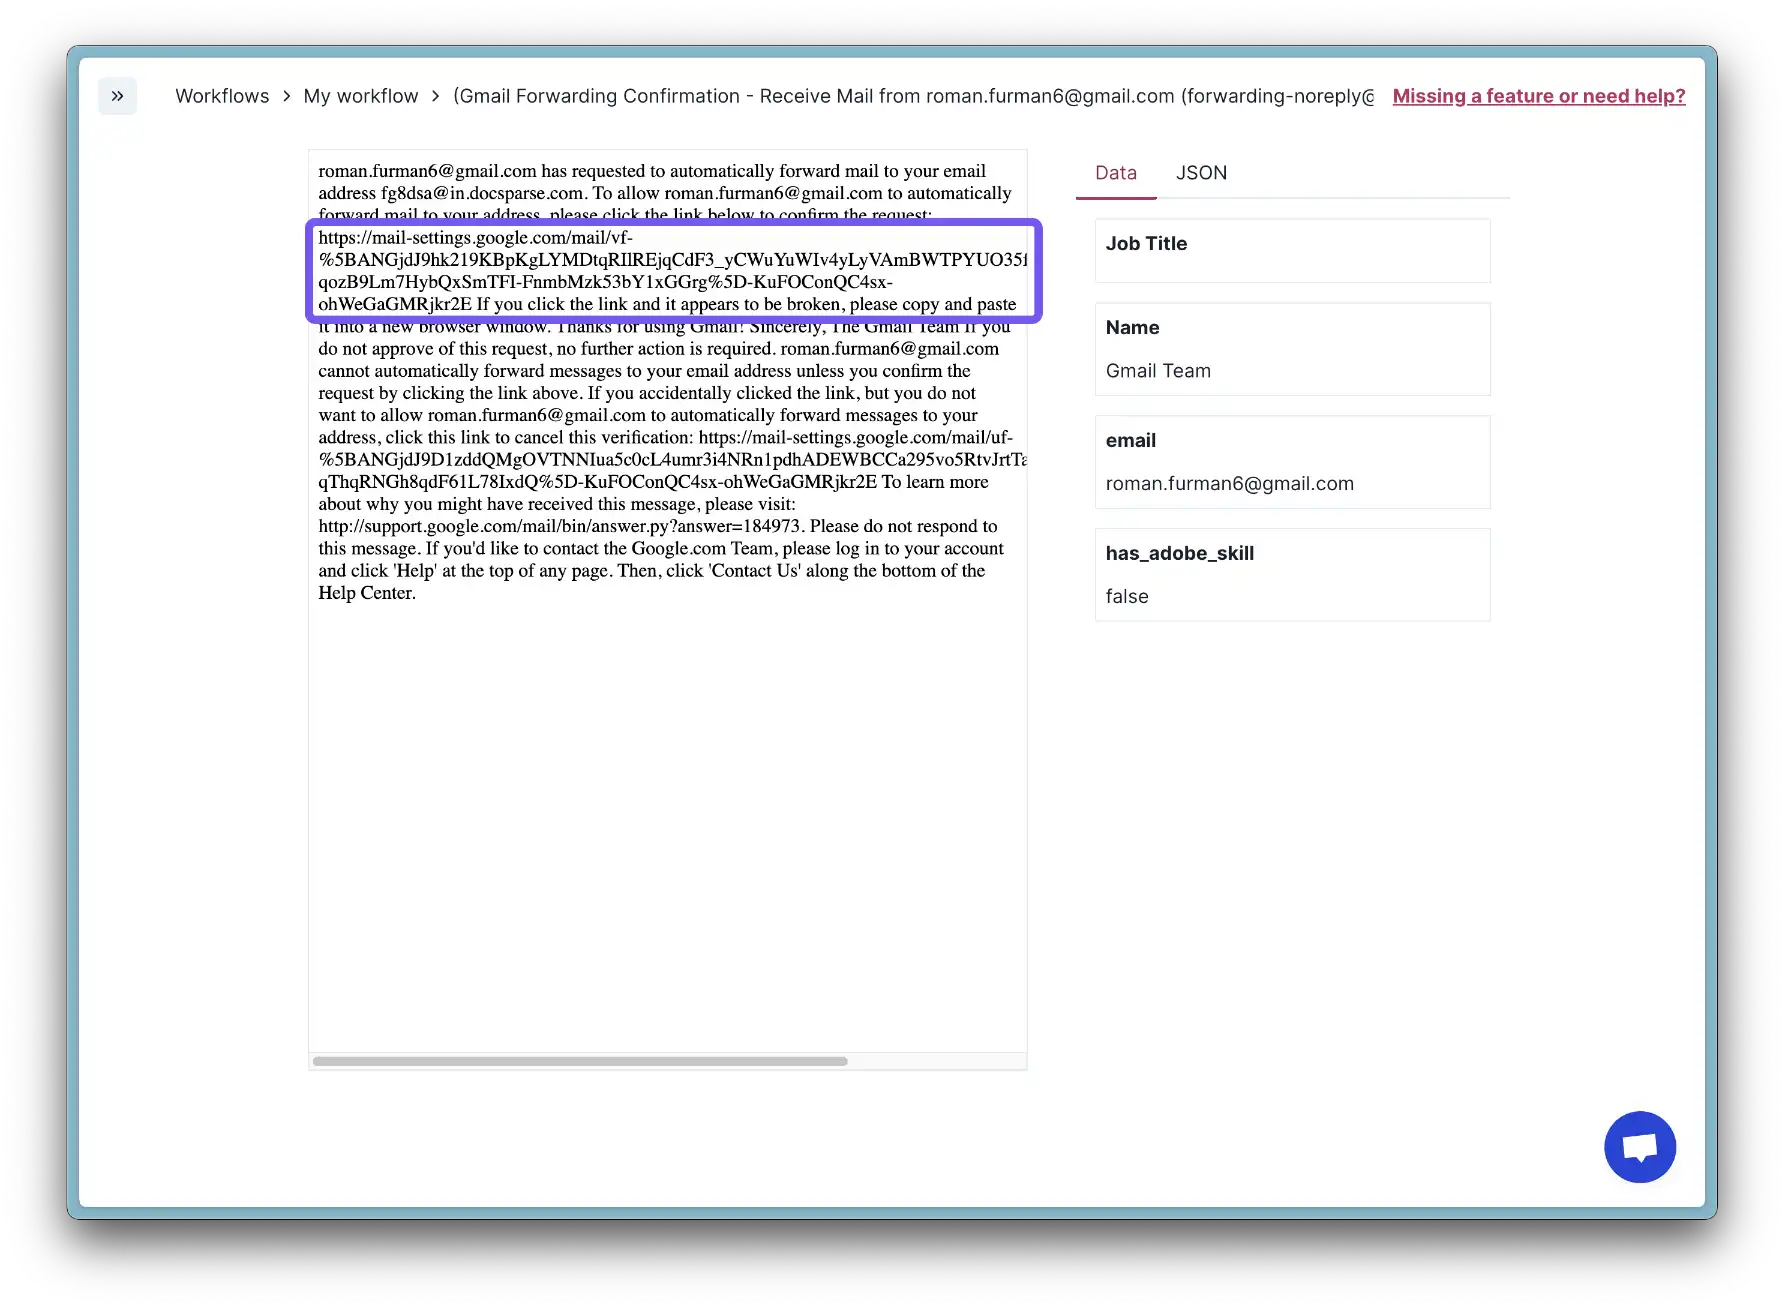
- On the details page, find a confirmation link. Copy it and paste it into your browser.
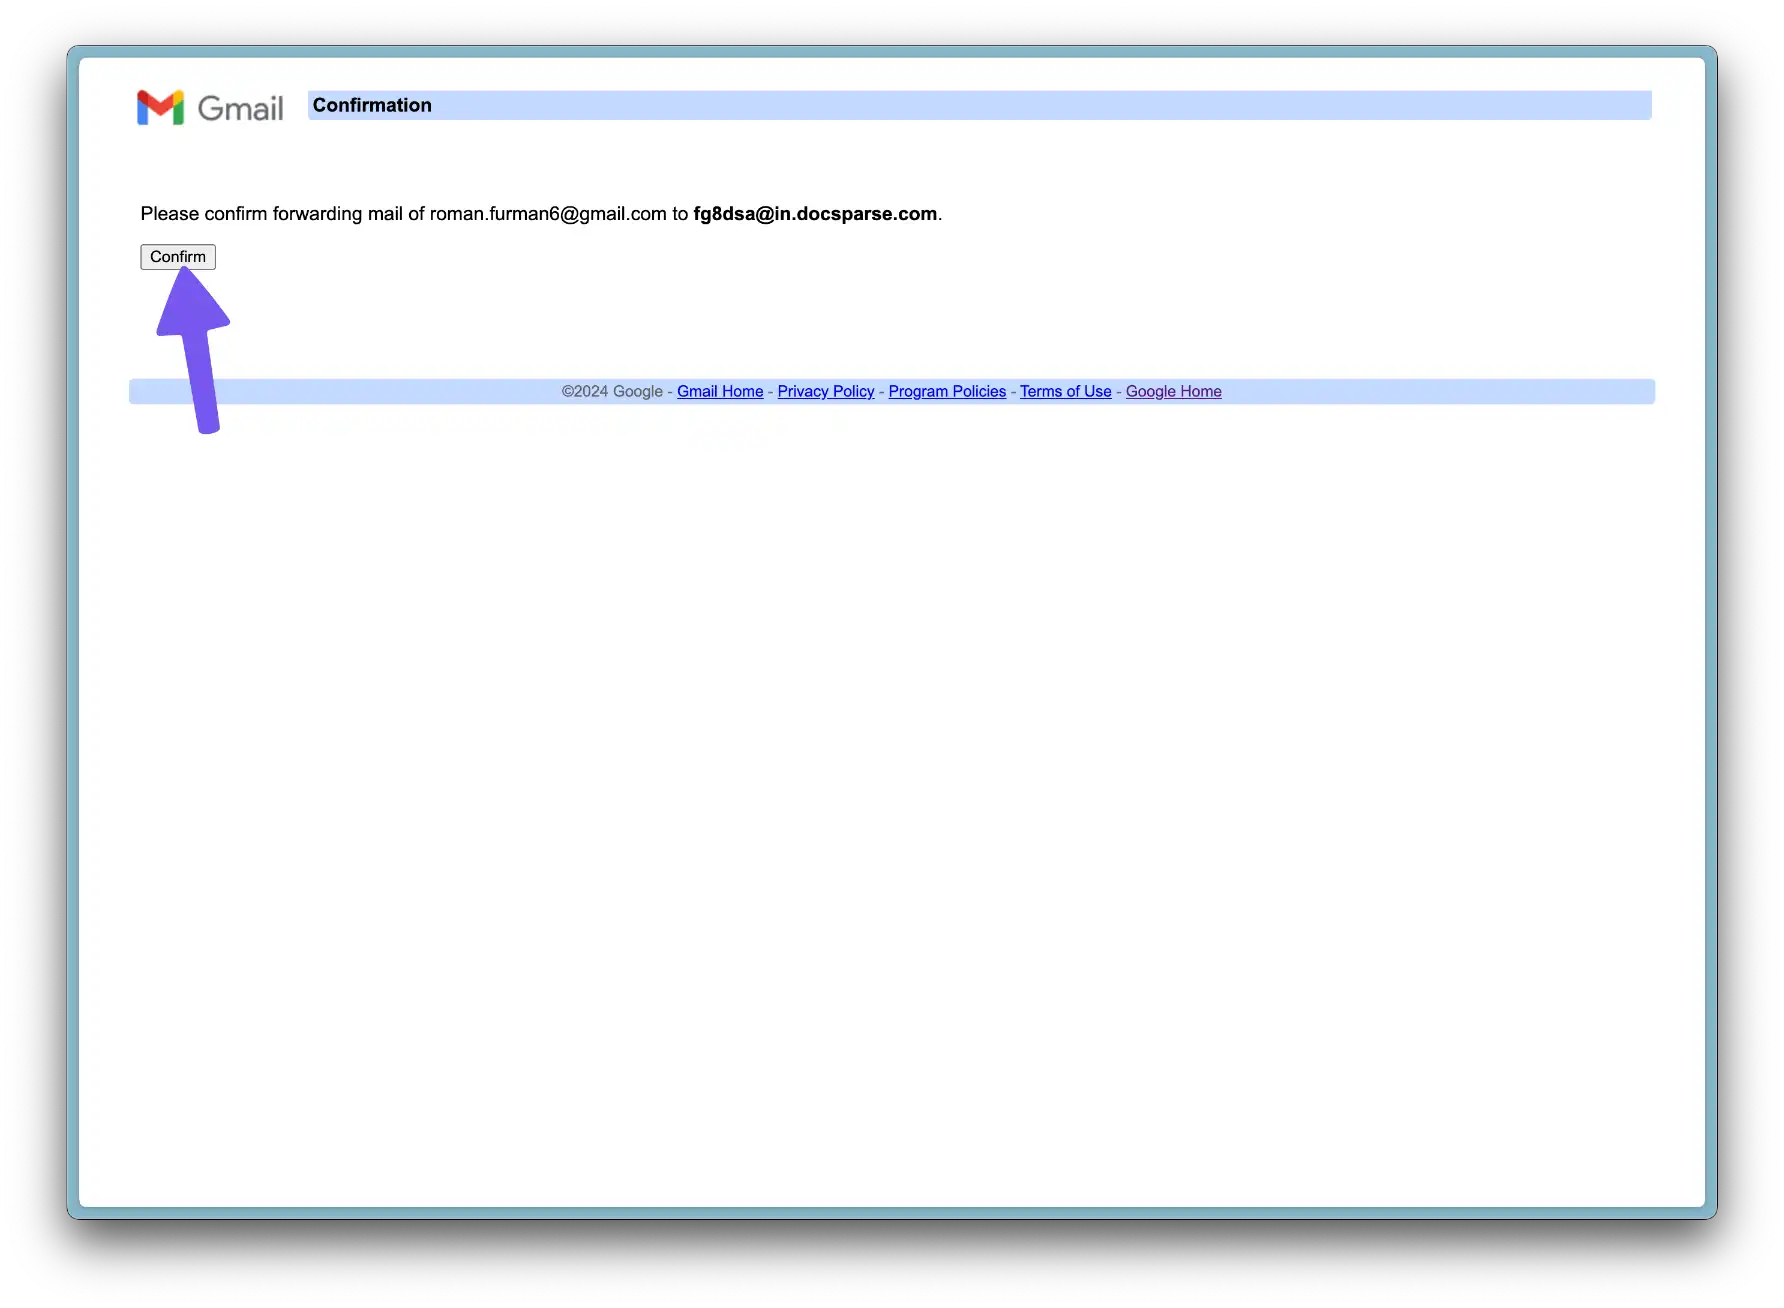
- Click on "Confirm"
- Then go back to Gmail and select "Forwarding a copy of incoming mail to...". Make sure to click Save Changes at the bottom.
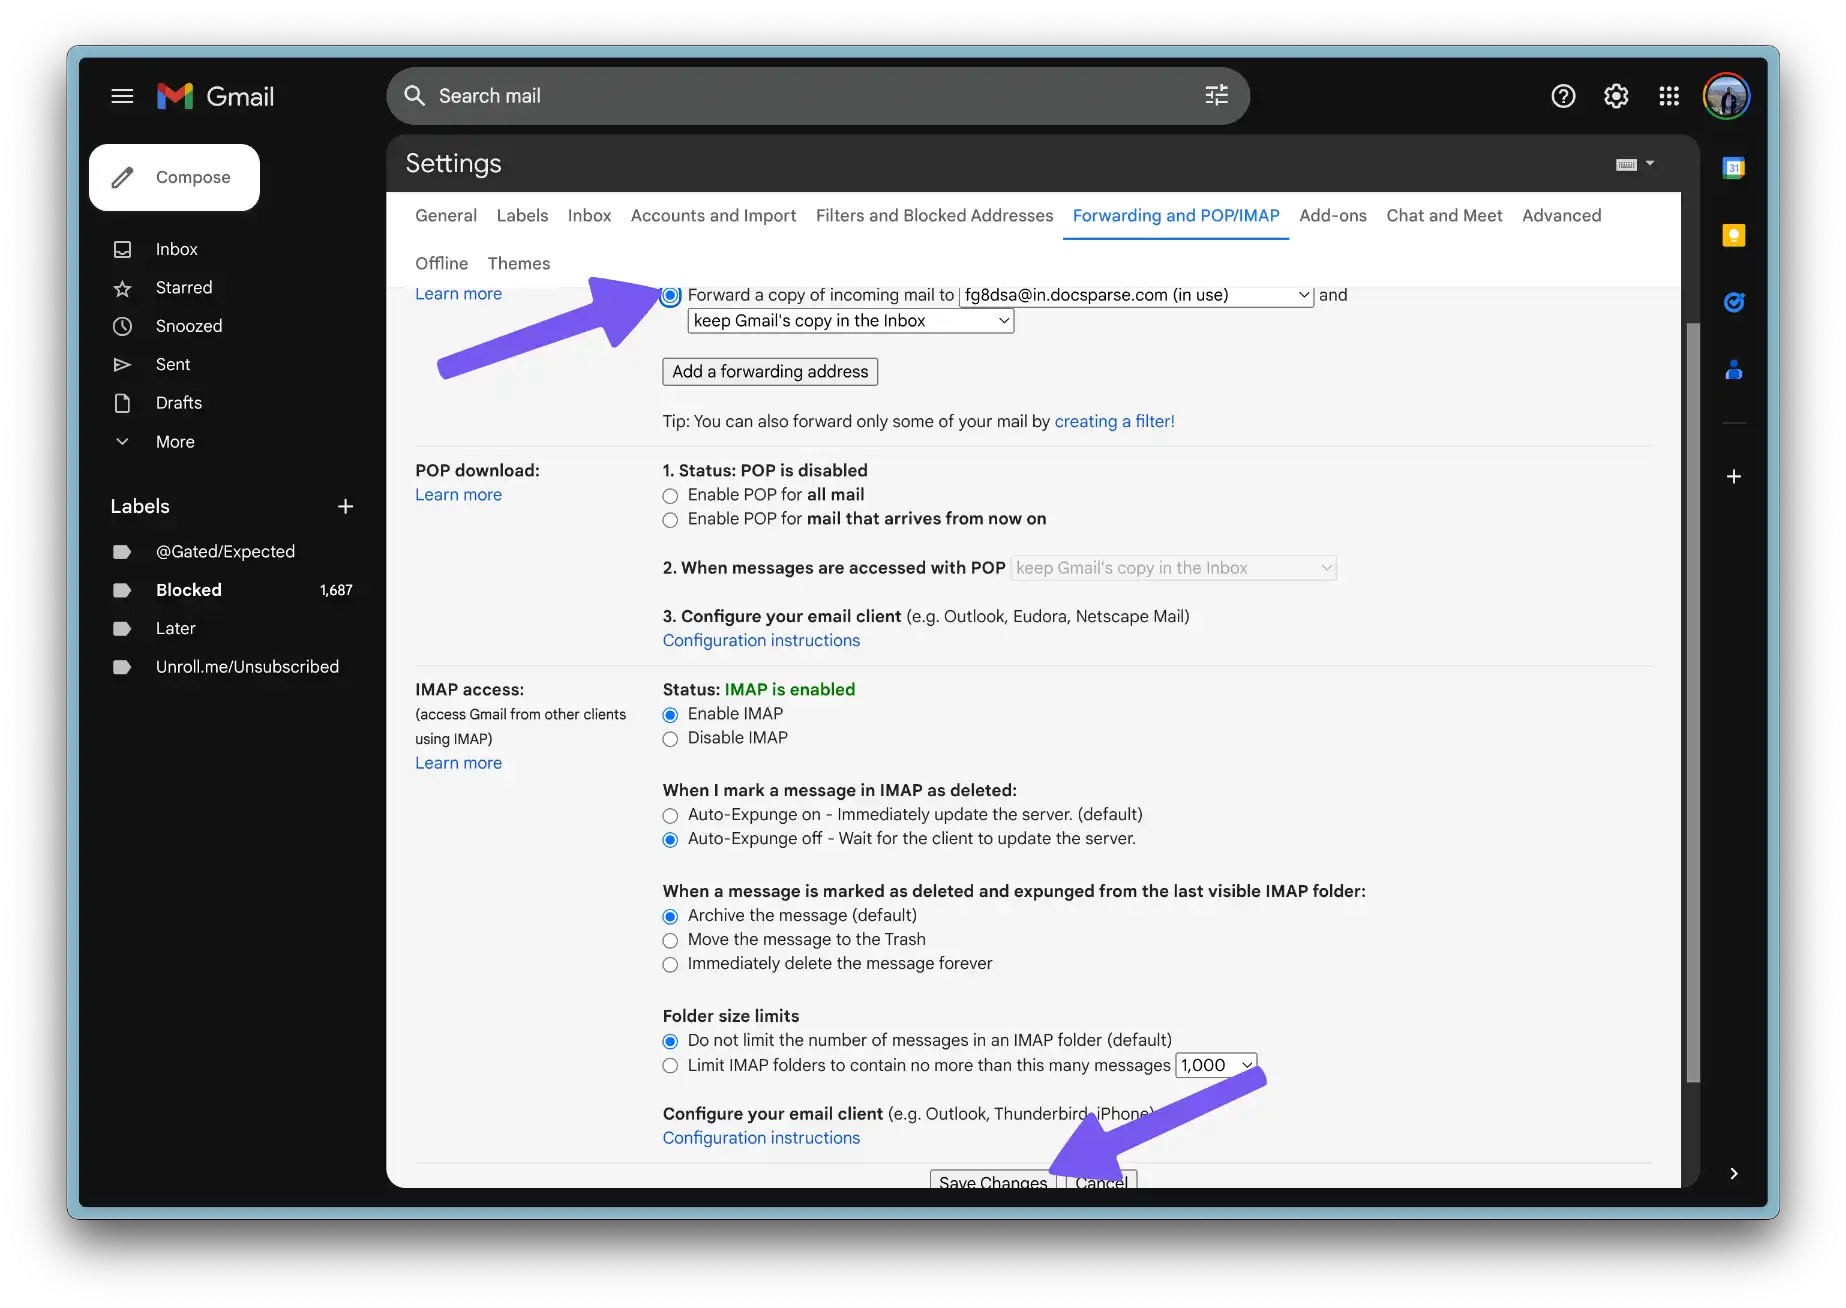
- You can now create a new filter with some specific rules and filters to start the forwarding process.
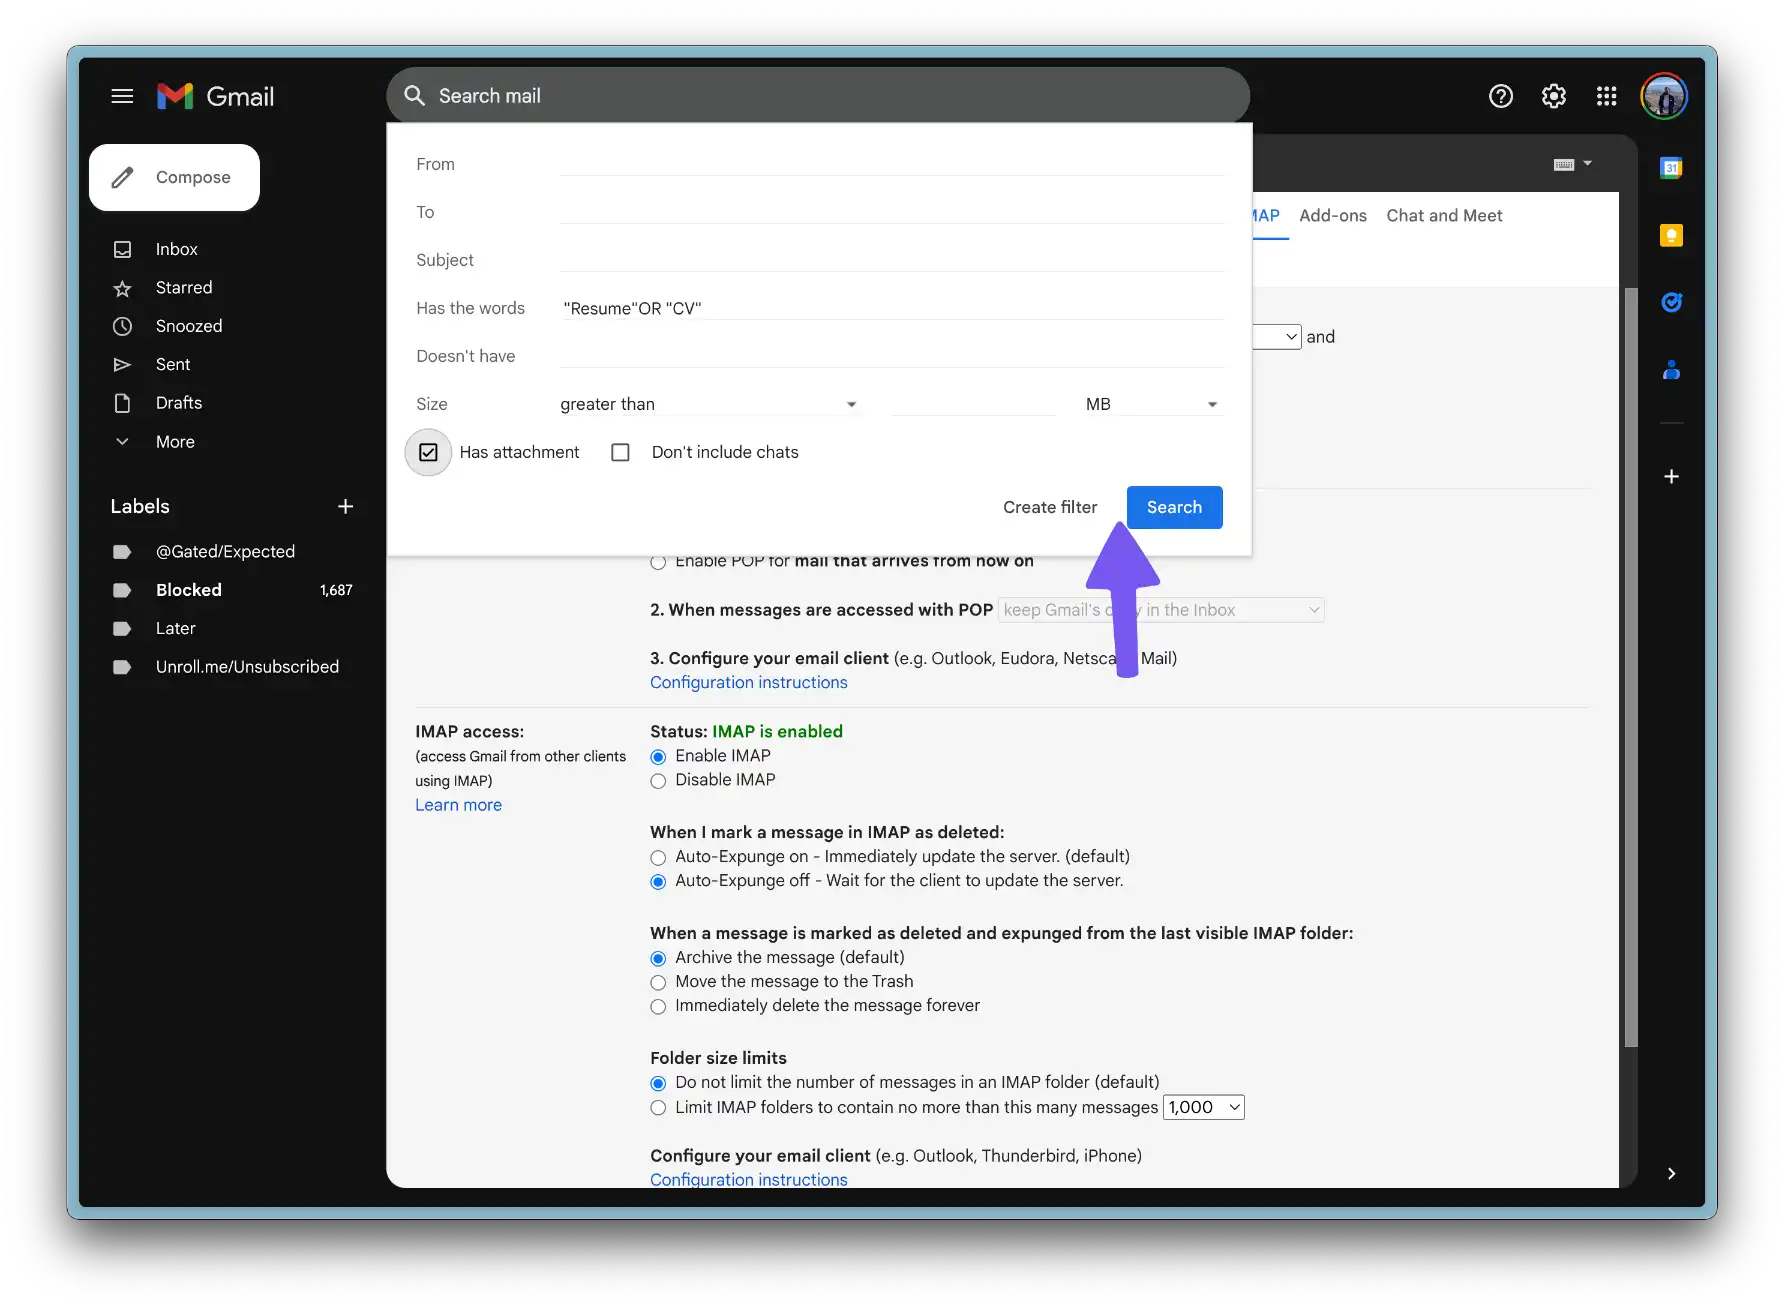
- Make sure to select "Forward it to ... " option and select DocsParse Workflow Inbox email address. Click "Create filter" or "Update filter".
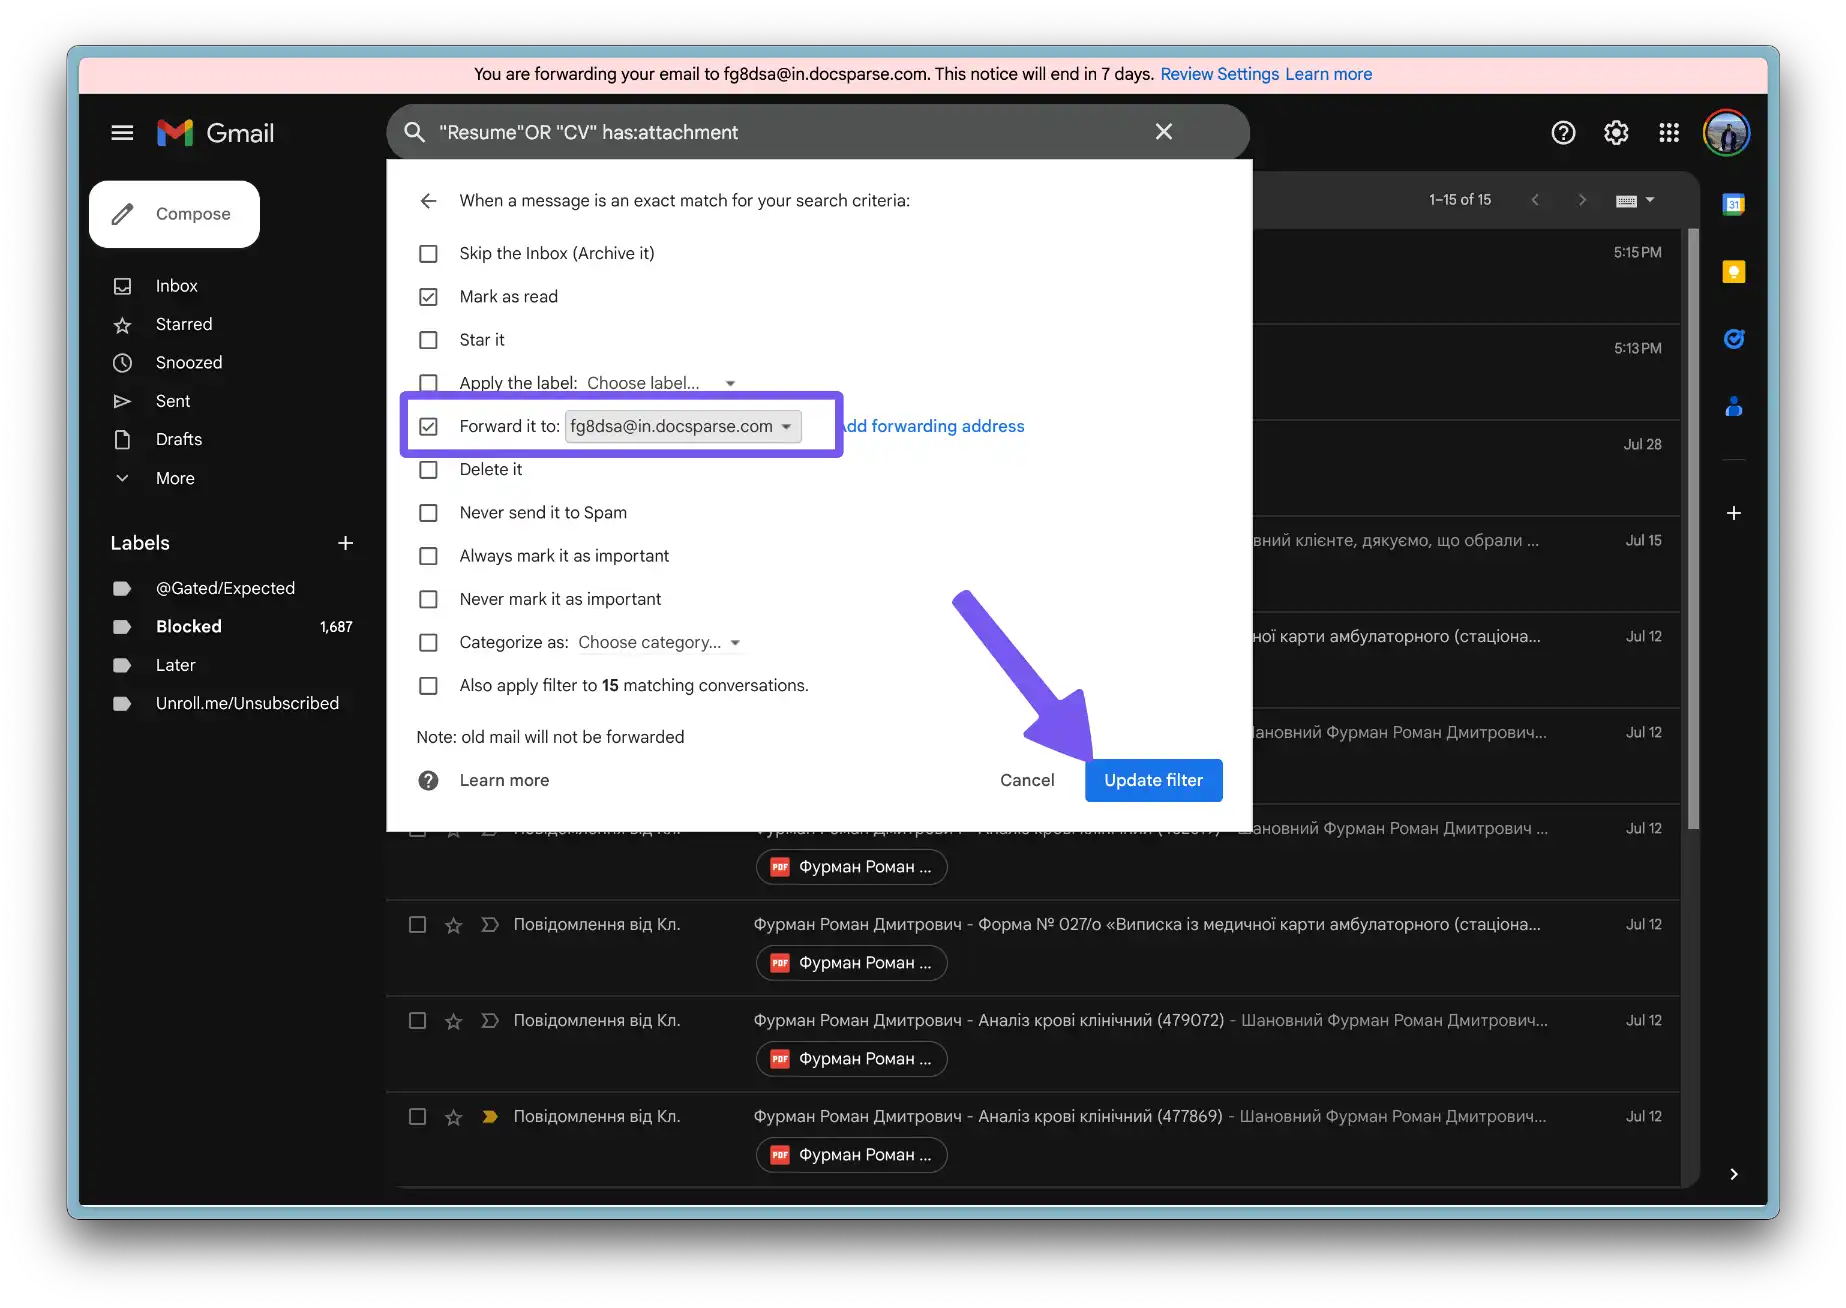
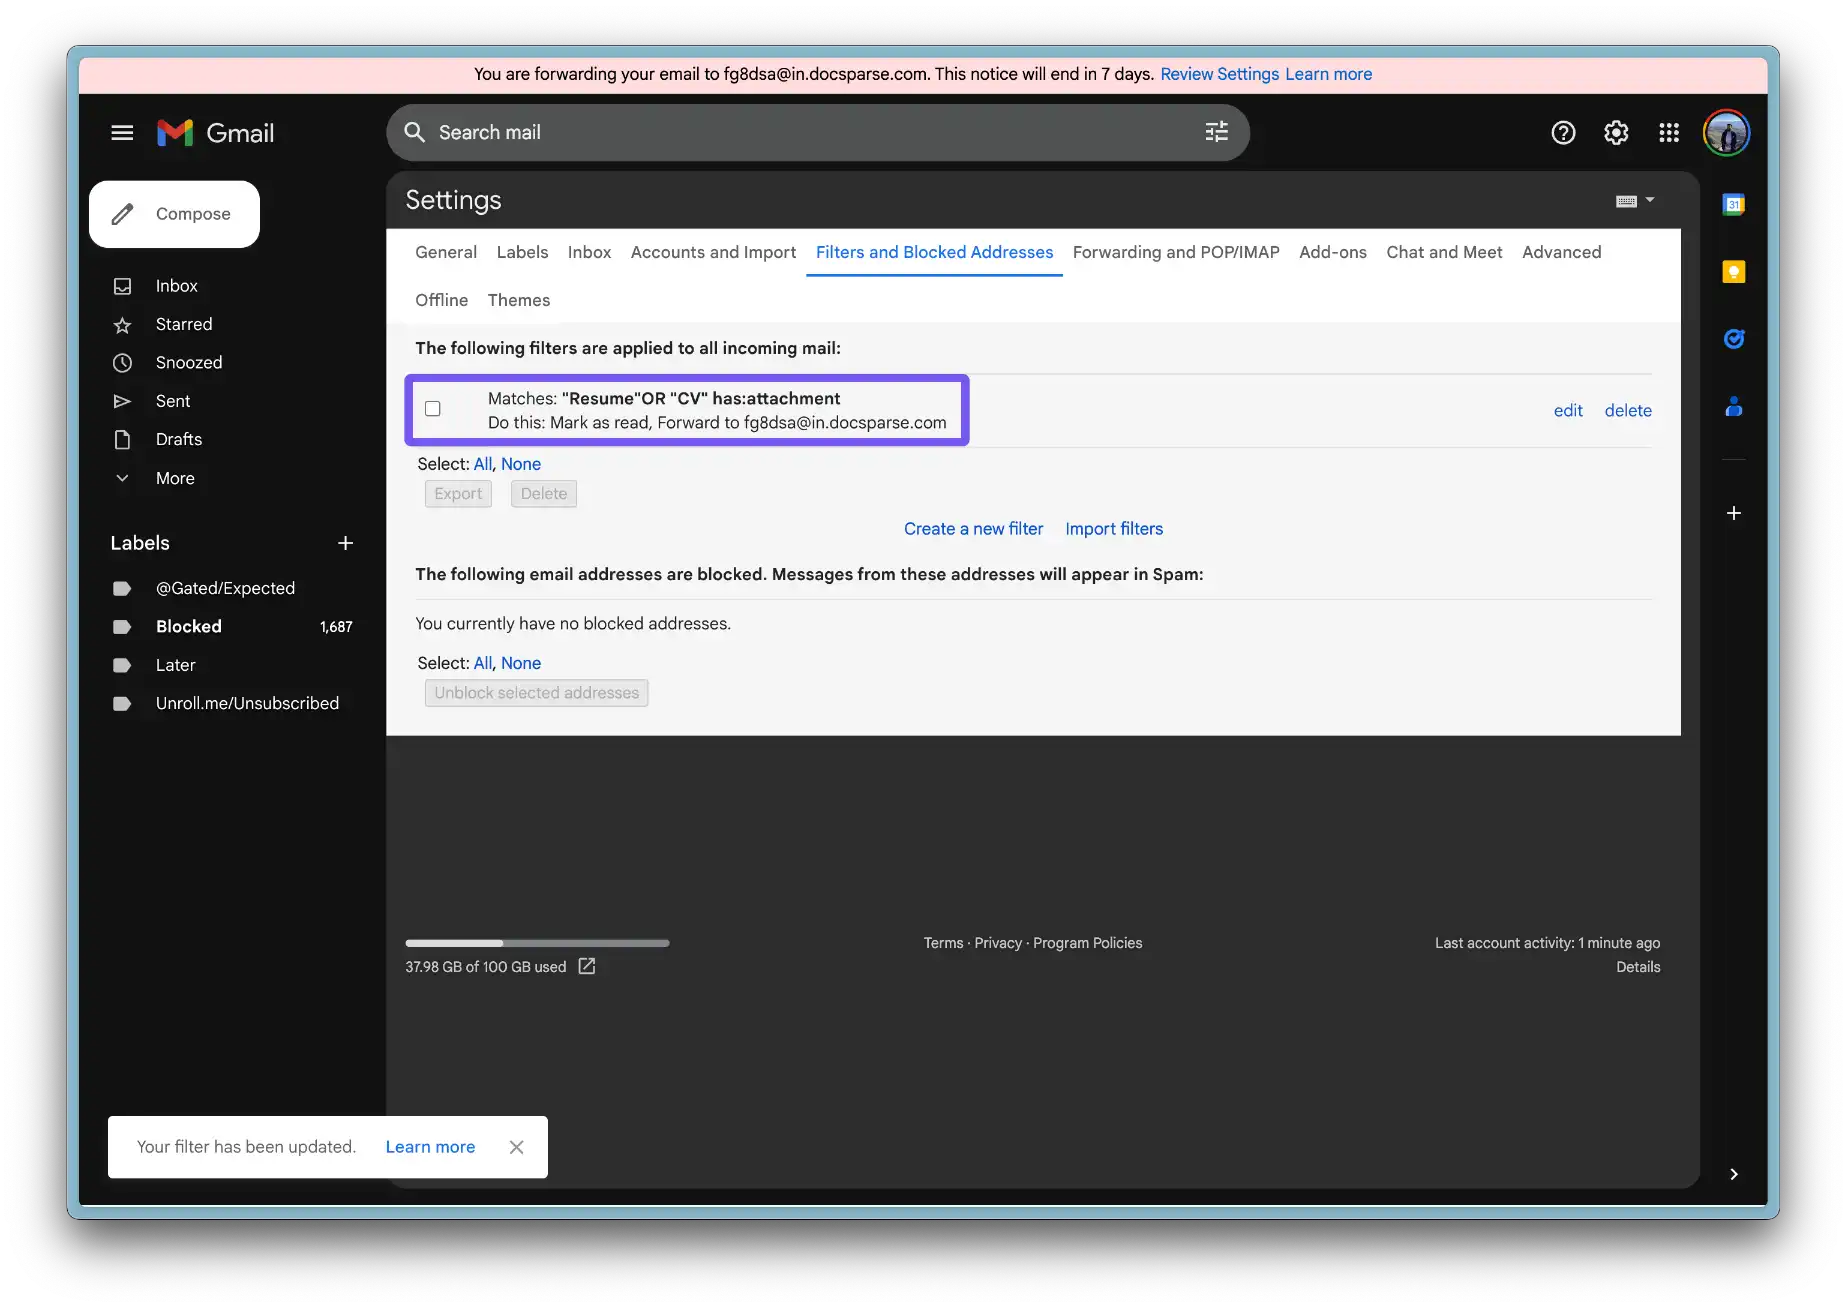
- In the list of Filters, you will see your new filter.
We've connected DocsParse with Airtable and set up Gmail forwarding. Now we are ready to test the workflow. Let's do it!
Step 5: Testing the Workflow
- Send a test email to your Gmail address. (Make sure your test email will be processed by Gmail filters).
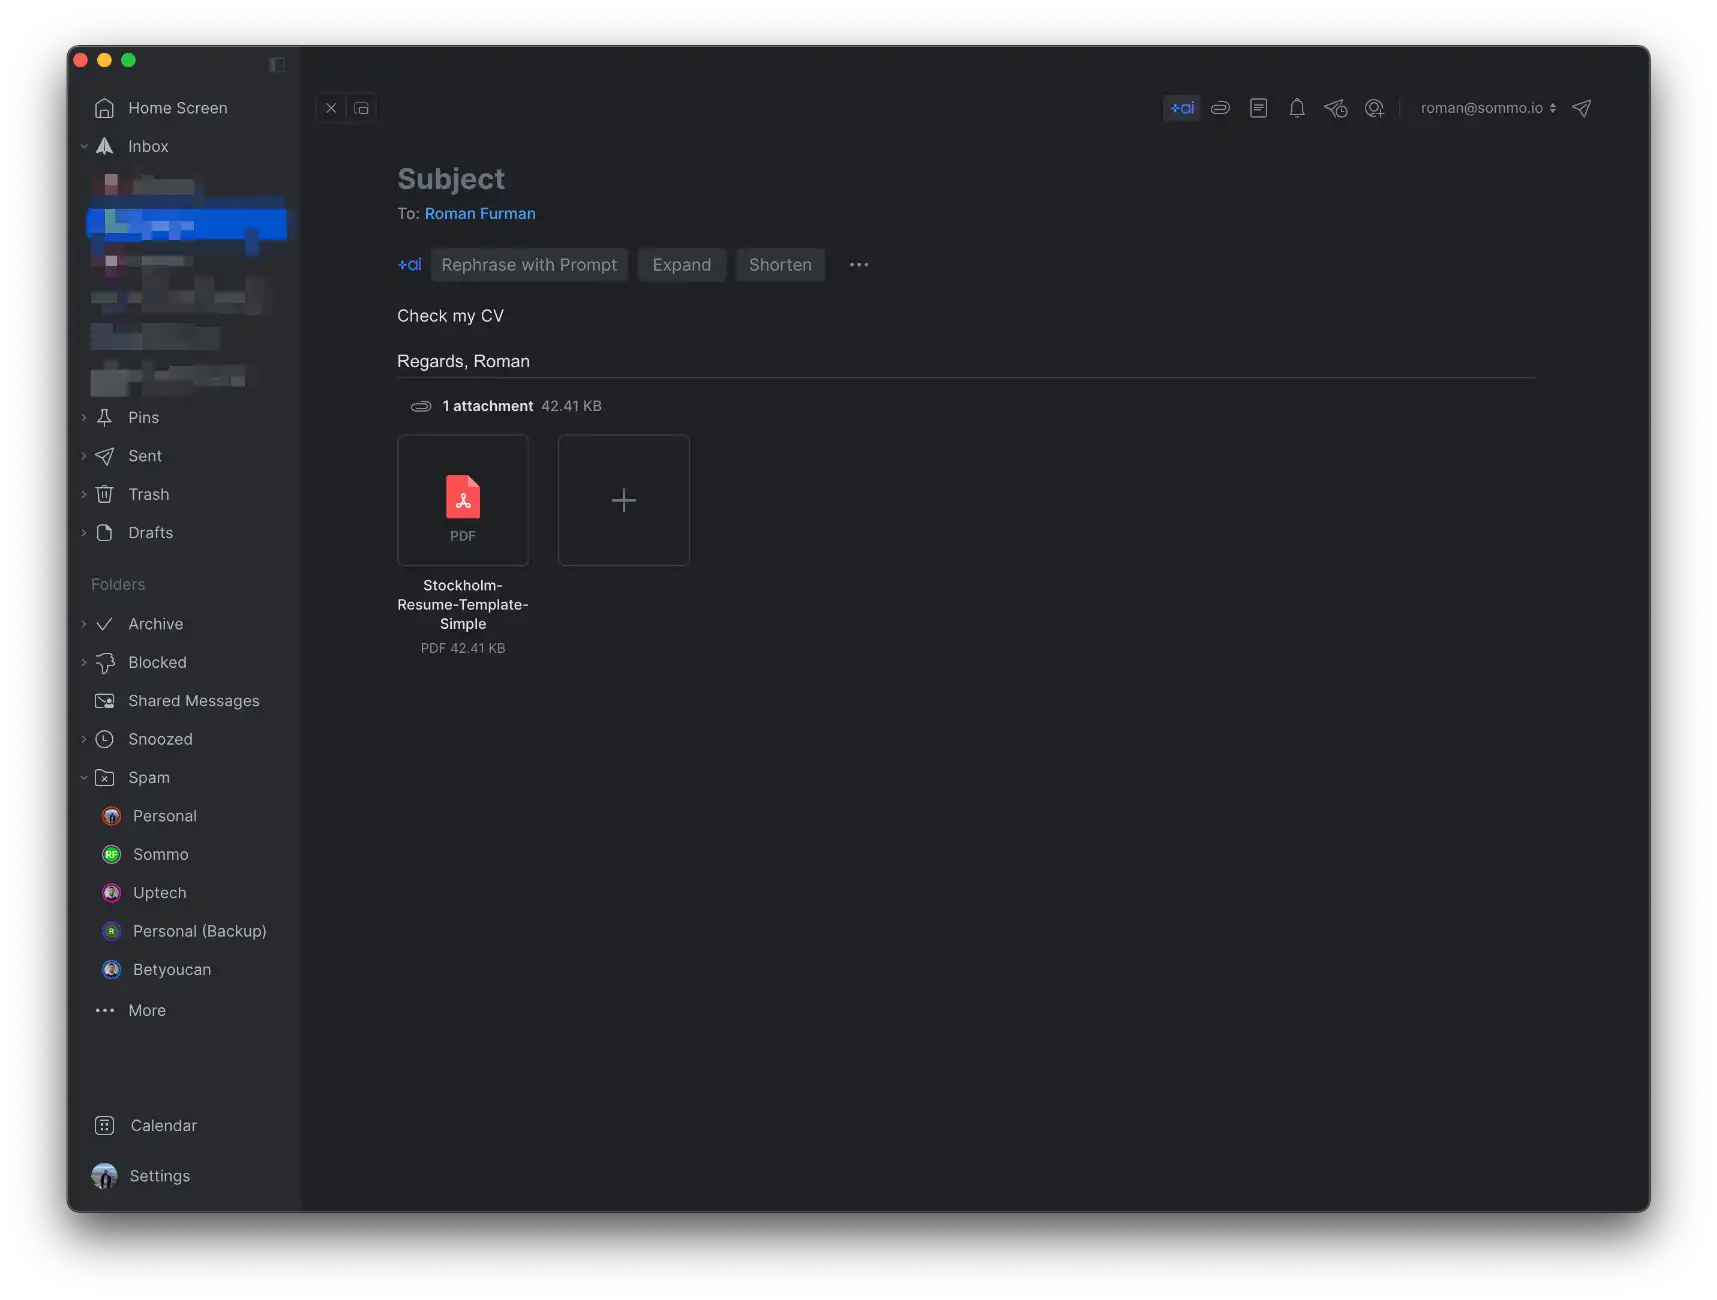
- After sending the test email, it might take a few seconds/minutes for forwarding to be processed. Once it's done, you will see a new Document in DocsParse.
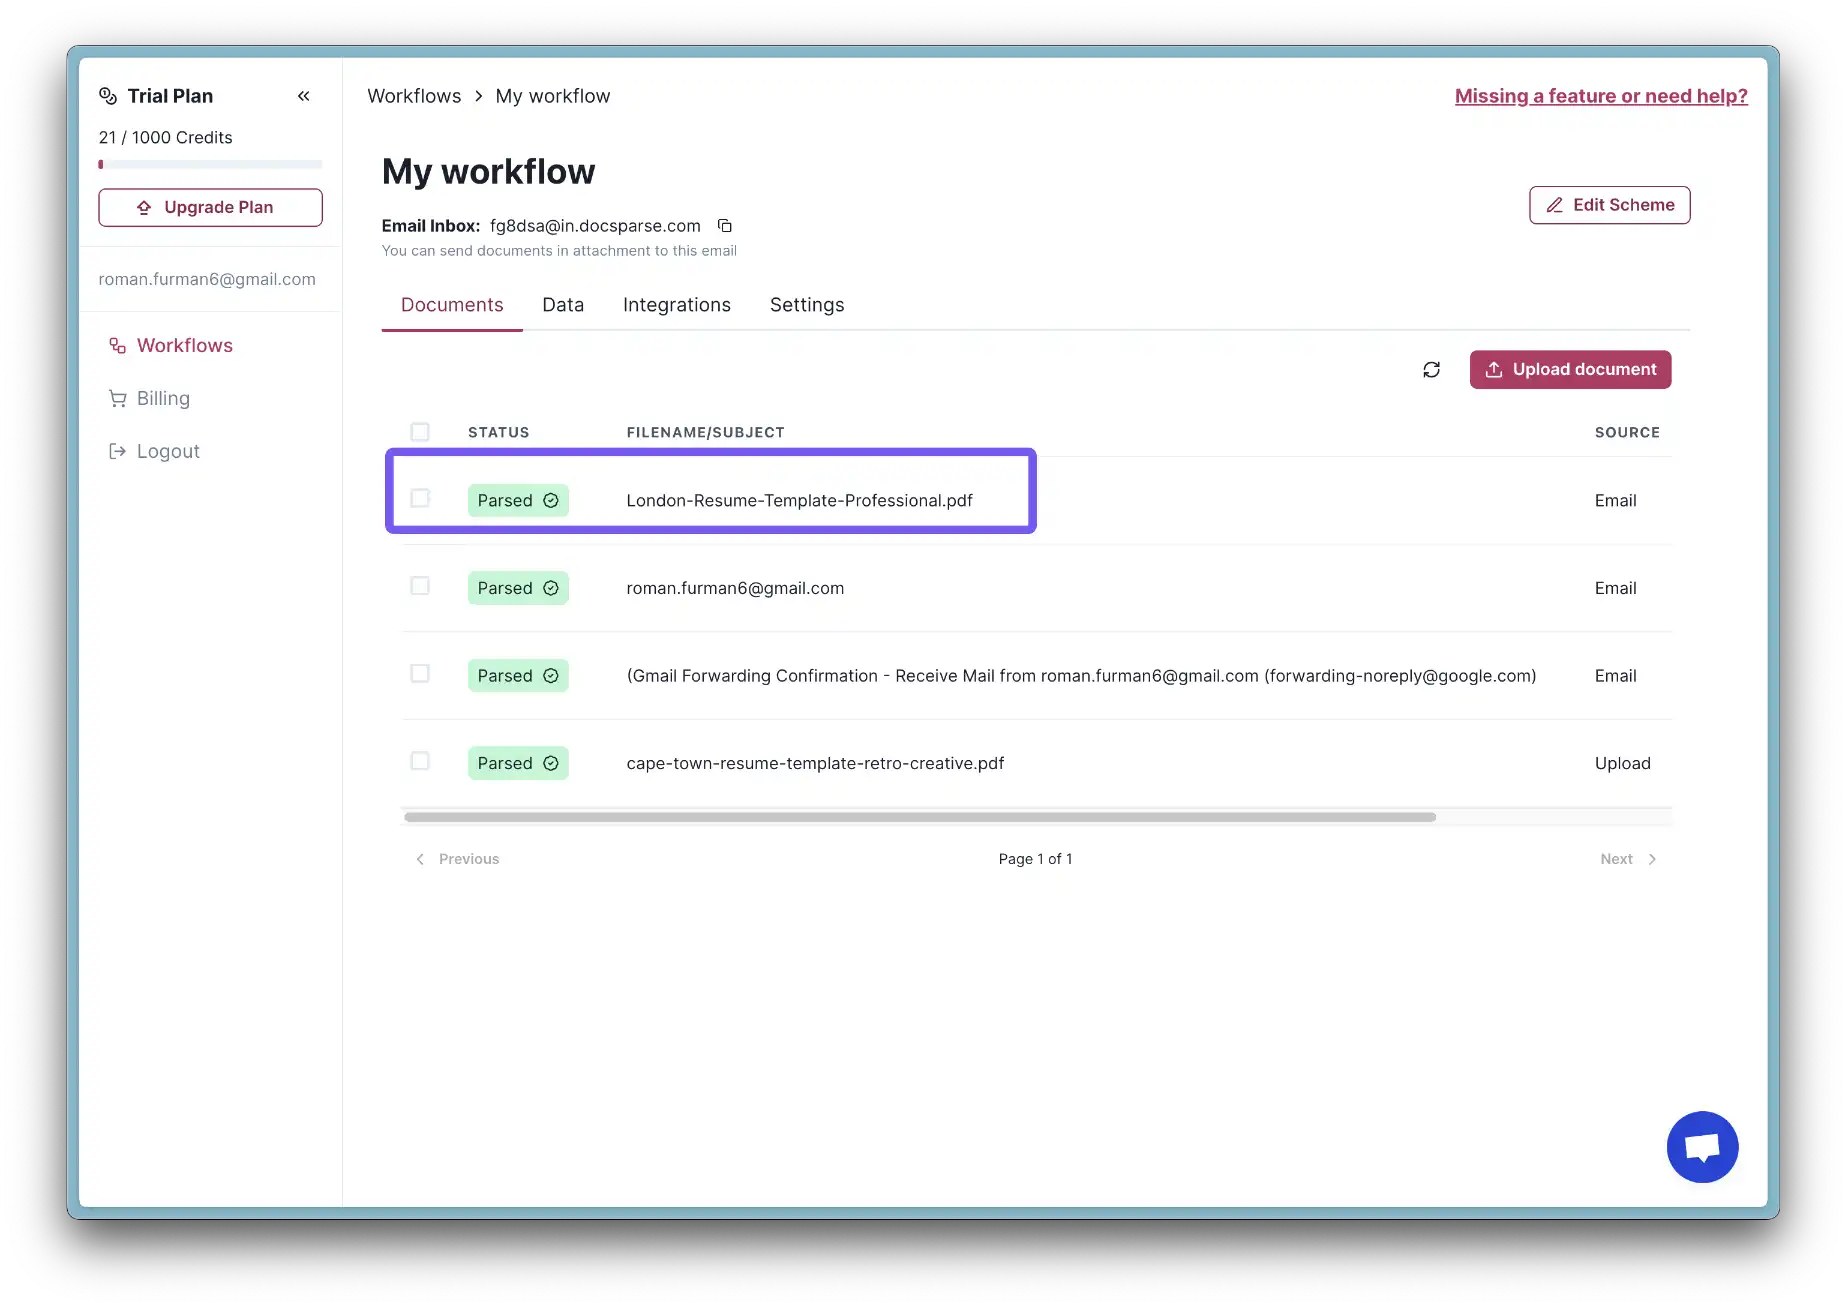
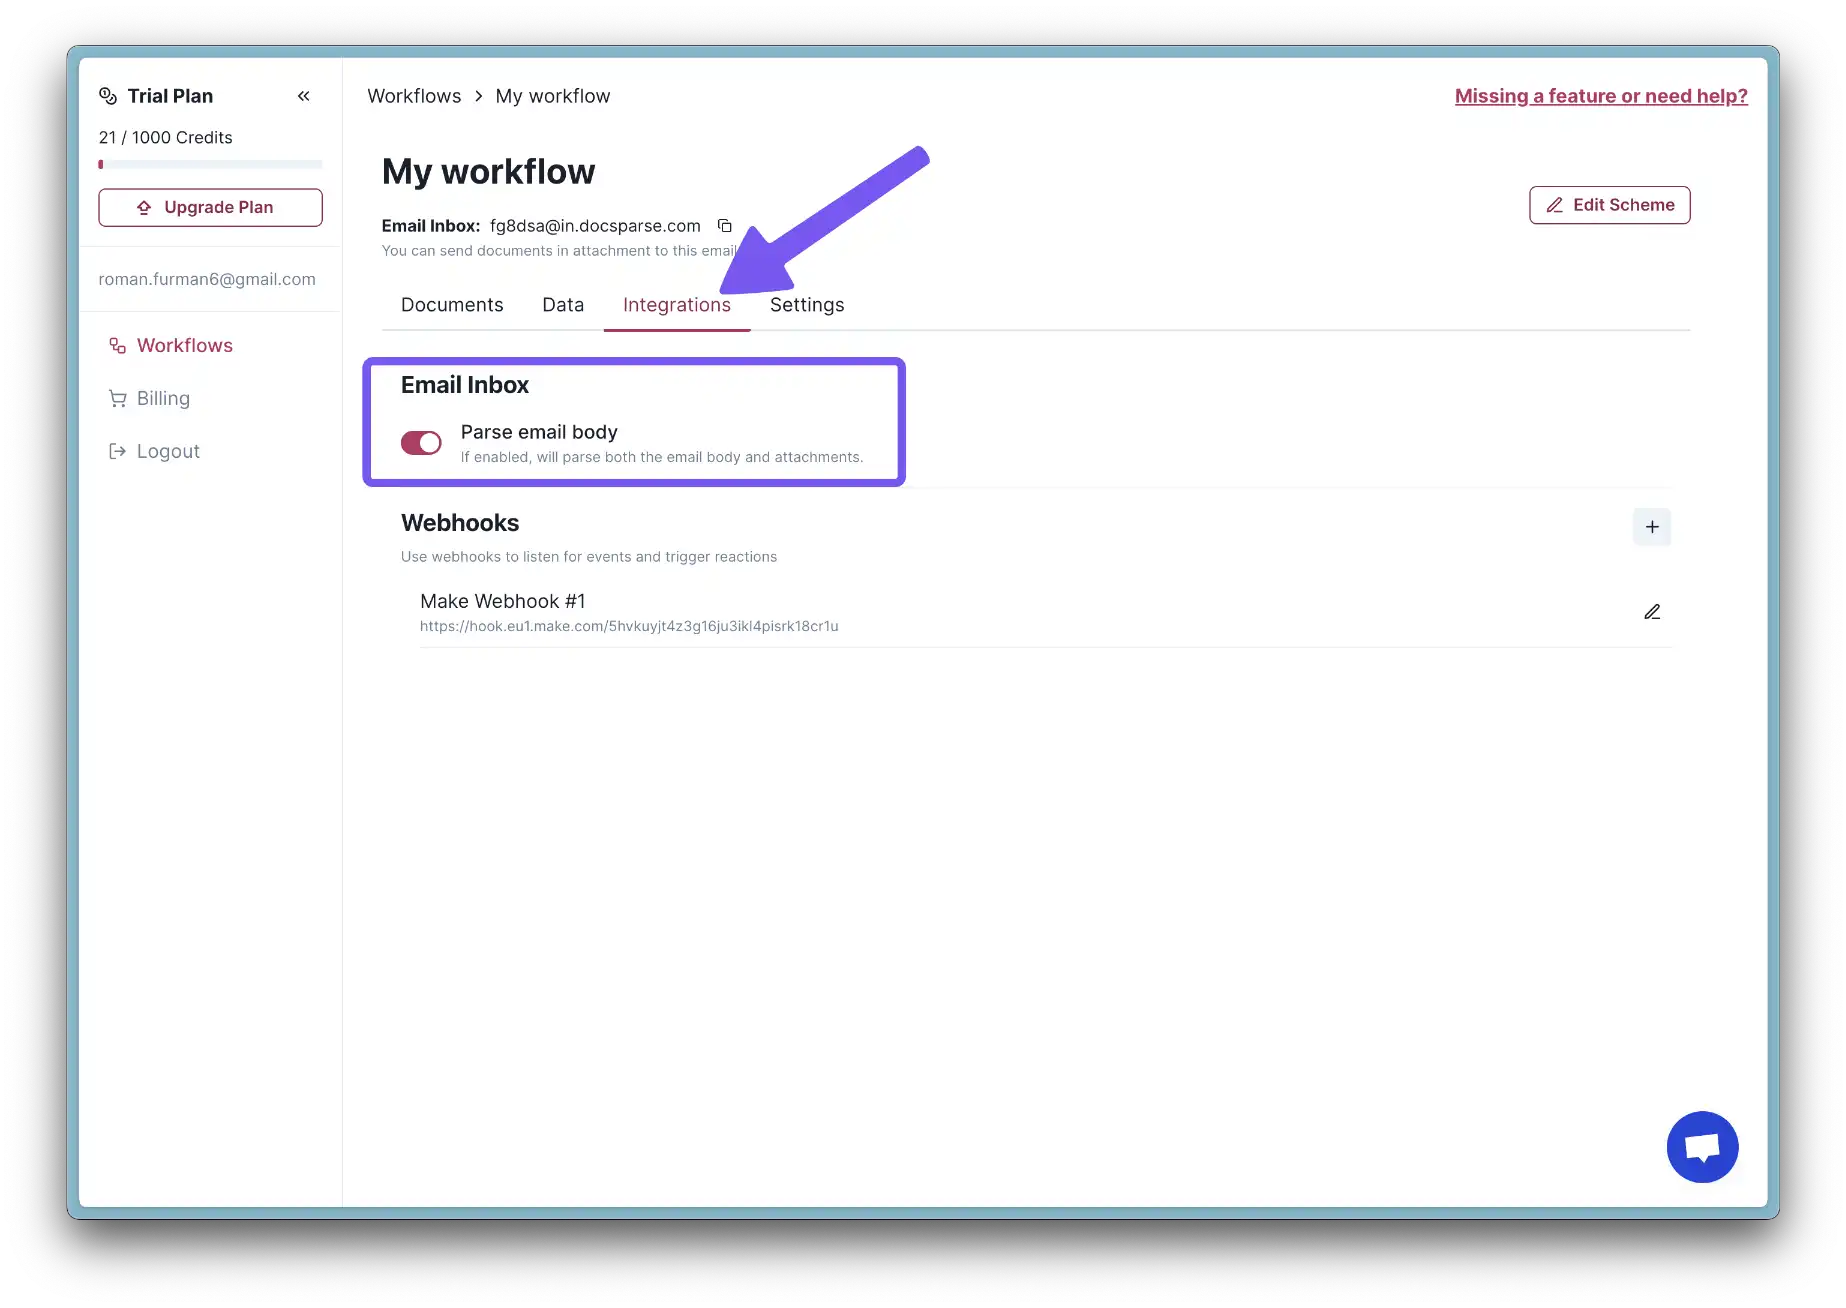
- (Optionally) As you can see in the screenshot below, DocsParse is also processing the email body. In some cases, you might want to disable this feature.
- Now let's switch to Airtable and check if the data was successfully added.

Conclusion
Congratulations! You've successfully set up an automated document processing workflow. This system will save you countless hours of manual data entry and reduce errors. As you become more familiar with these tools, you can further customize and expand your workflow to meet your specific needs.